Make a Trellis Card...
...for a Beautiful effect.
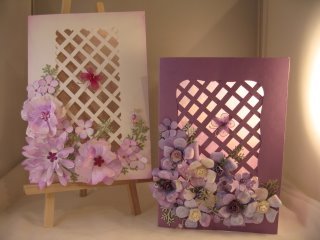
If you want to make an impression on someone special then make a Trellis Card and send it with love
These have got to be cards with the "WOW" factor and they are sure to please the recipient.
So here for you are the step by step instructions on how to make a Trellis card for yourself.
If you prefer to learn by watching then here is a short video Trellis Card Tutorial
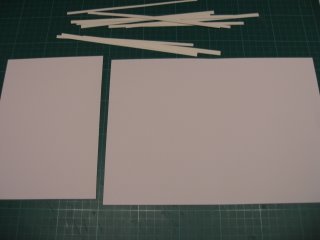
Step 1
You will need two A4 cards.(29.5 x 21cms)(11 3/4 x 8 1/4 ins) in the colour of your choice.
One of these cards should be folded in half to make an A5 cardblank.
The other needs to be CUT in half, and one of those halves used to produce the strips that you will need for the trellis.
Make about 20 thin stripes and keep to one side.
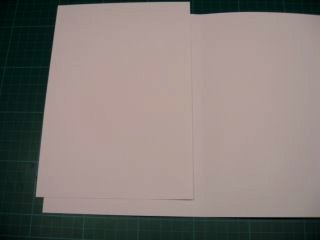
Step 2
Take the folded card and place to the left of it the other half piece of card.
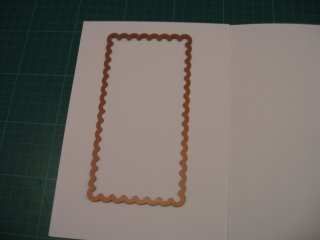
Step 3
Onto this double layer cut out an aperture.
Use whatever method you have ... free hand, ruler and craft knife, or Paper trimmer.
Cut through both the pieces as neatly as you can.
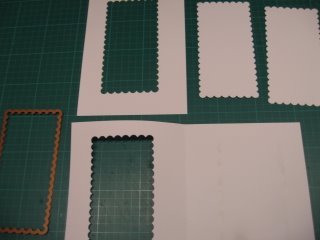
So now you should have the pieces as shown in the photo.
One large card with an aperture, (bottom of the photo) and the smaller piece has the same aperture (centre of the photo)
Keep the two inner parts that you have for another project. (top right)
Step 4
Place the card down so the you are working on the inside.
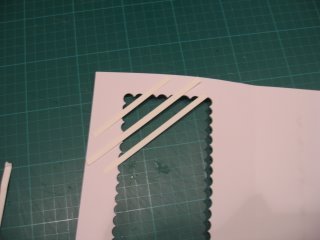
With your strips of paper you are going to lay them onto the aperture in a diagonal pattern.
Secure them with a Wet glue.
Use small blobs of the glue on the outer edge of the aperture and put the strips in place.
Trim off the excess strip. Press in place, and continue down the card until all the strips are in place.
Try to keep the gaps equal and the strips straight. But it doesn't have to be perfection...it is after all Handmade.
Step 5
Once you have them all in pace one way you are going to weave the rest of the strips in the other direction.
Leave an equal gap between them and try to keep them straight.
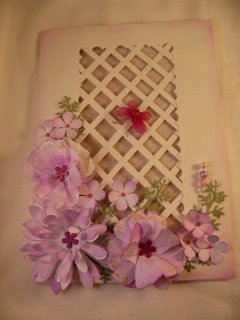
Once you have done this your card should look as the photo.
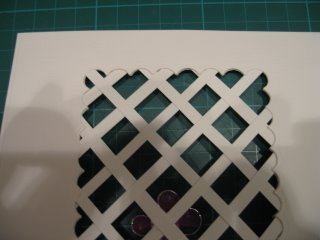
The workings of the card are visible but this is where the smaller piece of card with the aperture in it comes in to play.
Take the smaller card and lay it onto the inside of the card and marry up the shapes to form a neat edge.
The wet glue allows you to move it around until it is all aligned correctly and then press it down for a firm hold.
Step 6
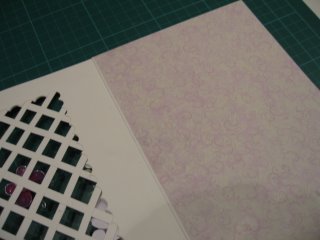
The next step in how to make a trellis card is to line the inside of the card with some of your pretty paper.
Glue it into place on the inside back part.
Step 7
Make some paper flowers for your card.
There are tutorials for
Handmade Paper Flowers,
Punched Flowers,
Poinsettias that can be made in pastel colours to suit your scheme.
Or even Crochet flowers.

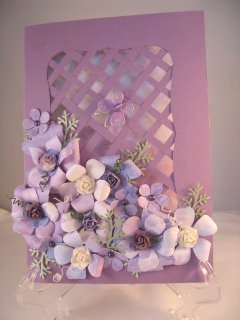
Place them on the card in a dry run first until you are happy with the look and then glue them in place and leave to dry.
Add any Embellishments that you have in your stash.
Try some Decorative pins, Gemstones or pearls, feathers or lace,
for a truly feminine finish.
So now you know how to make a trellis card you can have some fun and send them to your special friends.
Return from Make a Trellis Card to Homepage
Search


Recent Articles
-
Memory Book
Oct 15, 22 09:17 AM
 Make a memory book, fun to make and even lovelier to give.
 -
Die cut letters.
Jul 19, 21 10:12 AM
 Add that personal touch with die cut letters, add names or sentiment as you please.
 -
Diaper Fold Card.
Jul 19, 21 09:34 AM
Create this fun Diaper Fold Card...and no need for a pin!
Search