Another Interesting Creation...
...Try the Spinner Card.
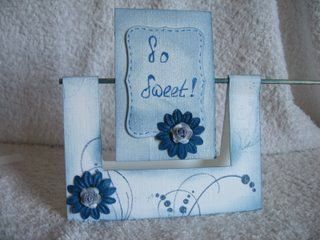
This Spinner Card looks fantastic and will "Wow" your friends.
Search

This stylish little number will have the recipient "OOOhing and AAAhing" as to how you did it.
Don't tell 'em...Keep em' guessing!!
It is lovely and would suit any occasion.
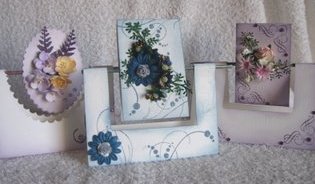
Dress it up exceptionally for a Wedding, or a Miletsone Birthday, with all your extra "Bling"
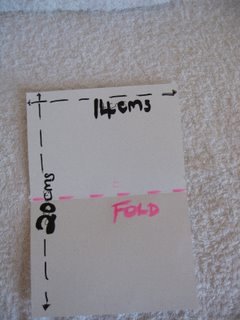
Step 1
You will need a piece of card 14 x 20cms, and folded in half.
You can make this from colored cardstock, or glue your favourite paper to it, if you prefer.
I chose to use stamped corners on mine, and Distress Inks to color it.
You will also need a
B-B-Q stick
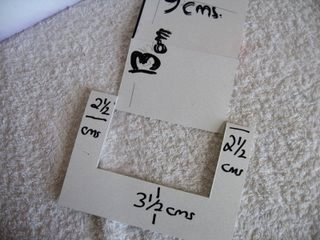
Step 2
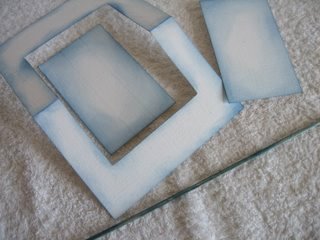
With the card folded up, and the closed spine at the top, measure in 2.5cms from each side, and 3.5cms from the open bottom edge.
With your craft knife cut this out carefully.
The piece you remove will leave a gap that is 13 x 9cms.
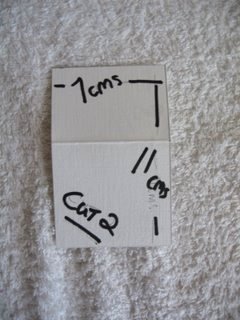
Step 3
Into this gap you will need two panels 7 x 11cms.
You will need them flat so ignore the fold in the picture.
Step 4
Ink all the edges of the card and both of the panels for the center.
Using the same inkpad color the BBQ stick to match.
Adding the extras is easier at this stage, so go ahead and dress up the panels.

Step 5
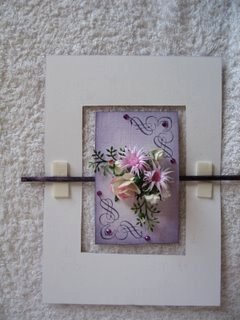
I added a stamped flourishes image, gemstones and flowers to mine.
Then with some silicone glue add the colored BBQ stick to the inside of
one of the panels, half way down, and leave it to dry thoroughly.
(Could be overnight)
Step 6
Once the glue is dry we can assemble the rest of the card. With double sided tape stick the two panels together.
Important...if you are adding a sentiment to the other panel you will need to add it upside down, otherwise it will be the wrong way round when you rotate the BBQ stick...Yep! been there... done that!)
Working on the inside, lay the BBQ stick in the center and on either side of it add some foam pads.
This creates a channel and allows the BBQ stick to rotate.
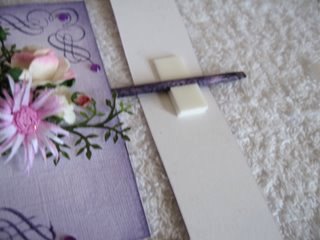
I stacked two pads to one side and one to the other.
When the Spinner Card is closed up these will stick together, and the channel for the BBQ stick is made.
Step 7
Now close the card up and the stick should rotate in the channel.
You can trim the BBQ stick to the size you want.
Leave some of it out so that the panels can be turned, or trim it all off if you wish.
Remember what I said if you are adding a sentiment.
Place it upside down on the other panel so that when it is turned around it will then be the right way up...
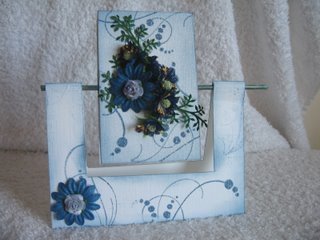
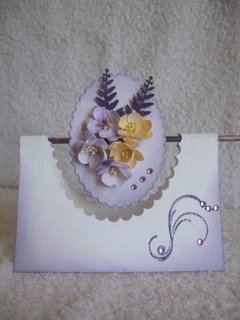
You can vary the shape of the panels if you would like to.
This one has been done with Spellbinders.
The flowers have been spritzed with Mica Powders.
And another beautiful Flourishes stamp and gemstones finish it off.
And don't forget to make a Template.

This Spinner Card is yet another addition to your growing skills as a cardmaker of some repute.
Happy Crafting!
Return from Spinner Card to Homepage
Search


Recent Articles
-
Memory Book
Oct 15, 22 09:17 AM
 Make a memory book, fun to make and even lovelier to give.
 -
Die cut letters.
Jul 19, 21 10:12 AM
 Add that personal touch with die cut letters, add names or sentiment as you please.
 -
Diaper Fold Card.
Jul 19, 21 09:34 AM
Create this fun Diaper Fold Card...and no need for a pin!
Search