Beautiful Crushed Flower Card...
for stunning results
This beautiful Crushed Flower Card is easy to do and you don't need to be artistic to recreate it.
Do you like the look of watercoloured cards but you're not very good at painting?
(No? me neither!!)
But this version is easy...messy!
but easy to do.
If you prefer to learn by watching, then you will find the Video Tutorial
You will need a Die cutting machine to crush the flowers through.
And lots of tissues to clean up after.
But it really is a lovely technique to play around with and the results will surprise you every time.
Step 1
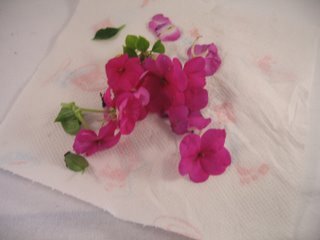
First you need to choose some flowers.
Pick those that are just past their best from your garden, and if it has been raining, pat them dry first.
These are small Impatiens(Bizzie Lizzies).
I have chosen about five for my card, and you only need the flower heads and a few leaves.
Don't worry about the colour of them, as the colour on the card will be nothing like them.
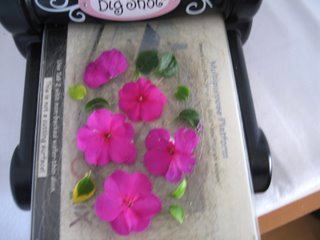
Step 2
Lay them out onto your die cutter platform in the pattern you would like them on the card.
On top of this place some white or cream card.
Layer up the rest of the plates and roll this sandwich through your machine...
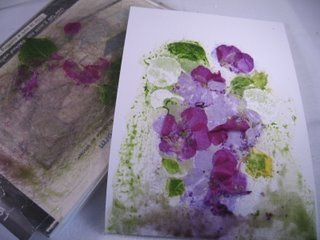
.and this is the gloopy mess that will greet you at the other end.
Urgggghhhh!
You need to, carefully, peel all this mess off the card.
Clean up your die cutter with the tissues straight away.
You can leave the card to dry overnight, or speed up the process with a Heat tool.
If the card starts to buckle just add some heat to the reverse of it and it should straighten out again.
But it is going to be glued down, so don't fret over it too much.
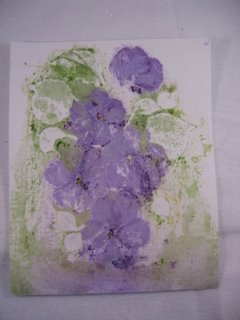
Step 3
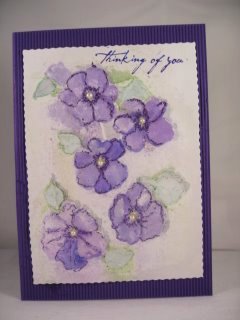
And this is the beautiful effect that you will be have, and you can now make your crushed flower card.
You can see the imprint of the flowers on the card.
Cut it into the size or shape that you want your panel to be.
Step 4
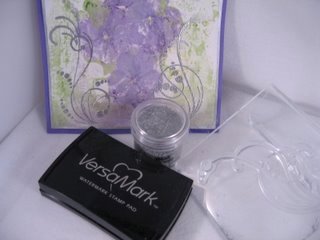
I have embossed "Flourishes" on to my crushed flower card with silver embossing powder.
I used a silver "Calligraphy" Marker on the edges of the panel, and some lilac card for matting and layering.
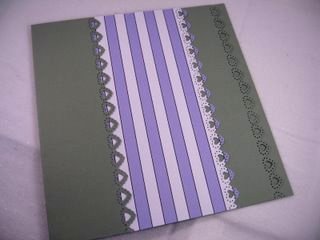
Step 5
I have made the base into a Big card, and the paper is from the
"Add A Little Stripe To Your LIfe" collection.
The borders have been punched and the base is now ready.

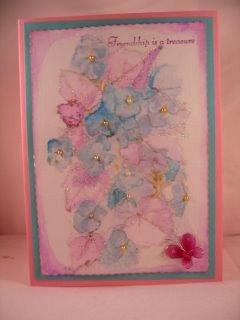
In the centre of the flowers I have added some small, flat backed pearls.
The ribbon around the spine is silver, to compliment the embossing.
Using different flowers will give another look to your crushed flower card.
Experiment with them and see what you get, and if you don't like the result, then start again....some you win, some you lose!!
If you want to go a step further then do as I have and add some colour to the leaves and flowers.
I used a "Big and Juicy" inkpad and a waterbrush and very lightly added the colour in stages.
Start pale and then go deeper to add shadows.
Add the sentiment that you want and as always sign the back with...
"Handmade by...your name"
Cardmaking Techniques
Cardmaking Ideas
Cardmaking Occasion
Equipment
Easy Projects
More Projects
Papercrafts
Novelty Cards
Kinetic Cards
Return from Crushed Flowers Card to Homepage


Recent Articles
-
Memory Book
Oct 15, 22 09:17 AM
 Make a memory book, fun to make and even lovelier to give.
 -
Die cut letters.
Jul 19, 21 10:12 AM
 Add that personal touch with die cut letters, add names or sentiment as you please.
 -
Diaper Fold Card.
Jul 19, 21 09:34 AM
Create this fun Diaper Fold Card...and no need for a pin!
Search
