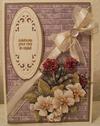
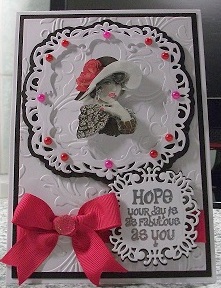
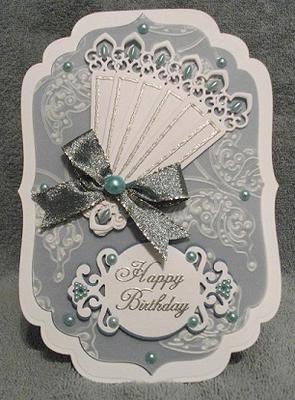
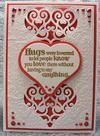
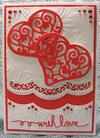
Some of the cards I have made recently
by Jenny Cottam
(Doncaster, South Yorkshire)

Christmas cards


|


|


|


|
I thought I would make a few Christmas cards and decided to use my favourite method of topping cards which is decoupage.
I used the pre cut decoupage sheets which I bought, and mounted them together using foam pads to achieve the finished result.
I used A5 card folded in half, and for a change instead of using backing papers I used coloured card, and topped them with the decoupage topper and peel offs to accentuate them.
Considering they were quick and easy I hope that the recipients will be pleased with them.
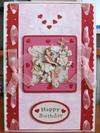
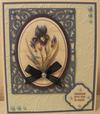
I made some birthday cards using the same method as above but the decoupage toppers are hand cut by myself from sheets which I have bought.
Again instead of using backing papers I used coloured and textured card. I will be keeping these in my stock for future use.
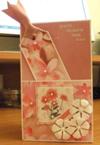
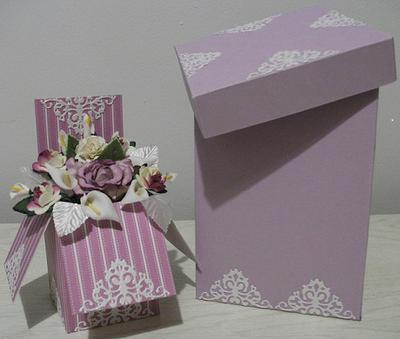
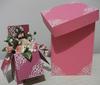
The gift bag was for a gift for a friend's birthday. I used the template from your very easy to follow instructions for the Bow Front Card Box Christina and just adjusted the measurements accordingly to accommodate the gift to go inside.
I used pink ribbon for the handles. I then decorated the front of the gift box with a panel of some deeper pink backing paper edged with white peel off border.
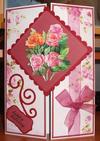
I then used some of the Paper Roses that I had in my stock which I had made using the instructions from your video.
I drew a green stem and stuck the roses and punched leaves on. I then made a bow from pink ribbon and stuck this onto the base of the stem to make it look like a spray of roses.
My friend was thrilled with this and was telling all her friends about it. This pleased me no end to know that my efforts were appreciated.
The final box is a box which I have made for a gift for my brother and sister-in-law for Christmas.
I followed the video instructions for Making a Card Box and just adjusted the measurements to suit the gift inside.
I then decorated the lid with peel offs and a decoupage Christmas image. After putting the gift inside I used gold ribbon tied round the opposite corners and then tied a bow on the bottom left corner. I hope they are pleased with the gift and also the box that I made.
Christina says ...
It makes me feel really good to know that people are making things from my videos or instructions and that they enjoy and like what they have achieved.
Thank you for the credit you give to the items you have made Jenny and also for the detailed instructions... which means others will be able to see what you have done to get the results you have.
There are detailed written and video instructions for many many cards in the NavBar to the left.
Browse around all the sections and you will find many surprises. Novelty cards ...Kinetic cards ...Easy Projects ... and Papercrafts.
All will give your cardmaking some new ideas.
All these submissions are just wonderful and I am sure that all your recipinets would have been thrilled with each one.
The roses look really beautiful and I love pink.
And don't forget to put any Embossing Folders in your "stash" to good use too, as they will give your plain card the textured finish that Jenny has.
Click here to read or post comments
Just a few of the cards I have made recently
by Jenny Cottam
(Doncaster, South Yorkshire)


|

|

|

|
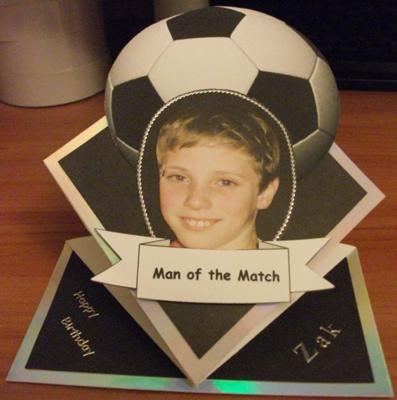
The football pop up card was for my niece's son who was very impressed with the card and thought it was wonderful. This pleased me no end.
I followed your video tutorial, Christina, and after a little trial and error was pleased with the finished result.
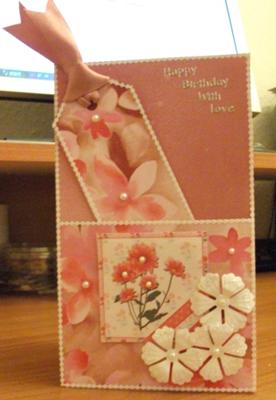
The pink pocket card is for my friend's birthday and as she likes reading I thought this one would be quite apt as it has a book mark in.
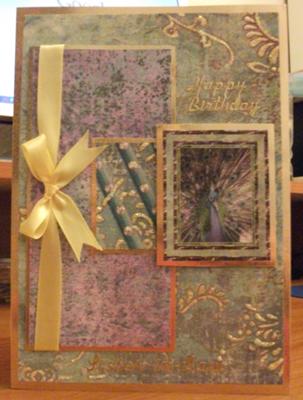
The card with the peacock on is for my sister-in-law's birthday in November, so fingers crossed she will like it.
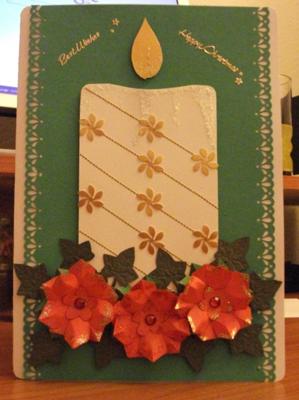
The final one is my first attempt at making Poinsettias and designing a Christmas card for a competition.
Not holding out much hope but at least I have tried.
Christina says...
Keeping the inspiration going for cardmaking is always foremost in my mind as it is so easy sometimes to lose ones MoJo and get card makers block.
But with so many folds and ideas in the NavBar to your left there is sure to be something to spark your imagination again.
Jenny has tried some of the projects here to good effect and I would be very happy to recieve a card like any one of these.
The Christmas one is lovely and it is certainly a winner in my book.
Click here to read or post comments
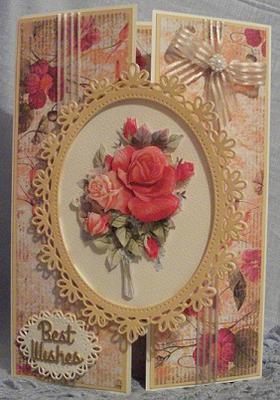
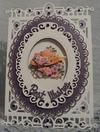
Trying out some more different styles of cards
by Jenny Cottam
(Doncaster, South Yorkshire)

Bow Front Wedding Card


|


|


|
As I am getting more confident in card making I keep trying out different folds and shapes.
My friend asked me if I would make a card for her niece as she is getting married so I thought I would give the Bow Front Card a go.
I thought it would be really difficult but once I got going I found it really quite straight forward.
My friend was really impressed with it and thought her niece would like it as she is a girly girl.
The blue card (can't remember what the fold is called) is just to keep in reserve. I loved doing this one and used one of my favourite decoupage toppers on it.
I used lace to outline the sentiment and then I used glitter glue to accentuate some of the flowers on the backing paper.
I got the template for the scalloped card from my favourite card making magazine and then used a decoupage flower topper on it (as you've probably gathered decoupage is one of my favourite things to do).
I used ribbon to accentuate the sentiment. I then outlined the scallops on the card with glitter to add a little bit of extra sparkle.
Christina, I can't thank you enough for your website which I find invaluable in teaching me loads of different techniques and ideas. Keep up the good work
Christina says ...
What a wonderful collection of cards you have here Jenny and if I have helped at least one person to find their feet in cardmaking then I am happy.
The second card Jenny has featured is the Diamond Fold Card and you will find the instructions in the NavBar to the left.
(And I recognise the papers too!!!)
It is such a wonderful and rewarding hobby, and if you take photographs of the cards as you go along you will be able to chart the progress you make.
You will be amazed at how quickly you improve and the more you improve the more your confidence will grow.
There are lots of techniques and ideas to try and none of them are hard. With just a little practise and patience then you too can make cards as beautiful as Jennys.
Click here to read or post comments
Spinner card
by Jenny Cottam
(Doncaster, South Yorkshire)


Spinner card
The spinner card is just a very basic try and although I am quite pleased with the result I will be having another go to improve on this technique.
Christina says ...
The Spinner Card is one of those that although not difficult to do it can be fiddly.
But I am sure that you will agree it is well worth having a try at, as are all the projects on the website.
Some you will like and others you won't be keen on .... and then there are those that are so spectacular you will just love them, and will want to do over and over again.
Have a browse through the Easy Projects section and then move onto the More Projects and Papercrafts for even more ideas.
For a first attempt Jenny this is really lovely and I hope you were pleased with yourself when you had finished it.
It certainly gets the attention of the recipient as they always wonder how it is made, and it can be very pretty when it is completed.
And remember that practise makes perfect so if it is your first attempt too, and you are not happy with your card then try again.
I promise you will be delighted in the end with your efforts.
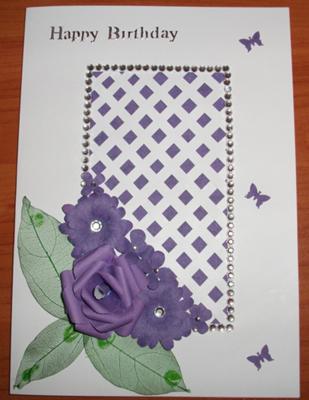
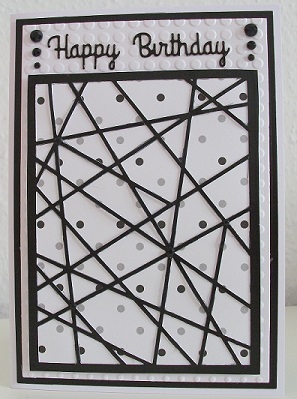
Trellis card
by Jenny Cottam
(Doncaster, South Yorkshire)


Trellis Card
This is a card that I made after following your video on making "Paper Roses", which I must say I thoroughly enjoyed doing.
I then watched the video tutorial for making the "Trellis card" ... so had a go at making that and merged the two together so to speak.
Christina says ...
This Trellis Card is beautiful Jenny and it isn't hard to do. I have tried to keep the video short and easy to follow.
And aren't those Paper Roses addictive. Once you see how easy they are to do you end up making them for all sorts of things.
If you would like to make some the Tutorial is in the video tutorials in the NavBar to your right.
Have a go at them and I promise you won't be disapointed with the result...even if you have never made them before.
You can make them in any colour you wish to match your designs, and the size can be varied quite easily too.
Click here to read or post comments
My latest cards
by Jenny Cottam
(Doncaster, South Yorkshire)

Congratulations Card


|


|


|


|
These are some of the cards I have made recently that I would like to share with you.
I made the Congratulations card for the young man next door who has just passed his A levels and gained entry into university.
He is such a nice, polite young man so I thought it would be fitting to congratulate him with a card.
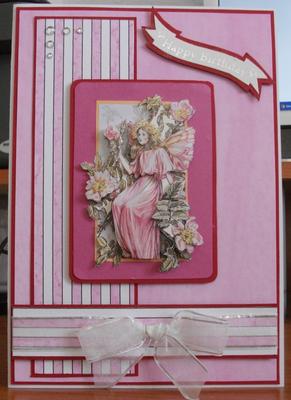
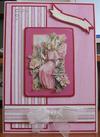
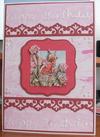
The fairy card was made for a friend at work who mended a bracelet for me so I did this card for her to say thank you.
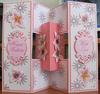
The quad easel card is my first attempt at making this type of card and I am quite pleased with it.
I didn't use flowers this time but used some holographic stickers with flowers and fairies.
As I didn't have any brads I used some large gems to enable the sections to stand up.
The gate fold card has been made just to keep in for emergencies when I need a card in a hurry. This time I tried pyramage and am quite pleased with the result.
Christina says ...
A lovely collection of cards using different folds, and the results are excellent.
Trying out these folds will stop you getting bored and enlarge your repertoire of skills.
Many of us start off just folding a piece of card in half and working with that but there are so many ways to try and none of them are really hard.
You will find many of these folds in the Easy Projects section and when you feel more adventurous then have a look at the Kinetic, More Projects and the Papercrafts sections too.
Plus don't forget that many of these folds are now on the website as video Tutorials that will take you step by step to getting the look that you want.
Click here to read or post comments
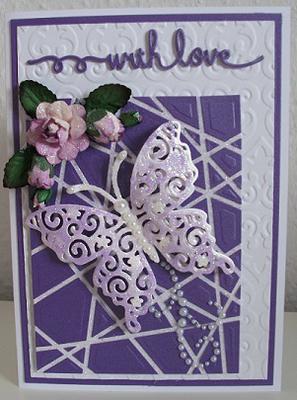
Wedding Anniversary Card
by Jenny Cottam
(Doncaster, South Yorkshire)
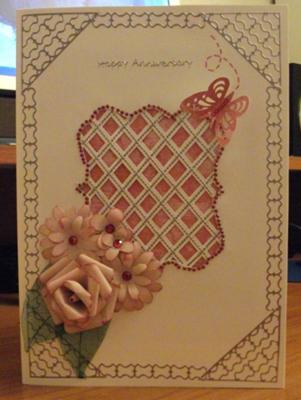

I thought I would have a go at the Trellis card again and hopefully this time it looks a bit more professional.
I took your advice and gave the butterfly a trail, and I must admit it gives it that bit more interest.
I will be posting this to my brother-in-law and sister-in-law next week so fingers crossed they like it.
I have also followed your tutorial and made a box for it as it has a rose on.
Christina says ...
Well what can I say to this card except "Wow" I love the "Trellis Card" as the results are always spectaculer.
It is one of the designs that look intricate and yet are so easy to do. The Bow Front Card is another that gives wonderful results.
You will find the instructions to make both in the More Projects section in the NavBar to your left. Along with lots more ideas for you to try.
Even if you are new to cardmaking don't be daunted by these designs. They are easy to do and you will be so pleased with them you will want to try them over and over again.
Making your own boxes to go with the card is a really professional way to give them and if decorated to match the card then the results are extra special.
You will find vido instuctions in Tutorials
Click here to read or post comments
New Baby Card
by Jenny Cottam
(Doncaster, South Yorkshire)


Baby Boy
My ex-supervisor from work, whom I am friendly with, has recently had a baby boy so I made this card for her.
Instead of matting and layering I printed the backing paper straight onto the card then cut it into the shape of a baby's romper suit and decorated it with lace and a topper to say "Congratulations".
She was delighted with it. She said it made her cry so I hope it was tears of happiness.
Christina says ...
Now this is the age that makes male cards no problem to create for. They are a delight to make and such a happy occasion too.
The colours can be all soft and pastels and on baby girl cards you can add the flowers.
The idea of printing straight to card saves you extra work ... but not every printer will print to card.
There is a page on Small Printers on the website and you will find it in the Equipment section in the NavBar to your left.
The romper suit is a novel way to make the card and the additon of the lace makes it extra special.
I am not surprised that you friend cried as your card is beautiful.
Click here to read or post comments
Moving house
by Jenny Cottam
(Doncaster, South Yorkshire)
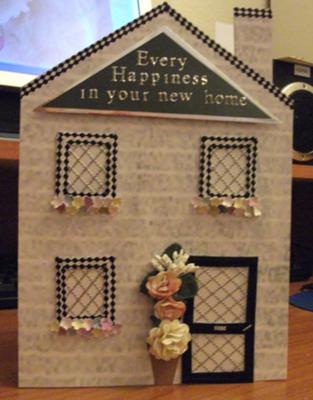

My Friend's daughter will be moving into a new home this weekend so I made this card for her to to give to her.
This, I am proud to say is my own idea and not copied from anywhere else. I've taken heed of your tips and don't let anything go to waste.
I have kept the flower shapes that were created from using my border punch and thought it would be a good idea to use them to represent flowers in window boxes for the windows.
I used acetate behind the windows and door and used a fine peel off border to make it look like leaded windows and door.
My friend was delighted with the finished product.
I apologise that the photo is not very clear - must not have made a very good job of taking that photo.
Christina says ...
When some one is moving house it is a lovely idea to give them a card to recognise the occasion.
This is a cool idea for a "New Home" card and I love the way you have added the peels offs to look like the leading in the windows.
The flowers around the door are a finishing touch for me as I love to add flowers to a lot of my cards.
As crafters we don't waste anything and this is a good idea to use the waste from your punches to add them to your flower boxes at the windows.
Little touches like this are what makes a "frugal" crafter and will always save you money using up bits and pieces that would otherwise end up in the bin.
You will find more ideas in the Recycling section in the NavBar to your left.
Click here to read or post comments
Gentleman's Card
by Jenny Cottam
(Doncaster, South Yorkshire)


I absolutely love doing decoupage and found this one on my favourite market stall.
I have made this card which I think will be suitable for my friend's husband's birthday which is in October - a little in advance but better to be prepared.
I think it is difficult to find suitable subjects for a man's card so I thought this would fit the bill.
Christina says ...
Cards for men are always hard to come up with and sometimes you can sit for hours racking your brains to think of a theme.
You could always base it around any hobbies, or interest that the man may have and use his favourite colour scheme to make the card.
This card fits the bill beautifully and is sure to delight the recipient, and it would fit a number of different occassions too.
The colours don't have to be muted though as bright colours can produce a really effective male design.
There are more Cards for Men which you will find in the Ideas section in the NavBar to your left.
If you find decoupage to difficult to do then why not try to find die cut sheets which are already cut for you.
All you need to do is push out the layers and build them up. Or perhaps you would like to try the Pyramge option which is far easier and you will find that in the Techniques section.
Click here to read or post comments
Cottage Creation
by Jenny Cottam
(Doncaster, South Yorkshire)


My friend at work asked me to make a card for her sister who will be 65 next week.
Whilst away on holiday in the Yorkshire Dales I saw several stone cottages with steps leading up to the door, with potted plants on each step and roses round the door.
This gave me the idea for this card as I thought it would be a bit different.
My friend at work says it will be quite apt as her sister likes gardening and doing planters so here's hoping I made the right choice for her.
Christina says ...
What an inventive idea and well interpretted with the roses on the steps and aound the door.
Yet another way in which the imagination has been put to good use.
The colours all blend well together and I am sure it was just the right card for your friend to give to her sister.
Using flowers on a card will always add that special touch for me and you can make them to match your scheme by making them from the same papers.
There is a Tutorial on Handmade Flowers in the NavBar to your left.
Click here to read or post comments
Pretty Border Card
by Jenny Cottam
(Doncaster, South Yorkshire)


The pink border card I made for my other friend, who has had her birthday today, and she was delighted with it.
I love doing decoupage and she likes butterflies so it just fitted to add a butterfly with flowers.
Christina says...
Butterflies are very much in fashion at the moment and they can be added to any cards for any occasion.
There are lots of different sized punches or die cuts around that will give you these delightful creatures but if you don't have one there is no need to despair.
All you need to do is make your own from the papers that you have used to make the base card.
That way you know they will co-ordinate with your scheme and they are very easy to do.
There is a Video Tutorial on how to get the look you want in the NavBar to your left.
Click here to read or post comments
Pussy cat decoupage.
by Jenny Cottam
(Doncaster, South Yorkshire)
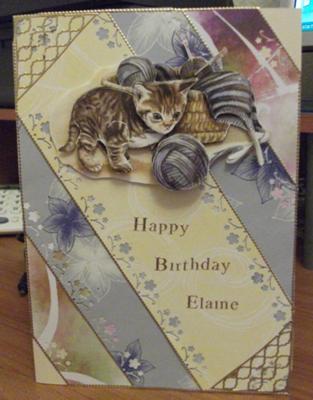

I'm just sharing with you my next creation.
I think I'm getting a bit more adventurous now and just a touch more experienced.
The pussy cat card is for my friend who just adores cats and I will be giving it to her for her birthday in August.
So fingers crossed she will like it.
Christina says ...
Decoupage is a lovely technique to try but can be a bit fiddly for arthritic fingers.
It consists of cutting out ever smaller areas of an image and then adding them to the card using foam pads or silicone to the layers to give them the height that is needed.
The cutting out is the bit that can be difficult.
However you could buy the decoupage sheets ready die cut and then all you need to do is push the pieces out and layer.
But why not give some of the other ways to add the layered effects to your cards?
You will find the instructions for Invertage and Pyramge in the Techniques section in the NavBar to your left, which can be achieved using a die cutter and several identical images.
Click here to read or post comments
Sharing my first attemp cards - Diamond Top card, Paper Shirt card and Trellis card
by Jenny Cottam
(Doncaster, South Yorkshire )

I just thought you might like to see my first attempt at making these cards.
I am experimenting at the moment with the techniques that you show on your video tutorials (which I must say I find invaluable).
The Diamond Top card I made for a colleague at work who has just retired and when he received it he was delighted with it and amazed that it was hand made.
The Folded Paper Shirt card I made for my brother-in-law who is having his 60th birthday shortly so have not had a response on that one yet.
The Trellis Card was not made for anyone in particular. I made the paper flowers following the tutorials and then decided to have a go at the trellis work.
Even though I say it myself I am quite pleased with the result for my first attempt.
I haven't been making hand made cards long so I am just in the trial and error stage, but with the help of your tutorials I am hoping to become much more proficient.
I hope the uploading of the photos has worked because I am not very good at this part of it.
Christina says ...
These cards are just fabulous Jenny and thank you for sending them in to the Gallery. They may be your first attempt but they do you proud.
You should see some of my first attempts ....they were so bad, and bits fell off them whenever someone picked them up.
The colour on the Trellis card is lovely and I am sure that whoever you send it to will be delighted with it.
Click here to read or post comments
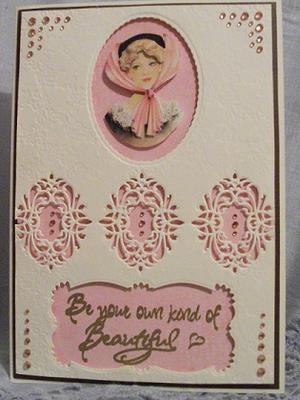
Retirement card
by Jenny Cottam
(Doncaster, South Yorkshire)
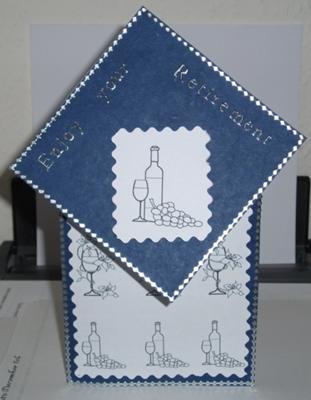

This Diamond Topped card is one that I made for a colleague at work when he retired recently.
He was delighted with it and was amazed that I had made it.
Christina says...
This card is always a popular fold and it really impresses poeple. It looks intricate but it is quite easy to make.
It is one of the new videos that has been added to the website.
I have tried to keep the video short and easy to follow and you will find it in the Video Tutorials in the NavBar to your left.
You can dress it up for any occasion and it will be sure to please your recipient too.
Click here to read or post comments
60th Birthday card
by Jenny Cottam
(Doncaster, South Yorkshire)


Folded Paper Shirt
This is a birthday card that I made for my brother-in-law who is 60 today.
Christina says...
This Folded Paper Shirt has been such a hit since it was added to the website and this one is just fabulous Jenny.
I bet your brother-in-law was delighted with it.
You can add your sentiment to the inside and it can be for any occasion. I once made some and sent them out as invitations to a dinner party.
You can make them look like a blouse for ladies too, but if you add a patteern then keep it small or it will be lost in the small size of the shirt.
You can find both the Written and Video Turorial for this project on the website.
Both links are in the NavBar to your left.
Click here to read or post comments
Four More Cards after a break
by Jenny Cottam
(Doncaster, South Yorkshire)

Son's card


|


|


|


|
I've had a break recently because I seemed to lose the inspiration but hopefully back on track now.
The cricketer card was for my son's birthday because he is a cricket fan. I cheated a bit on this one because the card was one I bought already the oval already pre-cut and background included.
For the cricketer I printed out five pictures of a cricketer and then decided on the parts to cut out to decoupage the picture. He was pleased with the card and I was pleased with the results.
The work book is one that I have made in advance for my friend's son's wedding. I followed Christina's instructions as to how to make it but I did the letters myself because I didn't have any templates.
I then outlined the letters with gems and put a butterfly on one of the letters. I made a posy of purple roses surrounded by a small doily and attached a purple bow which I put on the front of the word book along with the sentiment. I was pleased with the result considering I've never made this type of thing before.
The tiger card was for my husband's birthday because he loves tigers. I used an A4 card and folded it gate fold, put gold mirror card on each front then covered each side with a paper to blend with the tiger.
I printed five pictures of the tiger then cut them down individually to make a pyramage picture. I attached them together with foam pads and matted them onto gold mirror card. I attached this to one side of the gate fold along with the sentiment.
The birthday card is supposed to be lemon but doesn't show very well on the photo. I used A4 cream card folded in half then covered the front with yellow card. I then covered one diagonal half with lemon backing paper and the opposite diagonal a white textured backing paper.
I used a border punch to punch both sides of a piece of card and attached this diagonally across the seam of the backing papers. I then used yellow ribbon down the middle and then attached a bow.
The top left hand is a decoupage of flowers (decoupage - my favourite) and the bottom left the happy birthday sentiment which is matted and layered using the yellow card and lemon backing paper. I then stuck gems on top left and bottom right of the card.
Christina says ...
What a fabulous collection of cards and thank you for sending them in ... with such detailed instructions for everybody.
I like them all but my NO.1 favourite is the Lemon card as it looks so fresh and clean. That is simply gorgeous and one I would be delighted to receive for a birthday.
I am glad you have found your inspiration again as it is really stressful when you have some card and you can't think of what to do with it.
But maybe the Free Card Making Sketches booklet can help if any one else is in the same rut... and if you are new to the website you can get yours by adding your email address to the box in the top left of the pages.
Click here to read or post comments
Cards to Keep for Future Use
by Jenny Cottam
(Doncaster, South Yorkshire)

Pink Lady


|


|


|
I made these three cards to keep in my stock for when needed. The lady one was made as follows using backing papers and toppers from one of my magazines.
I made a gate fold card from white A4 card.
I cut two pieces of silver mirri card slightly smaller than the two sides then layered two slightly smaller pieces of the pink backing paper on top of both.
I attached ribbon with a silver trim across the top corner of the one to be attached to the left hand side and then made a bow which I stuck in the middle.
I stuck these two sections on each side leaving a small white border round each. I cut an oval piece of mirri card larger than the pink lady topper.
I ran a glue roller round the edge and then attached pleated ribbon round the edge on the glue.
I then cut a slightly smaller silver oval and attached this in the middle using foam pads. I then attached the pink lady topper on the oval again using foam pads. I glued the left half of the topper and attached it centrally down the left section centre edge.
I cut a piece of silver mirri card larger than the sentiment and attached this to the bottom right corner using foam pads then attached the topper again using foam pads.
I glued a smaller topper (the corresponding one that matched the centre piece) to the middle of the bow. I then using silver glitter glue round the inner edges of the topper, smaller topper and the sentiment. I also used the glitter on her earring and also to make it look like she had a necklace on.
I put clear adhesive gems on the bottom left and top right hand corners of the card for extra effect.
The two smaller ones were made using aperture cards which I had bought. On both cards I stuck backing papers round the apertures then put glitter card behind the aperture and put decoupage flowers on each using foam pads.
I then finished them off using peel offs for a bit of added effect.
Christina says ...
The Gatefold card is one very beautiful centre piece and who ever gets it is sure to be delghted with it.
They are very easy to do and the result is just that little bit different. New cardmakers would have no problem at all in doing this style of card for themselves.
There are lots of written and video instructions in the NavBar to your left that are all there to help you create cards as stunning as Jennys.
Click here to read or post comments
Trying some New Techniques
by Jenny Cottam
(Doncaster, South Yorkshire)

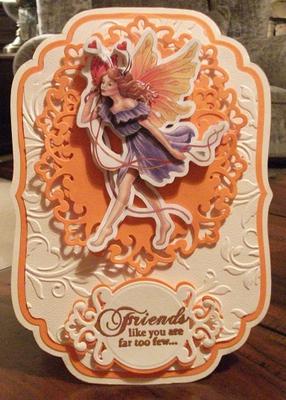
Fairy


|


|


|


|
I've been watching some more of your videos, Christina and have had a go at putting them into practice.
The fairy one is for my mum's birthday as she likes fairies. I used some card and fairy toppers which I bought.
I used ivory card and used two patterned card and inserted the borders down the side with the ruffled gold ribbon in between and then along the middle with the topper in the middle.
I am pleased with the result but think I have done the ruffles too close together.
The blue one is to try out the plaited ribbon technique. I used dark blue backing paper and improvised for doing the ribbon.
I used my border punch down both sides of a strip of paper and then used a small flower punch down the middle.
I then stuck a strip down the middle to give holes at either side. I then tried to copy the plaited ribbon technique. I also used some of the paper roses which are my favourites from your video, Christina.
The red one is another try at the ruffled ribbon and I tried to get the ruffles a little farther apart this time.
I did this corner to corner on the card and then inserted punched flowers on one corner and a sentiment on the other.
The turquoise one is my efforts at the paper lace which I made by using my border punch on paper and pleating it onto card.
I then stuck the topper above it with foam pads. I used the same paper border across the top twice and bottom twice with a different backing paper to tone with the middle one.
I love watching the videos and when I have the time I try to put into practice what I have seen.
Christina says ...
Each and every one of these cards is just so special and I love them all... and I am sure that each recipient of them will be delighted with them too.
The ruffled ribbon is just perfect each time you have done the technique and I love the plaited ribbon. Doesn't it make a card look stunning?
It makes me feel so happy to see some of these ideas being put into practise and the results are spectacular.
Thanks you so much for sending them in to the Gallery. xx
Click here to read or post comments
Spellbinders at last
by Jenny Cottam
(Doncaster, South Yorkshire)


|

|

|

|
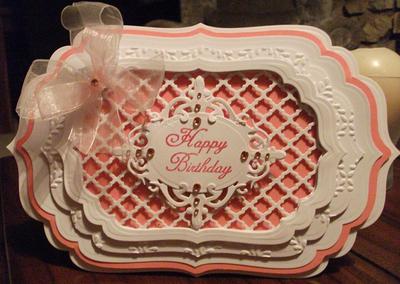
Three out of four of the cards have been made with my new Spellbinders dies.
I took your advice Christina and bought the basics which you show in your videos - the Parisian Accents and Parisian Motifs and have had such fun using them.
I have followed your video for making the large square card and and then used one of my punches to make the patterned join in the middle of the back.
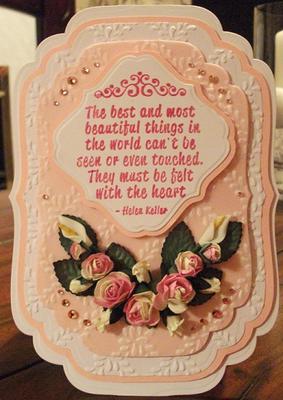
For the purple and lilac card I followed another video to link together the motifs and used a corresponding colour scheme which blended with my decoupage flowers.
I used the small collar for the bow and then stamped a sentiment and mounted it with corresponding colours also.
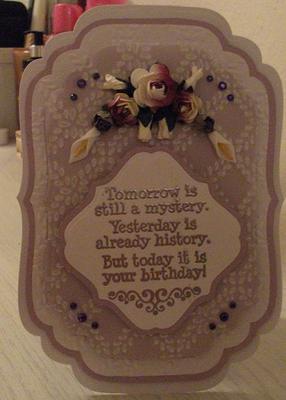
The final card is using A4 card and folded gate fold. It is matted and layered using dark pink card and then pink rose backing paper.
I have attached a ribbon down one side of the gate fold and used die cut swirls on the other side. I then attached near to the top on one side a decoupage rose plaque.
I then stamped a sentiment and mounted it and stuck this to the lower left side with foam pads to give a raised effect.
Hope you like my cards and colour schemes.
Christina says ...
Oh those Spellbinders are awesome are they not????
I love using them and producing the most beautiful cards and there are so many ways to make them work for you.
Each die can be used with any other set and will always look good together. So have fun and enjoy playing with them ... and keep sending in the photos of all these lovely creations that you do. xx
Click here to read or post comments
Very pink
by Jenny Cottam
(Doncaster, South Yorkshire)


|

|

|

|
These four cards are my latest attempts at different techniques.
The concertina card is made following your video, Christina. I used one of the pretty backing papers from your downloadable collection to layer onto pink card on each of the larger sections.
On the smaller section in the middle I just used pink card matted onto white card. I used the Fleur de Lys Edgabilities border to edge the card to take away the plainness of the edge.
I cut some flowers from a backing paper from making handmade cards and used a ball tool to make the petals more curved. I used gem flowers for the centres and attached these to each panel using foam pads.
I then cut out two Spellbinders Parisian Accents tags in white card and followed your method of shadowing them with pink card. These I attached to the far left and far right sides of the card with stamped sentiments on each.
On all of the cards I have shown I have used some of your backing papers, Christina. On the pink fairy one I have followed your ideas from card making sketches to come up with the design.
The little fairy one is a topper mounted in the middle with a Parisian Accents border above and below. I them went over the happy birthday on the backing paper with Stickles glitter glue to give a bit of sparkle.
The final card is matted with a piece of pink card edged down each side with heart shaped Edgeability border and before mounting onto the base card.
I threaded pale pink gauzy ribbon through and tied a bow in the middle on each side. I then mounted onto the base card, then attached a panel of packing paper.
I mounted my fairy topper in the middle and used the hearts left from the border to create an extra little design to create a little more interest.
On the three fairy cards the toppers I have used are hand cut decoupage fairies mounted onto complementary colour card.
Thank you once again, Christina, for the use of your backing papers which are, I must say, very pretty.
Christina says ...
What a very pretty collection of pink cards and how lovely to see how you have used some of my free papers.
Thank you so much for using them and sending in your cards.
I would be hard pushed to pick a favorite as they are all simply gorgeous and as I make no secret of the fact that I love Spellbinders, pink and girly cards then all these are right up my street.
And I am sure that whoever gets one for your designs will be even more pleased with it.
Click here to read or post comments
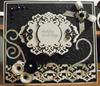
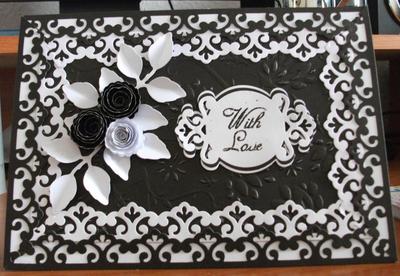
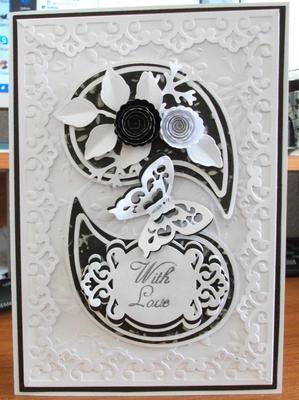
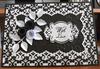
Black & White
by Jenny Cottam
(Doncaster, South Yorkshire)

|


|
These are two cards using black and white colour ways. They are both using A4 card folded in half - one made tent fold and one with the fold down the left hand side.
For the tent fold one I matted an embossed piece of black card leaving a white border. I cut out in black and white the border from Spellbinders Parisian accents.
I then attached the white border all the way round the black card and mitred all the corners. I then attached the black border round the edge of the white border, mitred the corners and made it so that the patterns were alternating.
I then attached some white leaves which had been cut using the Spellbinders foliage collection. I attached two black and one white flower which I had made from a die.
I cut out two white sentiment tags and one black and attached them together using the shadow technique from Christina's video. I heat embossed the sentiment in black sparkly. and attached it to the card using foam pads.
For the second card I matted a piece of black card onto the front leaving a narrow border. I then layered a piece of embossed white card on top leaving a narrow border again.
I then used some Parisian accents border right round the edge of the white centre and mitred the corners. I used two of the dies from the Xcut paisley leaves nesting dies.
For each size I used my machine to cut out the outer shape in black then drew round the outer edge on white card and cut them out by hand. I matted and layered them together using foam pads.
I arranged them on the front of the card and used flowers and leaves on the top on and a shadowed sentiment on the bottom. In the middle of these I inserted a shadowed butterfly which I had cut from a die from a magazine.
These cards I though could be used for several occasions.
Christina says ...
Both of these cards are stunning and I love the black and white theme. It is so striking.
You have certainly put those Spellbinders to work and you are making sure that you get your monies worth from them all.
My favorite is the Paisley patterned one and you are right they both would be suitable for any occasion.
Click here to read or post comments
Variation on a theme
by Jenny Cottam
(Doncaster, South Yorkshire)

|


|


|


|
I have recently bought Grand Labels 4 and to make them work for me I have made the book card and then adapted the making a frame card and spellbinders and parchment. I followed your videos for them all, Christina.
I made the blue book card as a get well card for my husband as he has just had an operation.
The pink and white frame card was made for my friend to give to her sister for her birthday and she was highly delighted with it.
I followed the video for making a frame card but used my grand labels die instead. I was pleased with the way it turned out. The last two, pink and lilac, were made by following the video using parchment.
I cut out the shapes and then cut off the points at either side so that the card would stand one end.
I made them both in the easel method. They both turned out pretty good and they are just to go in my box for future use.
Christina says ...
Every one of these cards is just beautiful and you have certainly been busy ... you'll get square eyes watching all my videos.
But what a compliment to me that you enjoyed them and then came up with cards as lovely as these. Thank you for your faith in my tutorials and for showing us all what can be done.
My favorite has to be the pink birthday card with the lattice inside the frame ... that is so my type of card. And I see you have been buying the Sentimentals stamps too.
Click here to read or post comments
Further creations
by Jenny Cottam
(Doncaster, South Yorkshire)


|

|

|

|
The first two cards with an orange theme are two that I made to use some of my decoupage images. The A5 card has a cream base with a layer of orange and then an embossed layer of cream using the grand lattice embossing folder from Spellbinders.
I then used two of the shapes which I had cut using the radiant rectangles dies and lined them with orange so that it showed through. I arranged them on the card so that the decoupage was suitably placed. I placed them on using foam pads.
I then stamped a sentiment from the Sentimentals range from Crafters Companion onto the oval from the radiant rectangles set. I placed this at the top of the image using foam pads.
The other orange based one is using grand labels four for the base card with the points cut off and turned on end and made into an easel card.
I matted it with orange and then and an embossed layer. I cut two Persian Motifs from Spellbinders and attached together and topped with the decoupage fairy using foam pads.
I then stamped a sentiment onto the tag from the Persian Accents and shadowed it in orange and attached it with foam pads to the bottom of the card.
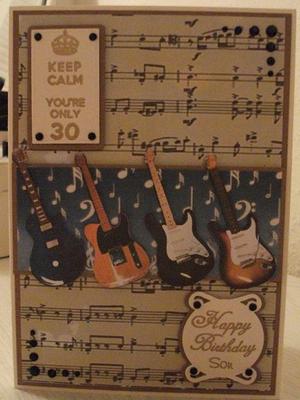
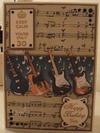
The other two cards are music based as my friends son is well into music so she said would like a card for her and for his sister to give him for his 30th birthday.
The A5 card is just arranged using music based backing paper and four guitars cut and arranged along the middle.
I stamped sentiments onto cream card and mounted onto Kraft card and attached to the card with foam pads. I put black gems into the bottom left and top right corners.
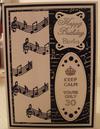
The black and white card was matted and layered using using white and black card and the top black layer was embossed using a music embossing folder and then rubbed the top off with sandpaper block so that the white core showed through.
I then stamped and heat embossed music scores onto a piece of white card and then mounted it onto the card using foam pads. The sentiments were stamped and heat embossed in silver and mounted onto the card using foam pads again.
Christina says ...
What a fabulous collection of cards and it would be hard to choose a favorite.
I really like the Spellbinders Cards as they are both very elegant and suitable for any of your female friends.
But the use of the music sheet and the guitars is really clever and sure to please the man that gets it whatever his age.
Click here to read or post comments
My Latest Creations
by Jenny Cottam
(Doncaster, South Yorkshire)


|

|


|


|
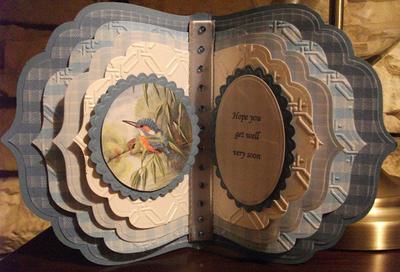
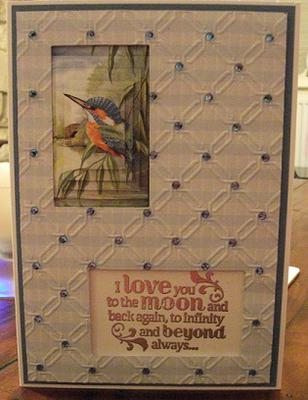
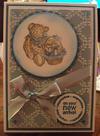
The first card is an anniversary card that I made for my husband.
It is A4 card folded in half then matted with blue. I placed a sentiment towards the bottom and a pyramage kingfisher top right.
I embossed blue gingham card with the A4 lattice from spellbinders and cut out two relevant rectangles to correspond with the sentiment and kingfisher.
I mounted it with foam pads on the card and I put blue gems on each section where the lattice crossed.
The teddy card is made in the easel style copied from your video, Christina.
I matted it with blue card and then again with white. I cut the next piece from parchment and embossed it with the other side of the lattice folder.
I then attached it to a piece of blue card with a little dot of glue in each corner which I covered up with gems (as I couldn't find my brads at the time).
I wrapped ribbons at an angle across before I attached it to the front of the card with foam pads. I then attached bow.
The stamped teddy image is my first attempt at colouring which I did with coloured pencils. I mounted it onto a scalloped shape.
I then mounted it onto the card with foam pads. I stamped and heat embossed a sentiment for a baby boy and attached this also.
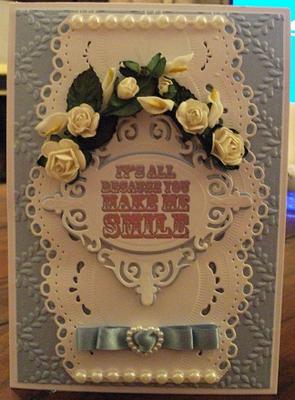
The next two cards are my interpretation of your videos using the scalloped borders and the video using the butterfly corner dies. Hope I've done you justice with my interpretation.
Christina says ...
What a beautiful collection of cards and Yes you have done both you and me proud. I love them all and it is so satisfying to know that my tutorials are being put to good use.
Every one of these is just simply lovely but if I had to pick a favorite it would have to be the pink one.
If you wanted to make this style of card as Jennifer has done then you will find Spellbinders Butterfly Corner in the Video tutorials in the NavBar to your left.
Click here to read or post comments
Cards using Sparkle medium
by Jenny Cottam
(Doncaster, South Yorkshire)


|


|


|

|
I bought some Sparkle Medium from Imagination Crafts when I visited the Papercraft show at Harrogate and really enjoyed playing when I got home.
I taped the stencil and card onto a mat. Using the spatula I spread the sparkle medium onto it and then scraped off the excess.
I gently peeled off the tape and removed the stencil gently so as not to smudge the sparkle. I then left them to dry before creating cards with the finished results.
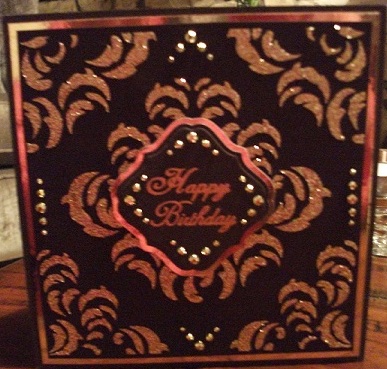
I made two six inch square cards and used the brown with gold sparkle to make a birthday card for my friend and the cream one with amethyst sparkle to made a thank you card for future use.
On both cards I put the relevant colour gems to add that extra bit of something to finish off.
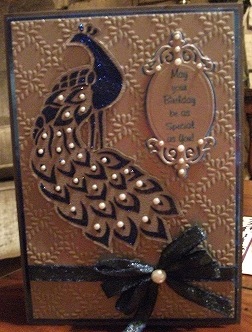
The blue sparkle peacock was done with another stencil but had a little one with it. I cut round the large one and used it to make an A5 card.
I used A4 white card folded to create an A5 card blank and then matted and layered it with blue mirror card and Spellbinders lattice embossed platinum Centura pearl card.
I cut a Spellbinders tag and shadowed it with the blue mirror card. I stamped the sentiment in blue and the heat embossed it with clear embossing powder.
I then arranged these elements on the front of the card and attached blue ribbon along with a bow around the bottom. I put little pearls onto each of the peacock feathers and a larger pearl to hide the knot.
The pink card is A4 folded into A5 and matted and layered with pink card and embossed white card. I used an Xcut die to cut out four shapes.
Two of them I used a smaller die to cut out the middle to make a frame. I used the spellbinders lattice die to cut card which I used to insert into the two frames.
I backed these with pink card I arranged these onto the card with the two lattices ones at either end. I attached with foam pads a decoupage rose image to another shape which I attached as the main image.
I stamped and heat embossed a swirl and sentiment (from Crafters Companion) and slid this underneath the main image just to show the pattern. I arranged these on the front of the card as shown and further decorated with pink gems.
Christina says ...
What a beautiful set of cards and I would be thriller to receive any one of them.
You have made some beuatiful cards that you should be really proud of and I am sure that they are going to be treasured by the recipients.
Click here to read or post comments
Decoupage and backing papers
by Jenny Cottam
(Doncaster, South Yorkshire)


|

|

|


|
I decided to make some cards to use up my decoupage images (and I've got plenty) because I've been cutting out for a while now and just storing them away in a tin.
The first two cards I used Spellbinders matting basics A & B to cut the bases and mats and the backing paper.
I then decorated them with decoupage images, ribbons, pearls and sentiments. The pink ribbon one was using a backing paper with roses on which just, by chance, co-ordinated with the decoupage image of roses.
The blue iris one uses the A2 filigree die which I cut out in blue to blend with the blue of the irises. and is just A4 folded to make an A5 card.
The red rose one is and A4 card folded as gate fold. I then matted it and layered it with red card and then a lacey backing paper.
I inserted a sentiment (decided to have a Get Well card in my stock) and on the other side I wrapped it round with some beige cotton lace to correspond with the backing paper. Hope you like.
Christina says ...
I love 'em ALL ... they look a wonderful collection of cards and who ever is lucky enough to get one will surely treasure it.
I am hard pushed though to find a favorite one as they are all so charming in their own way .... but I really do like the one with the wall as that is unusual.
Click here to read or post comments
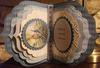
Christmas card showing our little treasure
by Jenny Cottam
(Doncaster, South Yorkshire)


Christmas card showing our little treasure
I would just like to share with you all the story behind this card.
In June of this year we lost our dearly loved little westie and I said that we would not ever have another.
But three months down the line, in September, we made the decision to get a rescue westie.
We got little Barney a day after his birthday (he is four) on September 15th and have not looked back.
He is such a little treasure. I made this card to send to Westies in Need where we got Barney from to show them that he is doing very well.
I used an A4 folded in half card and used it tent fold. I matted and layered with a red mat then a red and white snowflake backing paper.
I then used the Spellbinders Divine Eloquence card creator die (largest one) and drew round the outer edge and round the aperture in the middle and cut them both out.
I then die cut this die in red centura pearl card and again drew round the aperture and cut it out to form the frame for the photograph after being mounted onto the white layer.
I trimmed the photograph to size and mounted it with foam pads underneath the frame. I attached it to the centre of the card with foam pads (taking a cue from you Christina to give it depth).
I used a red bauble cut from a magazine and mounted it with a small frame round onto red centura pearl. This I attached to the lower left corner of the photo frame using double depth foam pads this time to keep it level with the photo.
I then used my glue pen and glamour dust to glitter up the snowflakes round the edge of the backing paper.
I'm hoping they like the card and our thanks for being able to get Barney.
Have a good Christmas everyone and all the best for the New Year. Special thanks to you Christina for all the help and inspiration you give to us all and hoping you go from strength to strength on Create and Craft and continue doing a sterling job in being Spellbinders Ambassador here in the UK.
Christina says ...
This card is lovely and so is Barney and I am sure that the rescue society will be happy that he has such a good home and will love the card.
Thank you also for the lovely comments to me personally it is very much appreciated.
Click here to read or post comments
Using my decoupage toppers and parchment
by Jenny Cottam
(Doncaster, South Yorkshire)


|


|


|


|
I absolutely love making decoupage toppers hence I have loads to use. Two of the cards are using ladies with fancy hats.
The first one uses the Spellbinders Reflective Moments card creator die to make the base. I then used an appropriate die to fit from matting basics A & B to cut a black layer and a white layer.
The white layer is embossed using the Regency Swirls embossing folder from Crafters Companion.
I then used largest and next two down dies from Spellbinders Gold labels four the create the frame.
The black and white layers were matted together in the middle and then the frame layers were put together using foam pads to give depth.
I inserted the topped inside the frame and decorated the card using black gems.
The second card is using Valiant Honour card creator in landscape with a decoupage flower frame round a heat embossed sentiment.
The third card is using matting basics A & B to create the card base and matting and layering with the white layer being embossed again using Regency Swirls embossing folder.
I drew round the largest decorative labels 34 die in black and cut out by hand.
I die cut in white and cut the middle out using the second smallest die which were then put together using foam pads to create a frame.
I inserted the topper again with foam pads into the middle of the frame. I die cut a heat embossed sentiment and shadowed this with black. I decorated the card with a pink ribbon and pink pearls.
The fourth card is made using Grand labels 4 die second one down to make the base by cutting the points from the top and bottom and attaching them together at the top.
I used the next die down to cut out a blue layer and used the same die to cut out a piece of parchment.
The parchment was embossed with the butterfly embossing folder from crafters companion. I followed the ideas of the parchment and fan from Christinas videos and photographs of her cards. I hope I have done it justice.
Christina says ...
You have more than done it justice as ALL these cards are so beautiful and you must be so pleased with your self over them.
Any recipient is going to be delighted with their card and I really would be hard pushed to name a favorite.
Click here to read or post comments
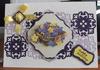
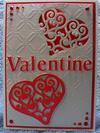
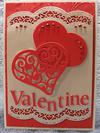
Valentine cards
by Jenny Cottam
(Doncaster, South Yorkshire)


|

|

|

|
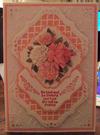
The four cards here are all made using Spellbinders 5x7 Matting Basics A & B - two in white and two in Ivory with the the red card being Centura pearl.
Two white bases and two ivory bases then red mats on all and the top layer on each was embossed using spellbinders grand lattice folder or crafters companion fancy flourish folder.
I used spellbinders scroll heart for the embellishment on all.
Two of them I used spellbinders scalloped border to make the top layer more fancy. I then finished by adding red gems in appropriate places.
Two of them are definitely for valentine cards but the other two could be used for any occasion.
Christina says ...
Oh! so pretty and what a wonderful combination is the red and white. All of these cards just simply pop and whoever is lucky enough to get one will be so pleased with it.
I really like the top one with the lacey hearts and I recognise that verse as I have it in my "Stash" too
It is so useful but as you say these cards could be for any occasion and would be perfect for a ruby wedding anniversary.
Click here to read or post comments
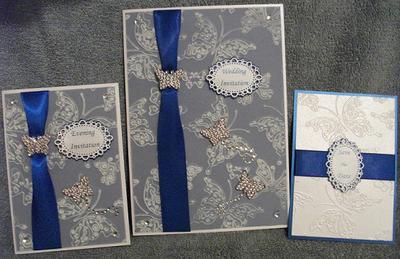
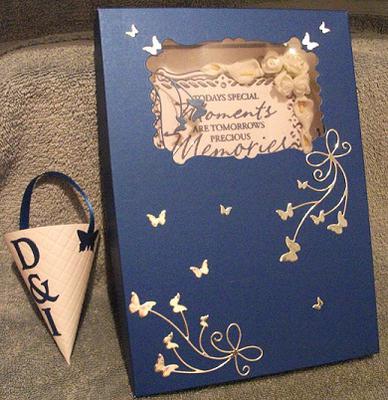
wedding stationery
by Jenny Cottam
(Doncaster, South Yorkshire)

|

|

|
I would just like to show you what I've been working on for the past few months. I've been doing invitations for my son's wedding - he's getting married next year on Easter Saturday.
The theme is blue and butterflies. The invitations for the daytime are made using A4 pearl card folded in half.
I cut blue pearl card to leave a little white border and then cut parchment to the same size as the blue card.
I then embossed the parchment with the A4 butterfly embossing folder from Crafters Companion.
I attached it to the blue card using tiny glue dots on each corner and covered where the glue dots are with a gem stone.
I bound the left hand edge about an inch in with blue ribbon and attached to the back with double sided tape. I then stuck this to the front of the card.
I used bling butterflies on the ribbon and placed two more on the front with a gem stone trail.
The wedding invitation label is cut with a spellbinders die and shadowed in blue.
The evening invitation is a miniature version of the main one using A5 card folded in half and decorated as above.
I have made the confetti cones with the create a cone die from spellbinders and attached a blue ribbon handle.
I die cut their initials and stuck them down the cone and covered where the handle joins the cone with tiny punched blue butterflies.
I have even made the confetti using coloured tissue paper. This is where my Spellbinders Sapphire machine came in very handy. A bit fiddly (and my husband has the job of separating the tissue paper pieces) but worthwhile as it is a labour of love.
I know I am well in advance but the last photo is of the card I have made to give them for their wedding day.
This is made following your video, Christina, for the acetate front card but instead of attaching ribbon to the acetate I have attached two die cut butterfly swirls as my future daughter-in-law is not into fussy and fancy so I tried to strike a happy medium.
I also made the box with an acetate window to see the sentiment through.
Christina says ...
How beautiful are these invitations Jenny and what a good job you have done making them. I love that butterfly folder and it is one I use a lot.
The effect of the butterflies on the parchment is exquisite and you future D-I-L is sure to be impressed with them.
The colors you have used are so regal and I love the acetate effect with the card you have made for them for their special day.
Click here to read or post comments
Variation on a theme again
by Jenny Cottam
(Doncaster, South Yorkshire)


|


|


|


|
These cards are all made using the glass effects die from Spellbinders and following Christina's video tutorial on how to use the positive and negative pieces cut from the die.
Three, I think would be suitable for the gents in our lives and the lilac one is definitely for a lady.
I won't go into the why's and wherefore's of how I made them because Christina's video explains it all beautifully and in great detailed easy to follow steps.
Thank you Christina - you are a godsend.
Christina says ...
The Glass Effects die from the Spellbinders Trendy and Simple Collection is really fun die to play with and will create some amazing looks for your cards if you think outside the box.
Here jenny has done just that and all her cards are lovely. They will suit male cards too as Jenny has shown you.
But my favorite one has to be the frilly flowery one for the ladies as this is the kind of card I love to make.
For this tutorial and many others please look in the Video Tutorials in the NavBar to your left.
Click here to read or post comments
Bit of sparkle and variation on a theme
by Jenny Cottam
(Doncaster, South Yorkshire)

purple sparkle


|


|


|


|
The cards are made using Sparkle medium from Imagination Crafts. I used sparkle medium in blue, purple. gold and silver and applied it to pieces of card using stencils then left them on one side to dry.
I then matted and layered them onto white card blanks using a matt in a colour to match to colour of the sparkle medium.
The peacocks were together with smaller peacocks but I fussy cut the larger ones out and used them alone in various designs.
The peacock cards are all using A4 card folded in half and the purple honeysuckle sparkle is made on a 5 x 7 card blank.
The black and gold peacock one is on ivory card which I'm afraid looks white on the photo.
I decorated them in different ways using flowers, ribbons and pearls (to coin a phrase, Christina). I also stamped and heat embossed a sentiment for each one.
Christina says ...
What a lovely collection of cards and all looking so very different. I would be happy to revive any one of them and they are suitable for any occasion
The Sparkle Medium gives such a pretty effect and it comes in a myriad of colors so that you too can vary your theme like Jenny has done here with her designs
Click here to read or post comments
Latest makes
by Jenny Cottam
(Doncaster, South Yorkshire)


|


|

|


|
The aperture card is made following Christina's Spellbinders aperture card video.
I used the second smallest die from Spellbinders Elegant Ovals to cut out the top aperture.
Across the middle I have used spellbinders Elizabeth border strip to create the pattern in the card and for the bottom sentiment aperture I have used the second smallest die from Romantic Rectangles.
Instead of using flowers I have used one of my ladies with hats decoupage images.
I stamped and heat embossed the sentiment in gold.
The gatefold card is matted and layered with beige card and a pretty backing paper.
I then cut out the largest die from spellbinders Oval Floral in cream textured card and created a frame using the largest and second largest dies in the beige card.
I then inserted a decoupage flower image. I attached this to the middle of the left hand side with foam pads. I decorated the inside to match the outside.
I used the smallest die to create the plaque for the sentiment which I cut using spellbinders sentiment dies.
The next card is created using heirloom legacy to create the card base. I then cut the largest die from elegant ovals in lilac pearl card and then the second largest die from the same set in white.
I then used the second smallest die from floral oval to cut out the middle to create a frame in which I inserted my decoupage image.
These were all attached to the front of the card with foam pads.
The last card is using the glass effects die again and following Christina's video for another effect by colouring in the parts between the frame.
Christina says ...
What a lovely collection of cards all with different looks and techniques. And all of them so pretty it would hard to choose a favorite.
But whoever is lucky enough to get one of these will be so pleased with it and treasure it for a long time.
Click here to read or post comments
pop up boxes
by Jenny Cottam
(Doncaster, South Yorkshire)


|


|
These pop-up boxes are made following your instructions, Christina. I have made the boxes without the pop-up box die but have used die cut corners to decorate them.
I made the boxes for them following your instructions also, and have decorated them with die cut corners as well.
Another thing which I did differently was to insert some dried flower oasis inside the pop-up box being supported by the three card pieces which have been stuck lower down inside.
I found it easier to insert the flowers as I was using flowers with wire stems.
One of these I will be giving as a gift to an old friend who has been very ill. I sincerely hope she likes it.
Christina says ...
I love these boxes and don't they make a fabulous gift. They are so well worth the effort it takes to make them and you can then decorate them any way you wish
The idea of the Oasis is excellent to add the stems too and save a lot of messing about with glue ... so I will be giving that one a try too.
If you would like to make these boxes then you will fine all the video instructions to make them with and without dies and also for the outer box to add the gift too.
Take a look in Video Tutorials in the NavBar to your left
Click here to read or post comments


Recent Articles
-
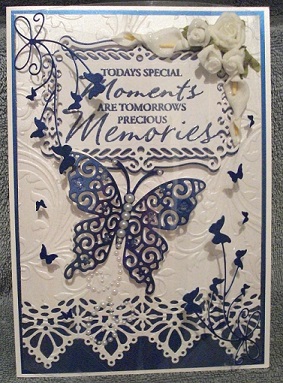
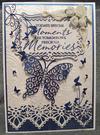
Memory Book
Oct 15, 22 09:17 AM
 Make a memory book, fun to make and even lovelier to give.
 -
Die cut letters.
Jul 19, 21 10:12 AM
 Add that personal touch with die cut letters, add names or sentiment as you please.
 -
Diaper Fold Card.
Jul 19, 21 09:34 AM
Create this fun Diaper Fold Card...and no need for a pin!
Search
