A Special Card Box...
...for your "Special Cards"...of course!
Make this Special Card Box for all your projects. Easy and simple!
Search

Sometimes when we make a card the shape, size or the decoupage on it make it really awkward to get into an envelope.
And at other times we simply want to give the card in something a little more luxurious, to suit the occasion.
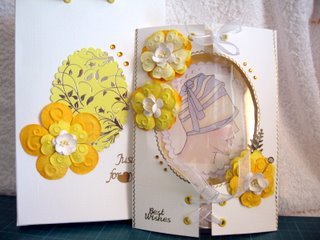
These Bow Front Cards are just one of those times when an envelope will not do the job.
The card is too big to go in one and it just seems to be better as a hand presented card rather than in the post.
Lovely for 18th/21st Birthdays, Special Anniversaries, Weddings, New Babies in fact anything that you want to create.
The Mothers Day Gift would also be well presented in it's own special card box, and the outside dressed to repeat the cards theme.
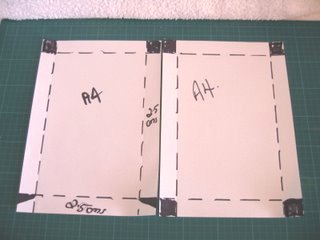
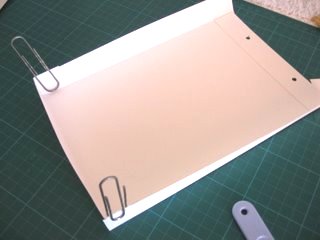
Step 1
You will need two A4 cards.
They can either match the card or be a contrast to it...but they need to match each other.
Measure in 2.5cms (1") around all the edges to the card, score and crease sharply.
Where the black squares are they will need to be removed.
On the card to the left, the bottom part is marked with a triangle, and that only needs to be trimmed, to leave a flap that will be folded inwards to hold the box shape....
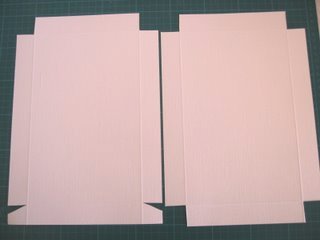
Step 2
...and your card should now look like the photograph.
Yes? Oh good!
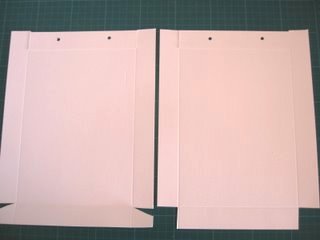
Step 3
The top of the card needs to be folded over, and glued in place, this adds strength to the top.
Measure equally from each side, and punch two holes.
Add eyelets if you want to, to match your theme, and do both cards the same.
Still look like the photo.....Yes!
Step 4
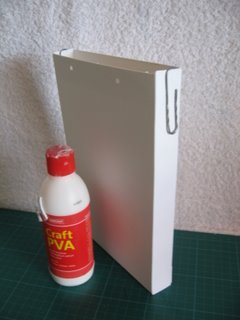
On the two triangle flaps add some wet glue, and fold them into place on the inside.
Hold in place with paperclips until dry.
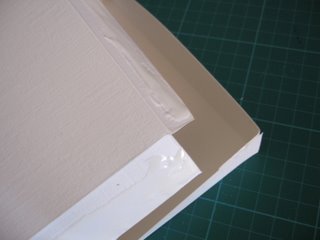
Step 5
On the other piece of card use a wet glue all around the edges, and carefully ease it inside the other.
Make sure all the edges fit neatly together and keep pressing the seams until they are all in place.
Add the paper clips to the top to hold them in place and leave to dry.
Check it periodically to make sure the seams haven't come unstuck.
Use a wet glue as this is stronger than double side tape, which dries out, and the box then splits...(been there, done that...)
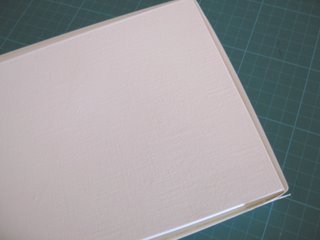
When the box is completely dry it is ready for any Embellishments you want to add to it.
Add some ribbon or cord through the punched holes at the top.
It is now ready for you to pop your card into.
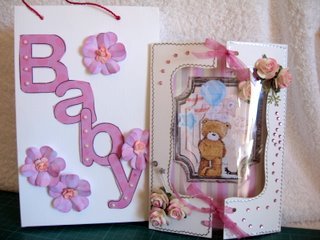
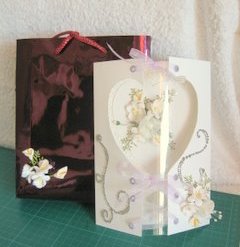
This Special Card Box is made in Mirror card and complements the lilac theme to the Wedding card.
Have fun with this project and watch the praise flow!
Add this to your collection of Cardmaking Templates, ready for you to re-use in the future.
Return from Special Card Box to Homepage
Search


Recent Articles
-
Memory Book
Oct 15, 22 09:17 AM
 Make a memory book, fun to make and even lovelier to give.
 -
Die cut letters.
Jul 19, 21 10:12 AM
 Add that personal touch with die cut letters, add names or sentiment as you please.
 -
Diaper Fold Card.
Jul 19, 21 09:34 AM
Create this fun Diaper Fold Card...and no need for a pin!
Search