Penny slider cards...
...another way to spend a penny...or two!
Penny slider cards are yet another form of "Kinetic" card, and just as easy to make.
Cards with movement are always interesting to see and to make.
Children are absolutely delighted with this one and it is a pleasure to give to them.
See the fun they have with it, making the slider roll from side to side.
The papers for this card are a purchased download from the "Happy Flowers" collection from Making Handmade Cards.
Are you ready to give this one a try?
If you would like to watch how the card is made then here are Video Instructions.
Step 1
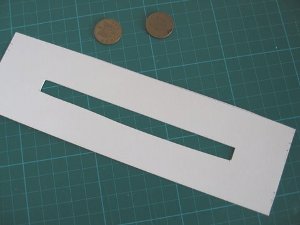
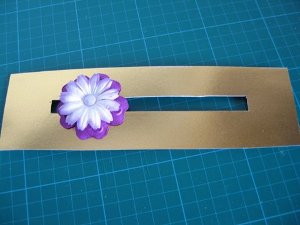
The main piece to this card needs to be long enough to fit onto your card and this one is 6.5 x 21 cms. It will fit onto the card horizontally.
You will need to cut out the slot in the centre of the panel 1cm x 14cms long.
This
is the bit that the two pennies will roll through. I have used gold
card for this panel but yours could be from whatever you have.
Step 2
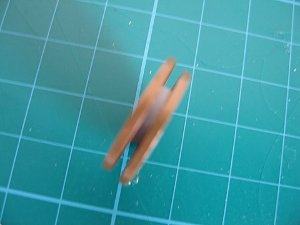
The two pennies need to be joined together with a round foam pad.
It needs to be thick enough to leave the space for the card to slot into to roll.
If your round pads aren't thick enough then use two, one on top of the other, to give you the thickness you will need.
Step 3
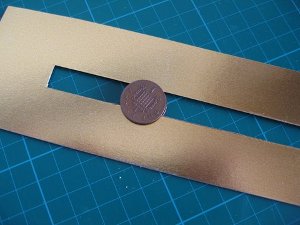
Now you can slot it onto the panel and test the mechanism.
Does it roll freely from side to side?
If not make any adjustments to it now. Perhaps the slot needs to widened a little.... but not much.
Step 4
On the front of the pennies add the embellishment that will be your focal point.
Mine is a flower (Well fancy that...)
Yours could be any thing you want it to be.
Perhaps you like flowers too, or if you are making the card for a boy maybe it could be a football rolling into a goal net.
This is where you can fire up your imagination, and add whatever you want to your penny slider cards to suit the recipient.
Step 5
Once you have decorated the front turn it over and add foam tape to the top and bottom of the panel. Make sure it doesn't obstruct the rolling action.

Step 6
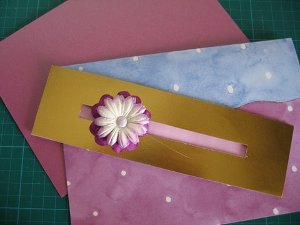
Choose the elements and papers you want to use.
I made mine with a purple card for the base and added the two tone paper to the front.
Then fit the slider panel onto the front. Remember not to obstruct the rolling element when you are adding more stuff to the front of the card.
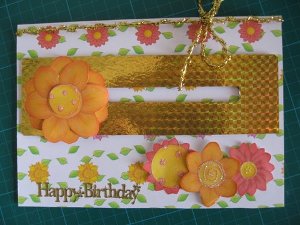
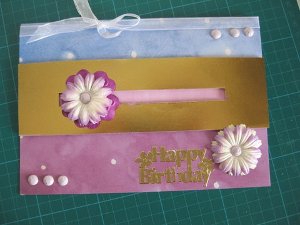
Once assembled the card looks like this.
With the addition of some more flowers in the lower corner, some organza ribbon around the spine of the card and some brads it looks really pretty.
The sentiment as always is a peel off...(you really wouldn't want to see my scruffy writing!)
I hope you will try this project for your self and have fun with it, it really is easy to do.
But as always have a trial run on some cheap card while you build up your confidence
Penny slider cards can be for any occasion and any age group.
Return from Penny Slider Cards to Homepage
Search


Recent Articles
-
Memory Book
Oct 15, 22 09:17 AM
 Make a memory book, fun to make and even lovelier to give.
 -
Die cut letters.
Jul 19, 21 10:12 AM
 Add that personal touch with die cut letters, add names or sentiment as you please.
 -
Diaper Fold Card.
Jul 19, 21 09:34 AM
Create this fun Diaper Fold Card...and no need for a pin!
Search