Beautiful Pennant Card ...
... step by step
This beautiful Pennant Card is right on trend and so easy to make
Try this for your self and see the look on someones face when they get this very pretty card from you
All you need is a decorative edged punch and some card and paper.
We are going to decorate the inside as well as the back and front to get an overall look and then the card will be good to view from any angle.
And if you prefer to watch then there is also a video version so here is the
With one sheet of A4 card (8 1/4 x 11 1/2 approx) you will be able to make two cards.
As always I would advise you to make a Templateand have that practise run before you let your self loose on your good stuff.
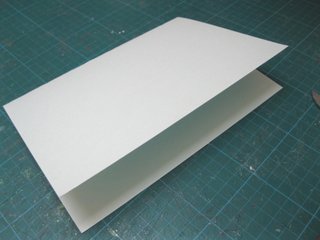
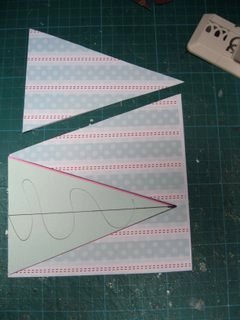
So start by folding your A4 card in half
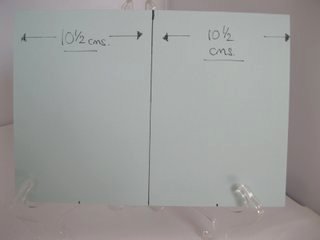
Keep the fold at the top and measure the card in half.
Then in each of those halves make a small mark at the bottom of the card so that you have the half way mark to each of those two panels.
You can just see the bottom mark in the photo

Now with your ruler you are going to draw a line from the outer edges and the centre mark at the top of the card down towards those centre lines at the bottom of the card that divided each of the two panels.
The photo shows you how your template should look once you have done that.
I have made the lines in pink so that you can see the effect
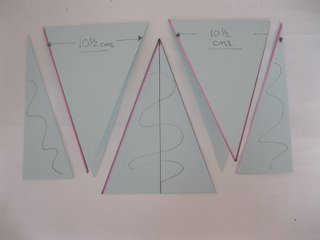
And so you are now ready now to cut along those lines and make two cards.
You should now have two folded and equal sized triangle shapes.
And these will be your template to be kept safe for future reference.
When you feel confident you can cut up that piece of card that you have been stroking for weeks...
The next steps will create one Pennant Card for you.
Using this triangle lay it onto some pretty paper that has been folded in half and with the widest part of the triangle on the fold.
Cut out two shapes as they will be the inside and outside of the card.
Glue these in place and trim if needed for a neat finish
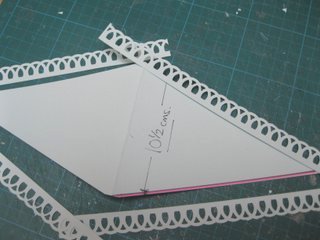
Then with your border punch you will make four strips for the top and bottom, back and front of the triangle.
Try to keep them the same depth as each other as they will be seen on the card.
Line these up and glue carefully in place and trim the ends neatly to match each other
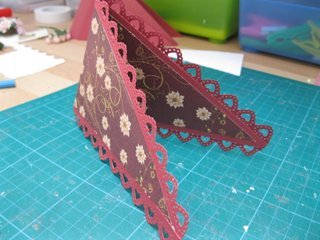
And this what your card should be looking like .... still with me so far? Oh good!
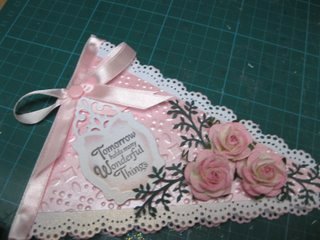
You are now ready to decorate the card any way you wish
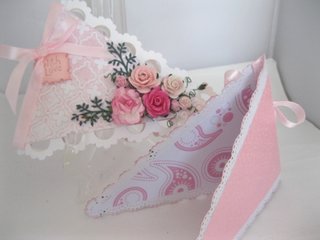
I have added flowers to all my cards and they are from Wild Orchid Crafts
The background to this card has been made with an embossing panel to create texture.
The Pennant Card has had ribbon wrapped around the spine and a small sentiment tucked just under the bow.
But it could always be added to the inside instead


Recent Articles
-
Memory Book
Oct 15, 22 09:17 AM
 Make a memory book, fun to make and even lovelier to give.
 -
Die cut letters.
Jul 19, 21 10:12 AM
 Add that personal touch with die cut letters, add names or sentiment as you please.
 -
Diaper Fold Card.
Jul 19, 21 09:34 AM
Create this fun Diaper Fold Card...and no need for a pin!
Search
