Anniversary Card
by Ethel
(USA)


First attempt at a shadow/spinner card.
My dear friends are celebrating their 69th Wedding Anniversary and I wanted to make something very special for them. My first attempt at a shadow box/spinner card.
I used a white cardstock for the back and a red cardstock for the front. I cut out the letters and numbers on my Cricut and used one part of a punch by Martha Stewart for the heart shaped embellishment.
I put glitter on the numbers and added some small embellishments from the dollar tree. I glued a sheet of red heart paper behind the spinning 69.
This card took a little longer than most of my easy cards, but it wasn't as hard as it looks, and I am VERY proud of the result.
I send this couple a lot of cards for many occasions and she saves each one. I'm anxious to hear her comments on this one.
Christina says ...
I am sure her comments will be heard around the neighbourhood when she gets this card as it is lovely and I am not surprised that you are proud of it.
And what an anniversary to be celebrating ... 69 years of being married ... WOW that is amazing and I would like to add my congratulations to your friends also Ethel so would you please pass on my very best wishes xx
Click here to read or post comments
Another Anniversary Card
by Ethel
(USA)

I was an only child, and in my twilight years it gets lonely. My 2 cousins have adopted me as their SISTER OF THE HEART...for which I am very grateful. The love I'm shown is undescribable.
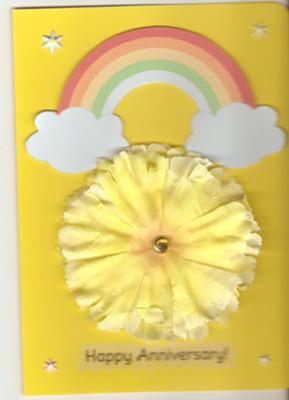
I made this card for one of them for their 55th Wedding Anniversary. It's simple, but I'm proud of it.
I folded a yellow sheet of cardstock in half and rounded the corners. (I love the look). I had printed out some rainbows and put one on the top of the card with foam dots.
Then added a yellow carnation (I purchase silk flowers when on sale, take them apart and put them back together without the plastic centers)
I used a brad to hold the petals and covered that with a yellow bling. I also printed out Happy Anniversary on vellum and attached that. I also printed out their pics (reducing the size) and put one on each cloud.
I don't have any fancy machines, but love finding reasonably priced items to add to my cards. I've used fancy hair bows, fancy bobby pins, barettes (cutting off the backs) and many other items I find in dollar stores.
Hope you like my simple, but lovingly made card.
Christina says ...
This card is beautiful and so much more so because it was made with such care and love.
I am sure that your cousins have really appreciated it and it will be treasured for a long time.
Click here to read or post comments
70th Anniversary Card
by Ethel
(PA/USA)

|

|
Last year I submitted a 69th Wedding Anniversary Card I made for dear friends..it was a big hit with the couple, and all who saw it.
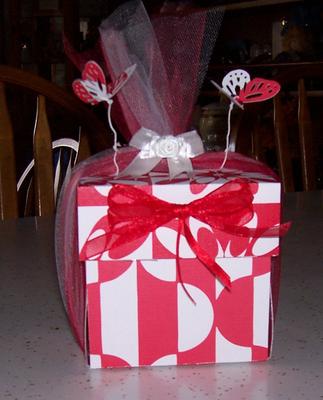
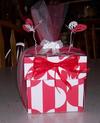
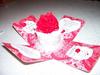
This year I tried a new style...the Explosion Box Card. It was my first attempt at this too.
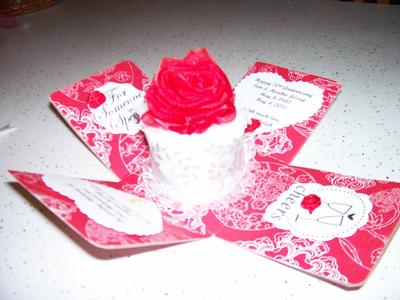
Instead of several layers, I glued one on top of the other so each side was covered. I made a "cake" in the center of Styrofoam and covered with a fancy ribbon, put a red rose on top to decorate the 'cake'. (They are Polish, so red is their color).
On one side I made a heart with their info, another with Special Someone, another with 2 champagne glasses and Cheers, and the last, in memory of their only child who passed away.
On each heart, I placed a rose and on their son's a gold cross. I put a red ribbon bow on the front of the top of the box so it would open to their info.
I tied it with red and white tulle and put 2 red & white butterflies which I punched out as if in flight. I'm anxious to see what they think of this unusual card. I know they will love it. Thank you for viewing. Ethel
Christina says...
What a gorgeous creation this is and I am sure that your recipient will be delighted with it.
It is extra special because of all the personal touches that you have added for the couple.
Treasured memories that will mean the world to them and this gift will be a "Keepsake" for many years to come.
Wedding Card
by Ethel
(USA)

My grand niece was married recently and I created this card for her and her new hubby. I am proud of it, tho' I did use an idea for part of it which I have seen on the internet.
But that's where the similarity ends.
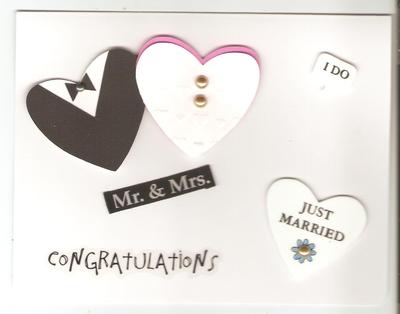
The "Bride and Groom" were made from 2 inch hearts. The groom's was a white heart and a black heart glued to the top with a 'V' cut out. I then made a tiny bow tie and glued it at the top with a silver pearl.
The bride's was a pink heart with a white heart which I embossed with hearts and added 2 pearls down the center.
I added an 'I DO' on the top right corner, a congratulations on the bottom left corner and a smaller heart with a 'Just Married' printed on and a small flower colored in the same color of her bridesmaids gowns, with a pearl in the center.
I added a ribbon MR & MRS that I found in my cache.
On the inside, I printed the beautiful verse: Grow old with me, the best is yet to be!
Then rounded the corners and added my tag on the back. I print up clear address labels with my name on and add to every card.
Christina says ...
What a fabulous card and so inventive. I bet they were thrilled with it when they got it.
I love how you have used the hearts to create the focal point ... a really novel idea and one that I am sure many others will be copying in the future.
Click here to read or post comments
Flower Pot Greetings
by Ethel
(USA)

Birthday Flower Pot


|


|


|


|
I saw this cute card on the internet and am going wild creating all types of them. I have made birthday, get well, sympathy, thinking of you and thank you "POTS"... it brings a smile to everyone who receives one. I love when my cards are well received by others. It makes the creation come alive for me.
I cut a piece of card stock 3 1/2 x 8 1/2...therefore getting 3 'pots' from one piece of cardstock. Score at 3 1/2 and 7. fold, round the corners on the short fold. I put the folded pot into my embossing folder. Glue the corners to make a pocket and insert a short piece of cardstock with your msg stamped on. I add flowers on the top. Instead of making my flowers, I buy silk flowers at the $ store and take them apart, putting them back together without the plastic, by using dimensionals.
I hope you enjoyed my short tutorial and will enjoy making friendly 'pots' as I do.
Christina says ...
How cute and such a novel way to send a greeting. The flowers look really pretty in the pots and they would be suitable for many occasions.
A summer garden party invitation would be perfect for these little cards .... always assuming the we get some sunshine of course!!
Wedding Favors
by Ethel
(Pennsylvania, USA)
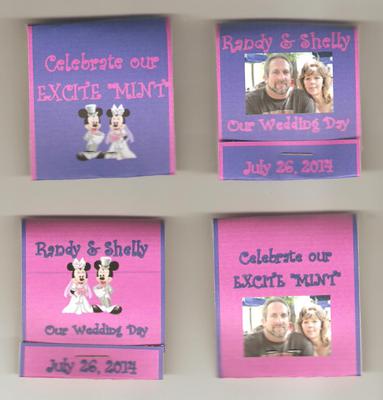

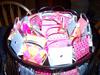
My son is being married in July. I am making the favors for the wedding and chose to make "Matchbook" favors.
I am doing them in the colors of the wedding...cobalt blue and magenta. I have made these for baby showers, 50th Wedding Anniversaries, Red Hat parties, weddings, etc.
I designed these and worked out the measurements on my PSP7 long before others had posted theirs. I love creating and hope you like my creations. You need a program that allows you to turn some of the text and photos.
My measurements are 2x5 inches and I can get 5 on an 8x11 card stock. At last count, I have to make over 100, so I'd better get busy...
Christina says ...
Well you are certainly going to be kept busy making all the items for your sons wedding but I am sure all your hard work will be appreciated.
The colors are pretty and adding the names is a real personal touch.
Click here to read or post comments
Wedding Favor Mini Purses
by Ethel
(USA)


|


|


|
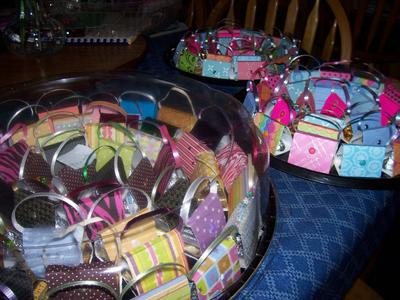
My son is getting married in July, and I made some very special favors for the country side wedding.
I loved making these and did them in a variety of DSP.
I created 105 mini purses using a 2x6 piece of card stock, scored at 1 1/2, 2 7/8, 4 1/2, and 4 3/4.
I punched one end with the tag topper punch. I put tape on the tiny fold to hold the ribbon handle, and a brad on the bottom section which closed through the tag punch opening.
Then added 2 pieces of wrapped chocolate, glued with mini dots to the bottom of the purse. I keep changing my favorites..."S"
I also made 100 of the matchbook "MINT" favors which have their picture and a cute graphic. (I shared this favor earlier) Hope the guests enjoy them as much as I did making them.
Wishing a happy life to my son and his soon to be bride!!
Christina says ...
Wow have you been busy or what .... these all look wonderful and I am sure that your son and new D-I-L will be delighted with what you have created.
The jewel colors are perfect and they all look so good together... and I really like the idea of favor purses with chocolates in them ....Mmmm!
The guests are going to love them and I to wish your son and d-i-l all the very best on their Special Day in July
Click here to read or post comments
Screen Card
by Ethel Sandstrom
(Pennsylvania, USA)
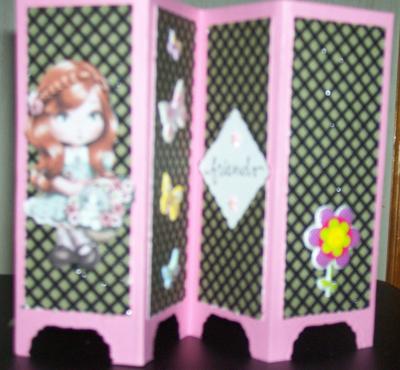

I used a piece of pink card stock for this card. I folded it into quarters and added some black DSP for contrast.
I didn't have a punch to do the bottom, so used the end of a die and cut through the 4 layers to get an even cut.
I added a 'friend' stamp and decorated with butterflies. The little gal is a tube I collected many years ago, when I gathered over 1,000 tubes.
Cut it out and used dimensionals to pop it up!! Hope you like this. It's one of my favorites.
Christina says ...
Screen cards are a really easy design to do and make such a pretty card once decorated.
There is a tutorial in the NavBar to your left that will show you how to get this look for your self from one piece of card
Add the Oriental look for a different aspect and add Cherry Blossoms and the branches.
Click here to read or post comments
Front Porch
by Ethel Sandstrom
(Pennsylvania, USA)
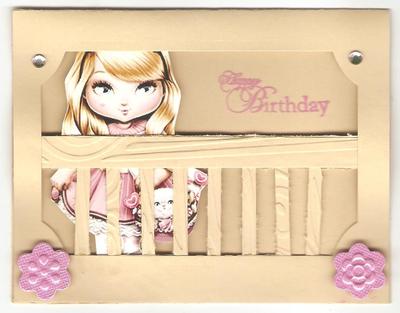

This was an original idea of mine after I purchased the embossing folder with the wood grain.
I cut the strips of 'wood' apart and made the tiny parts of the railing, and a wider piece for the bannister.
I glued them together and fitted them into the opening I made with a rectangular die. I then embellished the front of the 'porch'.
Inside I glued a gal cut from one of the tubes I had collected. I then added a Happy Birthday stamp and my card was finished.
I love this card and hesitate sending it, as I want to keep it for a pattern and make more when time allows. Hope you like it...
Christina says ...
Cute card and a novel way to use the wood grain embossing folder to make the fence. Has to be a winner for many types of looks
Crafters have some of the most useful ideas as they go along and I love that everybody is willing to share what they know.
You are never too old to learn as they say and I like to learn something every day.
Click here to read or post comments
Baptism Card
by Ethel
(USA)


|

|
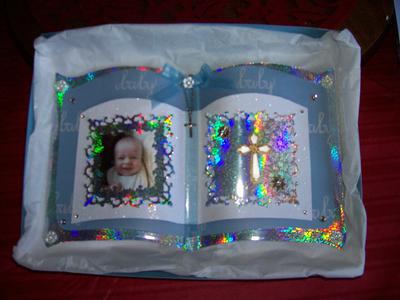
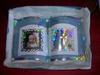
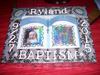
I wanted to make a very special card for my Great Grandson's Baptism. I decided upon a Bookatrix Card.
Never having attempted one, I knew this was what I wanted for him. It had to be special. It was easier than I thought using the bookatrix board.
I don't live near any craft stores, so had to use what I had in my stash. I chose an iridescent paper for the first page, a blue vellum with baby printed on it for the second and a glittery white for the top page.
I cut 2 squares from Spellbinder's dies for frames for his picture and a cross I had. Then added a blue ribbon and a cross on a chain I had purchased for him.
I added some bling to even it out. I then made the box to hold it with silver printed cardstock.
I cut his name and the other words and numbers with my Cricut. I added 2 ovals from Spellbinder's dies to frame the words FAITH and HOPE.
I am proud of my creation and hope his Mommy and Daddy will keep this for him to remember his GG for years to come. (The iridescent paper doesn't take well to the camera's flash)
Christina says ...
This is truly a "Keepsake" Ethel and one you should quite rightly be proud of.
It is beautiful and I love the colors that you have chosen and I am sure that the happy parents will keep this safe for him to see as he grows.
Handmade cards are made with such love and attention to detail and they are treasured by the lucky few who receive them.
And making them is one of the nicest things that can be done and I am know that it gives me as much pleasure to make them as it is to give them
Click here to read or post comments


Recent Articles
-
Memory Book
Oct 15, 22 09:17 AM
 Make a memory book, fun to make and even lovelier to give.
 -
Die cut letters.
Jul 19, 21 10:12 AM
 Add that personal touch with die cut letters, add names or sentiment as you please.
 -
Diaper Fold Card.
Jul 19, 21 09:34 AM
Create this fun Diaper Fold Card...and no need for a pin!
Search
