Spring cards
by Rosa Philippe
(Merksem, Antwerp,Belgium)

|


|
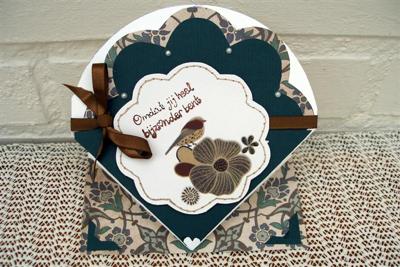
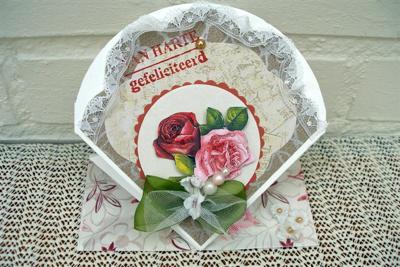
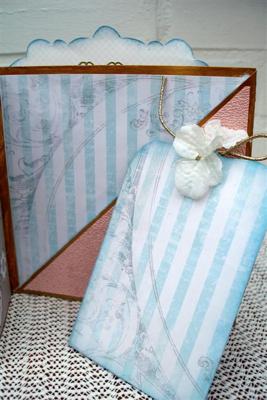
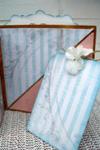
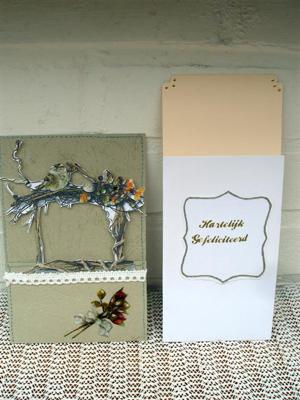
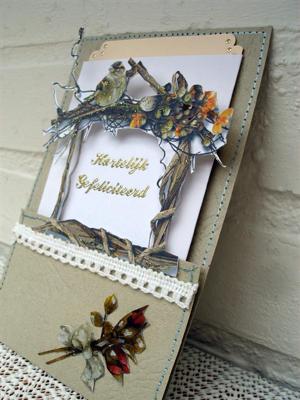
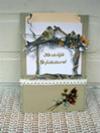
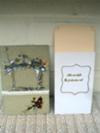
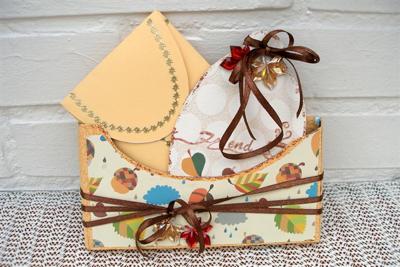
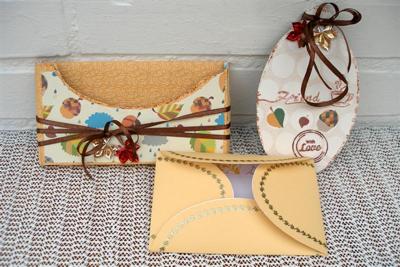
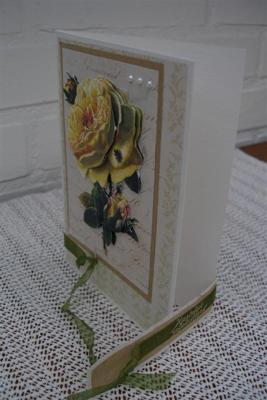
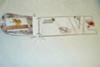
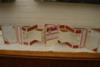
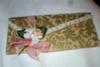
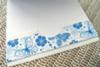
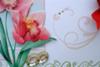
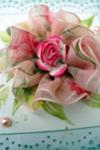
After seeing Christina's video on spring cards, which is so well and easily explained I decided to give it a go.
I made two. I changed the shape and had such fun making it!
Thanks Christina for your tutorial!
Christina says ...
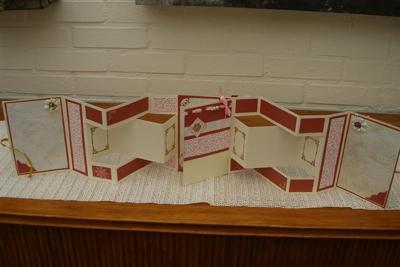
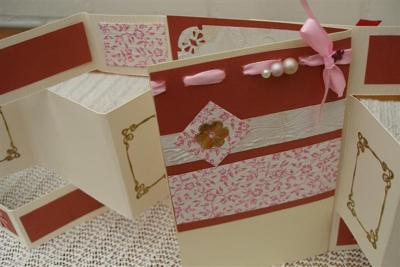
The Springfold Card is one of those that look much harder to achieve than it actually is and yet the results are very different.
If you are new to card making give it a try and the recipient will be so surprised at your skills.
Don't tell them it is easy to make...keep 'em guessing!!
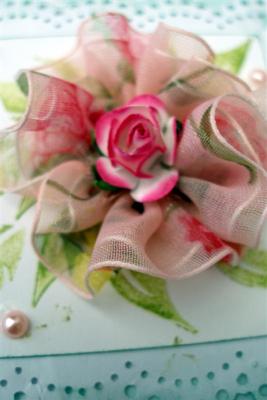
Rosa shows how the top of the card can be altered to any shape you would like. And then you can dress it up with all the "Bling" you want.
I particularly like the one with the pink roses on as it is very feminine, and the addition of the lace makes it more so.
You will find many card folds and ideas in the other sections on the website. Try the Easy Projects and then move on to the harder ones in the More Projects.
Take your time and browse through the NavBar to your left and don't forget that the Sitemap is designed specifically to help you find what you are looking for.
Click here to read or post comments
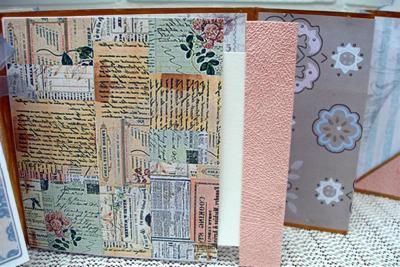
Pocket purse
by Rosa Philippe
(Merksem, Antwerp, Belgium)

|

|

|

|
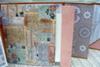
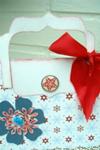
I made this purse on demand for a friend.
I used 3 square cards of which I painted all the sides with acrylic antique gold metallic and adhered them together.
I cut off a diagonal peace off the first page and used that to adhere to the last page, to form a diagonal pocket.
By glueing the left over diagonal off the first page to the second, again a diagonal pocket was created.
I covered all pages with patternd paper and left it simple to add pictures and added a few tags for pictures or journaling.
The jewel embellishment I made from a peace of an earring and some beads of broken necklaces.
For closing the pocketpurse I cut a circle and glued on a doilie, used the same paint for the dots on the doilie.
Added a ribbon as a handle, and used velcro to secure the closure.
On the outside of the purse is a pocket to hold the card with wishes.
Christina says ...
This is a lovely idea Rosa and so well put together. I am sure your friend was delighted with the result.
Just by playing around with card gives you the confidence to produce some unusual items. The thing is not to be afraid of making a mistake.
It is only card or paper and the more you practise and play the better you will become at cardmaking.
In no time at all you will be able to make some beautiful designs ... just like Rosa and many of the other people who contribute to the website.
Click here to read or post comments
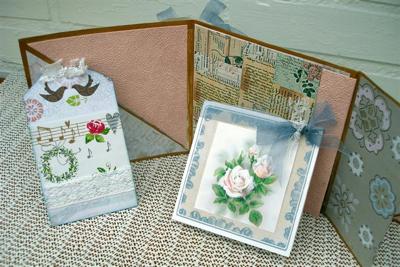
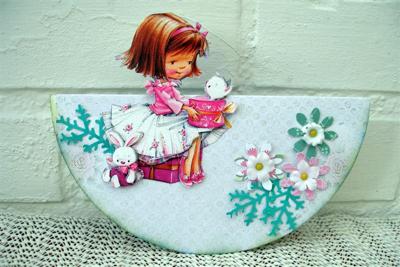
4 Cards
by Rosa Philippe
(Merksem, Antwerp, Belgium)

Vintage girl


|


|


|


|
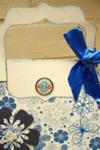
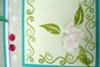
My first card is very vintage like.
A 3D picture matted on some layers.
My second card is one I don't usually use that colour scheme, but for this fun card I thnk it looks good.
For the Conecup card I used felt and also for the berry, and I added some lace and a lacy flower.
The Stair Step Card is a 3D card and very easy to make as Christinas' tutorials are very clear.
Mine is another version.
Christina says ...
The Step card on the website is a simplified version and is very easy to do, but of course you can adapt it any way you like as there are lots of variations on any one theme.
Take a look at the variations for the Easel Cards
That shows you the card from the single right through to the Quad Easel version.
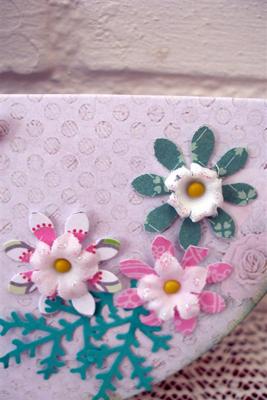
I love the use of the doyley on the first card and it makes for a very pretty back drop.
But there is so much more to be done with this little item that could be lurking away in your cupboards.
Paper Lace in the Papercrafts section will show you how to create the look of lace without the cost.
You will find it in the NavBar to your left and please remember that the Sitemap will show you every page on the website.
There is always a link at the bottom of every page to View all Pages and Topics and this is updated every time a new page is added.
Click here to read or post comments
Pocket card
by Rosa Philippe
(Merksem, Antwerp, Belgium)

|

|


|
I made this pocket card by folding the bottom part up and I used double tape on the sides to close it.
I faux stitched it and glued on a lace border.
Then I glued an image at the pocket border, that I cut out to get a see through. The image I embellished with glitter glue.
And then I made a small envelope that fits inside the pocket and added a wish.
In the (white ) envelope I tucked in a card to write a message on.
On the bottomside I glued a peace of a 3D picture I had found in my stash.
Christina says ...
Pocket cards are a really neat way to send a hidden message, or to put gift vouchers inside as a surprise.
But when you are making them please remember that double sided tape will dry out over time and the pocket will then not stay closed.
The last thing you want is for the card to come undone as you are giving it to the recipient.
It is always better to use a wet glue to stick envelopes or boxes together as it gives a much stronger bond.
It will hold the joins together better, which will then save your blushes.
You will find the instructions to make another version of the Pocket Cards in the Easy Projectssection to your left.
Click here to read or post comments
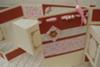
Gift box with envelope and a tag .
by Rosa Philippe
(Merksem, Antwerp,Belgium)

|


|
This giftbox I made from a box of chocolates (Merci) When I opened it the form of a tag came out.
So I embellished it with a peace of wallpaper and cut out a few fall items of patterned paper and glued them on to the tag.
A ribbon and some glittering leaves finished the job.
I made an envelope, one of which the four corners open, and I embellished it with gold colored sticker lines.
The box is also embellished with some wallpaper, and the front with the fall patterned paper, the same ribbon and fall leaves.
Christina says ...
Pretty papers can be found everywhere to adorn your cards and some of the colours are so refreshing.
But when those papers are not available to you then please consider using wallpaper as Rosa has done on her cards.
Go to the bargain box at your local DIY store and look for the cheap end of line rolls.
They can be picked up for a few coppers, and with a big roll just think how many cards you can cover with one roll.
Follow Rosas example and make matching boxes and tags for your projects.
There are video instructions to make boxes in the Tutorials section in the NavBar to yur left.
Click here to read or post comments
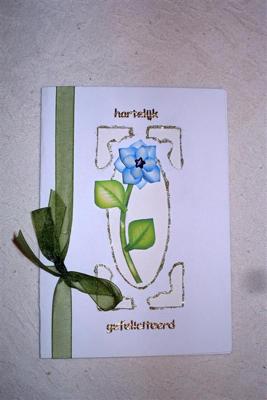
Vintage rose
by Rosa Philippe
(Merksem, Belgium)


|

|
I bought a magazine with vintage flowers suitable for condolances, but I think they can be used for genuine cards too.
I saw Christina's tutorial of a card which had a slit at the bottom of the card, and a tab on the side, so that by adding a piece of paper with ribbon, attached to the bottom back of the card and brought forwards throug the slit the card can be closed.
On the side of the slit, to cover it up nicely I tied my ribbon.
Thank you Christina for this very easy way of making a card more special!
Christina Says ...
The Tab Card is another easy to make card and enables you to close the card securely if you need to. You are very welcome Rosa and your interpretation of the card is lovely.
You will find step by step instructions on the website in the Easy Projects section in the NavBar to your left.
There are lots of different cards for you to try and all are easy to do and then when you feel a little more adventurous why not try the More Projetcs section.
If you like cards with movement then you will find them in Kinetic Cards and they will certainly delight your recipients.
Click here to read or post comments
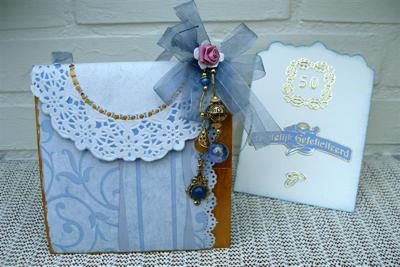
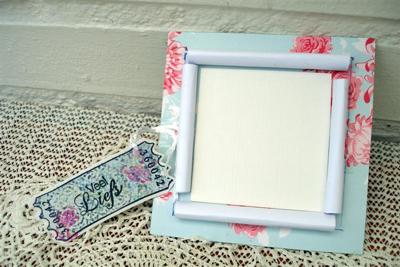
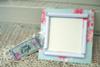
Gift Card Holder
by Rosa
(Merksem, Antwerp,Belgium)

Gift card holder


|


|


|
This holder is made of medium strong cardstock.
I embellished the inside with wallpaper and old lace.
I glued it on one side with doublesided tape and knotted the lace on the front of the card.
(I started this giftcard holder a while back and found it while checking my closet for other things!)
The lace holds the card inside.
The other side I made for holding gift cards. I used paper that I folded up and down several times to get the pockets and then glued them to the cardstock.
I covered the sides up with ribbon for a neat look.
So this week I made the card to fit the giftcards.
I embellished the front with flowers and added a stamped swirl.
Christina says
Gift cards are such a good idea to give as the recipient can then spend them buying what they like, and what a beautiful way to give them.
The use of the lace is lovely and I like the pockets on the inside for the additon of several gift cards.
Using wall paper is a very economical practise and it can also be used to make envelopes to send your cards in.
There are lots of pretty papers around that would suit all different projects and then you can dress them up as you wish.
You can find another idea for Gift Cards in the Papercrafts section.
Click here to read or post comments
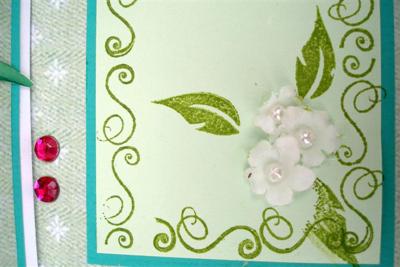
2 3D cards
by Rosa Philippe
(Merksem, Antwerp, Belgium)


|


|
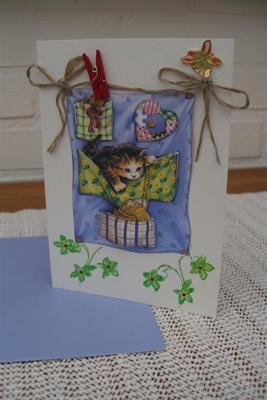
A cute kitten in 3 D with stamped leaves and coloured in with pencils.
I put some tiny red glossy stickers in the middle of the flowers and used twill (is this the right word for it?) to 'hang' my card.
A little butterfly and a clothes pin to finish it off.
A card for someone with the message "Hang in there" maybe?
And an early autumn get well card, as it seems we are right in the middle of it, also 3D.
I added a leaf from some bundle I took apart and glittered it up with a sprinkle of glitter glue.
A rose between the ribbon and some diecut flowers above.
Christina says ...
Whenever you make cards it is always a good idea to raid your "stash" because you never know what little treasures there are lurking away in there.
The use of the twill with the clothes pin is novel Rosa and looks really good on the card.
There are many ideas for different card folds on the website and you will never be bored if you vary your style.
The Tent Card will show you how to create this type of card and you will find it in the Easy Cardmaking section in the NavBar to your left.
Click here to read or post comments
Wedding card
by Rosa
(Merksem,Antwerp ,Belgium)


|

|

|
This "Wordbook" card I made for my aid in the household who is getting married in July.
This was actually easy to make from a template I found on the internet. I copied it four times and cut out of cardstock.
Then I glued it with a peace of beautiful left over wallpaper and used gold sticker lines for surrounding every page.
I embellished it and left room for some pictures.
And I made a little envelope on the back of the first page to hold a gift of money.
Two friends of mine reacted promptly asking me to make one for them !
Christina says ...
Wordbooks are very popular and can be for any occasion. You will need to keep the word short to fit the length of the cardstock that you are using.
There are ways to lengthen the wordbooks though and you will find the instructions on the website in the Projects section.
Make the books into a someones name, or from words associated with a particular time of year. (Noel, Joy or Santa at Chrisitmas time)
It is easier to decorate the book before you assemble it all and allow any glue to dry so as not to stick the pages together.
They are quite easy to make and there are many CD's around that will supply the templates amnd the paers and all the added extras that you may need to make the card.
And if it is for a wedding card then you can add all the sparkly embellishments that you want.
You may need to make an envelope or box to send the finished card in and the instructions to make one are also on the website in the Papercrafts section in the NavBar to your left.
Click here to read or post comments
Double Tri-fold Shutter Album for Hennie
by Rosa
(Merksem, Antwerp, Belgium)


|

|

|
When I saw the tutorial of this trifold-cardmaking technique I wanted to try and make an album for my neighbour who will be married for 59 years.
I am an invalid and can not stand or sit ( max 15 minutes sometimes ) so I make my cards and albums laying down on my side.
So this took me a whole week of every day doing some cutting on my cuttingboard, and since this is my first I had to try several times before I had my centimeters right and the album closed nicely.
This is the result. I embellished the two sides, so she can put more pictures in .
Christina says ...
This beautiful Tri-fold shutter Card is a credit to you Rosa and I am sure your friend was delighted with it.
She must be a very special friend as it was a real labour of love for you. And the result is lovely.
The Shutter Card is featured on the website in the Kinetic Cards section and all the measurements you need are there for you to create this card for yourself.
Here two of the cards have been joined together to make the album and the back and front have been decorated.
There is a lot of area for you to add any messages and sentiment that you wish to suit your recipient.
Click here to read or post comments
Card with envelope.
by Rosa
(Merksem, Antwerp, Belgium)


|

|
This card I cut by hand and glittered to cover up uneven sides.
Then I built a flower and attached it on the backside of the front. I attached leaves with foam pads and simply tied a ribbon.
I also made an envelope from cardstock. I sewed it together with my sewing machine and covered it with patterned paper and embellished with old lace and flowers.
Sorry for the bad quality photo's I had to use
the flash.
Christina says ...
Stitching on cards is very on trend at present wether it is by hand or with a machine.
But if you don't have a machine you can always add Faux Stitching on your cards and there is a page on the website to show you how to get the look. You will find it in Techniques
Making an envelope to match the card makes it look so professional. And to decorate them as Rosa has done makes them look very beautiful.
Who wouldn't want something like that from the postman.
If you make your own envelopes then you can make them fit any size or shape of card you do.
Bespoke envelopes is covered for you in the Papercrafts section. Both of these pages you will find in the NavBar to your left.
If you don't have paper that is big enough for the card you have made ... then why not consider using some wall paper to do the job.
There are some lovely papers around and it would be worth looking in the bargain bin.
Click here to read or post comments
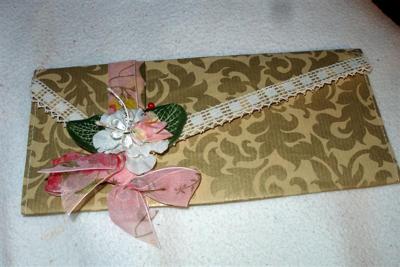
Purse-card
by Rosa Philippe
(Merksem, Antwerp, Belgium)
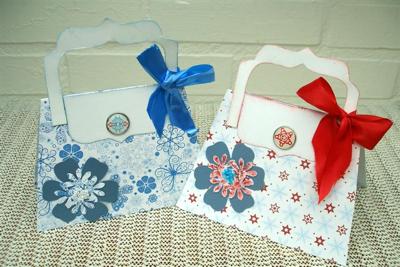


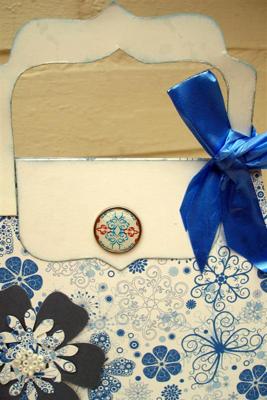
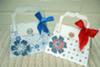

|

|

|

|
I have seen the tutorial on purse-cards and decided to make two for my upper neighbour to give to her great grand children ( 10 and 8 years old )
I made a small pocket inside to put in a gift of money.
Thank you Christina for your tutorials and video's !
Christina says ...
The instructions for making these Handbag Cards can be found in the Easy Projects section in the NavBar to your left.
They are a wonderful gift for young girls and they can be as pretty as you want to make them.
I think filling it with a small gift token or some money would be a real surprise for the recipient and what a lovely gift to give.
Click here to read or post comments
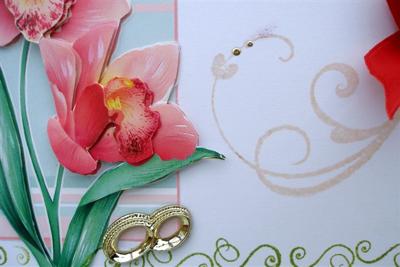
Easel-card
by Rosa Philippe
(Merksem, Antwerpen)


|

|

|

|
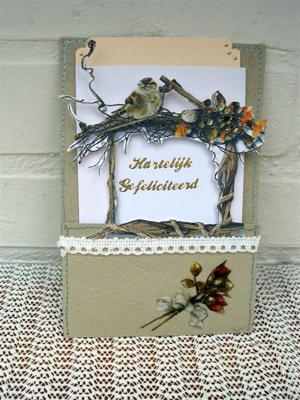
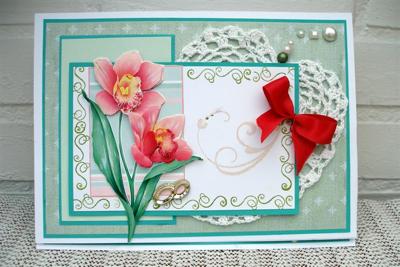
I was asked to make a card for a wedding anniversary and made this easel card.
I used a 3 D cuttingfile, a crocheted heart doilie, some sticky pearls and rings.
For my white background paper I stamped the sides with some curles and on the flat side I stamped some leaves and added a few small flowers.
I used foampads to attach my tag with wishes and attached two rhinestones to hold the easel open.
Christina says ...
Easel Cards are so effective and yet so easy to make and you can find Video Instructions on how to make lots of variations, from the single variety right up to the Quad Easel
It is a card that can be used for any occasion and suit the men in your life just as well as the ladies. You can "Bling" it up as you wish and it is sure to get the comments.
Rosas card is delightful and really special for a wedding anniversary. I love the colours and all the embellishments used to finish it off.
Click here to read or post comments
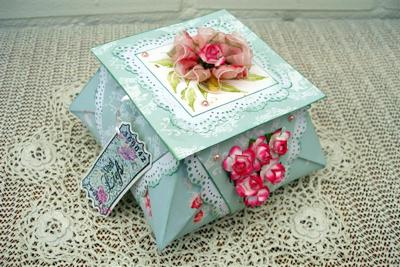
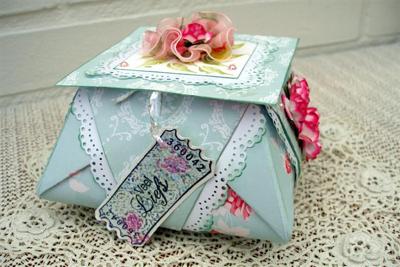
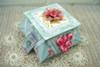
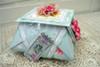
Origami folded starbox
by Rosa Philippe
(Merksem, Antwerp,Belgium)

|

|

|

|
I was looking on the internet for making boxes and found a tutorial on you tube how to origami fold a starbox - no cutting.
So I first tried a couple of times just with plain waste paper. Then I went for the real thing .
I used two sided patterned paper, 12 by 12inches.
When the box was folded I embellished the 4 sides and the top lid with punched edges ( Martha Stewart) and glued 6 prima roses to the front .
On one side I used a small bought flowercup which I fastened with a very small brad. On the other side the label is hanging, fastened on the lid.
The four sides are secured to the bottom of the box also with tiny brads to stay put.
The finished box measures about 4,5 inch square at the bottom and 3 inch square on top. The lid measures 4 inch square. Here and there I used self adhesive pearls.
On the lid I glued a selfmade flower from a 1,5 inch which I folded double and ruffled together by stitching in the middle another prima rose.
A lovely box I think for giving some goodies of all kinds to someone special.
Christina says ...
Origami folding is of course the Japanese Art of paper folding and some of the things that can be made with it are amazing.
And this Rosa is no exception....it is beautiful and well done you after only just learnning how to do it.
The whole thing is just gorgeous and the flower on the top looks real.
Any body special enough to recieve this gift from you would be absolutely delighted.
Thank you so much for showing us this lovely project.
Click here to read or post comments
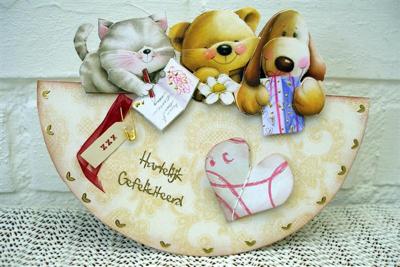
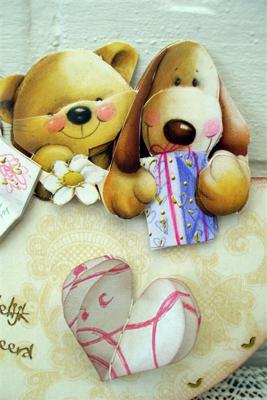
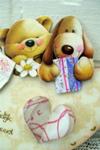
Wobble or Rocker Cards
by Rosa Philippe
(Merksem, Antwerp, Belgium)

|


|

|

|
I've seen Christina's tutorial of the Rockercards and thought it would be nice for the two of my 3 D cutting files I glue-dotted together.
The cards are approximately 10 by 15 cm, to fit a genuine envelope .
I cut my card circle with a cutting tool that was included with a circle punch and used the biggest circle (it has two measures) and then glued on the patterned paper and my 3D picture.
I added some papercut leaves and flowers and gave the flowers some glitter with glitterglue. I distressed the border.
For the animal card I used a tiny tag with a small ribbon attached by a tiny safetypin (if I call it right).
I cut 3 heart shapes from left over paper and hand stitched them together and glued this 'heart book' to my background.
Finally I embellished this card at the border with small gold sticker hearts,(they were left over on the foil after using the main sticker image)
These cards are very easy to make
Christina says ...
The Rocking Card is so easy to do and the effects are really cute as these cards by Rosa show.
And the addition of the other embellishments all go to make them even more special.
I think these are just gorgeous and I thank you Rosa that despite all your health problems you always manage to send the most beautiful cards to the Gallery.
You have to be an inspiration to many people.
Click here to read or post comments


Recent Articles
-
Memory Book
Oct 15, 22 09:17 AM
 Make a memory book, fun to make and even lovelier to give.
 -
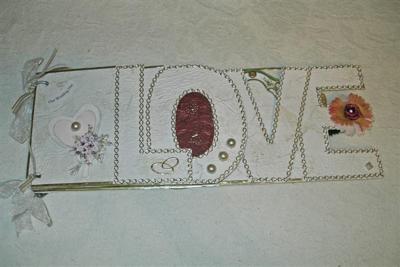
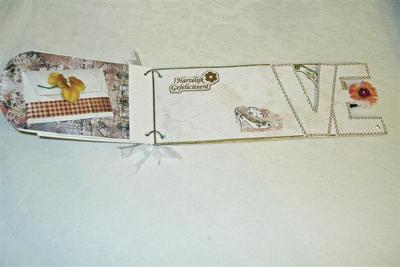
Die cut letters.
Jul 19, 21 10:12 AM
 Add that personal touch with die cut letters, add names or sentiment as you please.
 -
Diaper Fold Card.
Jul 19, 21 09:34 AM
Create this fun Diaper Fold Card...and no need for a pin!
Search
