Resist Stamping technique...
...to create unique cards.
Resist Stamping is another easy to do project, with stunning results.
Search

Are you ready to try something different? Then resist stamping may be the thing for you...
It is an easy technique to master and a very useful way to re-invent your stamps to create some unique papers.
And one thing is for sure...no one else will have them, because you have made them for your self.
Some of the background papers available in the craft shops look as if they have the Resist stamping technique already on them, and are usually expensive.
It is very easy to get the look yourself, and a lot cheaper...
There are many ways to produce this effect, but here are some of the ways I use.
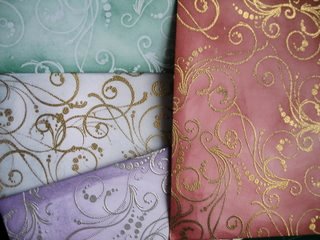
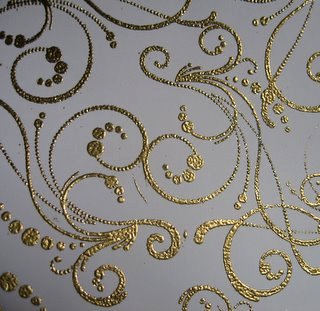
The photograph shows the paper done in four colorways, using a flourish stamp.
I have used clear, silver or gold embossing powders, and each one looks different.
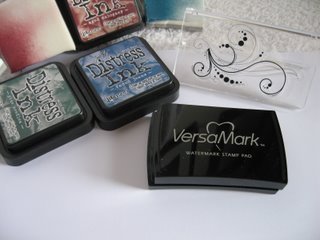
You will need a watermark stamp pad, which is sticky and stays wet long enough for you to emboss it. (I have used VersaMark)
Some embossing powder, and a stamp that you wish to use. (I have used the flourish stamp)
Distress inks. (These are all from Tim Holtz because the inks blend so well)
A foam pad to apply the ink. (I used Cut and Dry)
Ink up your stamp with the VersaMark and stamp it, in a way that pleases you, over your paper.
Re-ink the stamp each time for a good, clear result.
Sprinkle the embossing powder over the top...
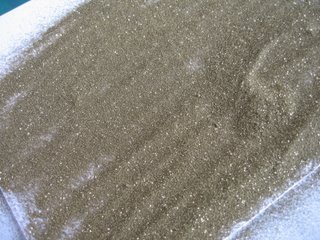
...and when you tip it off this is what it looks like.
Work on some spare paper so that you can tip the powder on to this, and then pour it back into the pot, for the next time you want to use it.
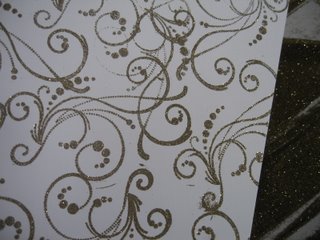
The powder is not very inspiring at this stage, but when you heat it up...
...it suddenly transforms into something really lovely.
Take a look at the Heat Embossing Tutorial to get some idea of how the powder melts.
I have used a gold powder on a white card here so that you can see the result.
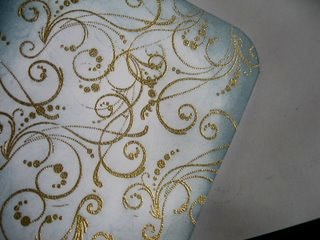
I rounded the edges of my card with a punch and then added the ink.
With a matchbox sized piece of the Cut and Dry, dab it onto your ink pad.
Then starting from the edges, and keeping the pad flat, work your way in towards the center of the card, going around all the edges first.
Continue working in to the center so that the ink fades out as you go.
Then with a tissue just wipe over the embossing to make it shine.
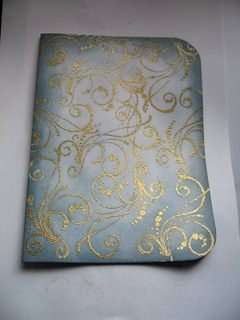
This colorway is gold embossing powder with "Weathered Wood" Distress Ink, from Tim Holtz.
And this is what resist stamping is all about, letting the embossing powder show through your choice of ink color.
In the top picture I have used... Gold with Aged Mahogony... Silver with Dusty Concord...Clear with Pine Needles...as well as the one featured.
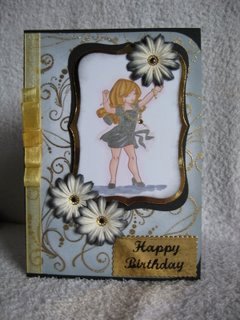
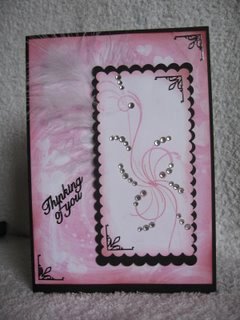
And here is the finished card.
I have adhered my paper to some black card, and added flowers.
The gold ribbon has been made into a bow, and this tutorial shows you how.
The topper has been Matted and Layered onto some gold mirror card, and the black card, and added to the front with foam pads to raise her up.
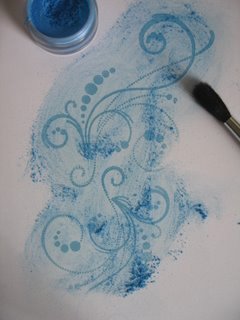
Another way to use the resist stamping technique is to stamp your design neatly onto your paper, still using the VersaMark.
But this time use Cosmic Shimmer Powder and brush it onto the stamped image.
The powder will stick to the wet ink and the rest can be brushed off gently.
Use a cheap hairspray to set the image so that the powder won't rub off.
And there you have...
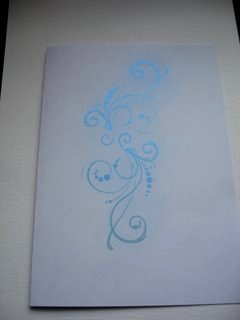
...the image underneath.
(I have tried to tilt the paper to the light so that you can see the sheen on the paper.)
This can now be trimmed to a size and shape that suits your project and added to the front of the card.
Use any embellishments you have in your stash.
Then use your imagination to create the most beautiful card for your recipient.
This such an easy technique to do but one that can give you some amazing resutls.
Magic!
Return from Resist Stamping to Homepage


Recent Articles
-
Memory Book
Oct 15, 22 09:17 AM
 Make a memory book, fun to make and even lovelier to give.
 -
Die cut letters.
Jul 19, 21 10:12 AM
 Add that personal touch with die cut letters, add names or sentiment as you please.
 -
Diaper Fold Card.
Jul 19, 21 09:34 AM
Create this fun Diaper Fold Card...and no need for a pin!
Search