Spellbinders First Attempt
by Carol
(Teesside)

|

|
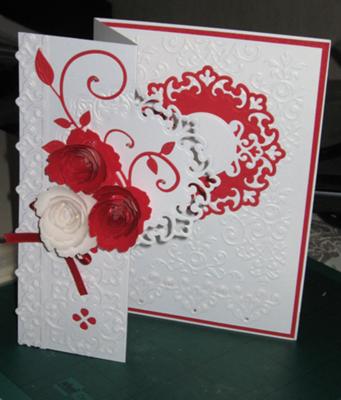
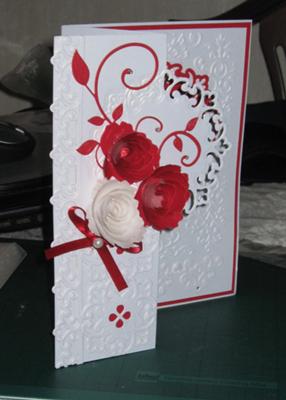
This is my first attempt at making a card with the Spellbinders dies.
This is taken from Christina's video of the flip card made with Spellbinders and this is my interpretation.
The dies are the ones Christina recommends for newbies. They are the Parisian Motifs/Accents and Spiral Blossom one.
I have used an embossing folder that I thought fitted well with the Parisian dies. The card is very similar to that made by Christina.
I have done the card in red and white as I have made it for a 40th wedding anniversary.
Wasn't sure how my first one would turn out but I am pleased with the result. Thanks Christina for your inspiration as usual.
Christina says ...
Oh wow! What else can I say Carol this card is just absolutely fantastic. I love the colour you have chosen and you must have been delighted with it when you had finished it.
It is real credit to you and I am so happy that you found the information in the videos helped you to decide on the dies to choose.
Spellbinders can help you to create mini-masterpieces just like Carols ... and it is almost impossible to make a bad card.
These dies are not just for seasoned card makers.
If you are a "newbie" you can get the specatcular results that you want and even if it is your first time using them take heart from the beautiful creation Carol has here ... and this is her first time with the dies too.
Click here to read or post comments
Christening Card
by Carol
(Teesside, UK)

|

|
I love your site Christina and often check for inspiration if I have a total mental block.
I saw the Bow Front Card with acetate and was wanting to make a christening card and came up with the card shown...Acetate Front Card.
I had a baby shoe template which I made out of pearlised card and added embellishments and peel offs.
The flower is made using spellbinders dies as is the oval with the sentiment. Ribbon and card candi were from my stash.
Thanks Christina for the inspiration.
Christina says ...
If you want to make a card as lovely as Carols then you will find the instructions for the Acetate Front Card in the Video Tutorials to your left.
The written instructions for the Bow Front Card are in the More Projects section and although they both use acetate they are made differently and each gives an individual look.
But they both make a a really special card, and this one is just gorgeous.
Nothing could be better than the feeling you get from producing something as gorgeous as this ... and basking in the comments that it is sure to bring.
Click here to read or post comments
Wedding Card
by Carol
(Teesside, UK)


Wedding Card
Inspiration from the Acetate Front Card by Christina which I adore.
Having made one card for a Christening I also made a Wedding card which is very similar just with different elements obviously.
I embossed some pearlescent card which the die cut heart is mounted onto and then adhered the silk flowers to the heart using silicone gel for a bit of dimension.
Ribbon and card candi from stash. Peel offs to decorate.
Christina says ...
This Acetate Front Card has been so popular and I have had lots of emails about it.
I think it is just a gorgeous card and so easy to achieve for very little effort.
No matter what level you are this is one you just have to make.... and the results will be as spectacular as Carols.
Take a look at the other tutorials too for some really special creations. I know you won't be dissapointed and I hope you will add your photos to the Gallery.
That way you will have your very own page just as Carol has here.
Click here to read or post comments
Bow Front Card
by Carol
(Teesside, UK)


Bow Front Card
After seeing your bow front card I thought it was really pretty and decided to give it a go.
I used pearlescent card with the acetate and peel offs and other embellishments.
I made this as a wedding card. Thanks for the idea.
Christina says ...
Whenever I see this card made it never fails to impress me and it always looks really beautiful.
This one is gorgeous and a lovely card to make for a Wedding.
I am sure that the bride will really have appreciated your efforts with this Carol and it will be one to treasure for years to come.
It is a real "Keep Sake" card that many people would hate to throw away. I know I would keep this ....I still have my 21st Birthday cards and they are now ancient...
You will find the instructions to make this beautiful Bow Front Card in the Projects section in the NavBar to your left.
I hope it is only one of many ideas that you will try on the website.
Click here to read or post comments
Silhouettes
by Carol
(Cleveland, UK)
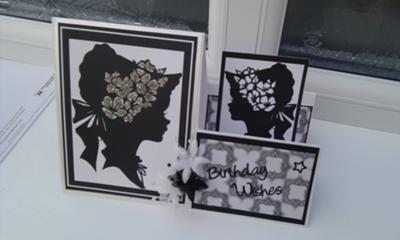

Love the stepper cards and have made quite a few. Also love the silhouette toppers and decided to make this card just for the sake of it.
I added glitter to the main topper with silk flower embellishments adorning the corner. Totally addicted now to card making.
I started in February of this year and attend a weekly class. Love the company of the class as well as enjoying the lesson.
Christina says ...
Stepper Cards are very easy to do and yet make such an impact on the recipient.
The silhouettes on this card by Carol are really lovely and I always think that the black and white scheme is classy.
You will find the instructions to make the card in theTutorials Section in NavBar to your left.
It always helps to see what is being done so if you are new to cardmaking then why not take a look.
There are many different card folds for you to try and they are all easy to achieve.
Just practise and make a template before you start on your good stuff and build your confidence first.
Click here to read or post comments
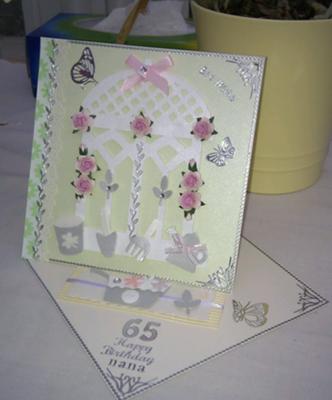
Gardening Delight
by Carol Parker
(Teesside UK)

I have just been card making for about 5 months now and really enjoy it.
My daughter started showing her work colleagues some cards I had made and I started to get some requests for cards.
I wasn't really confident enough to make for others but I thought I'd give it a go all the same.
The gardening theme card was asked for and so this is what I came up with. The recipient was delighted with the card and I received lots of favourable comments.
The easel style cards are so lovely.
Christina says ...
We all start off by folding a piece of card in half to make our designs ... but we all very soon want to be more adventurous.
Easel cards are a very effective way to try something that little bit different and they aren't at all difficult to do.
You will find the istructions to make them in the Easy Projects section in the NavBar to your left.
Try the Double, Twisted and Triple variations too and some of them have the Video Tutorial to show you what to do.
It won't be long before your confidence grows and you move on to the More Projects section for other ideas.
Click here to read or post comments
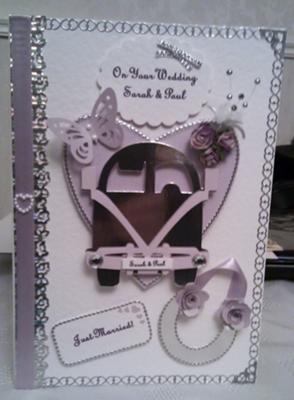
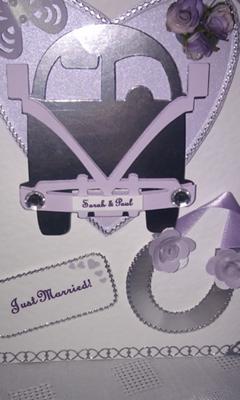
Wedding campervan
by Carol Parker
(Teesside, UK)


|

|
I have only been crafting for 5 months but when my daughter showed my cards to her friends I was asked to make a wedding card with a campervan theme.
What!! I said. Hmm how do I go about that... After thinking for a day or two I came up with this.
The happy couple were "over the moon" with the card and I received lots of lovely comments.
Christina says ...
Isn't it amazing what the mind can do when faced with a challenge.
Just the words "Camper Van..." set Carol off on this wonderful idea for her design.
It is truly personal for the recipients and they would be thrilled to get such a card.
A real "Keepsake" for them to treasure for years to come.
Never under-estimate the pleasure that your cards can give to someone and never under-estimate your talents as a cardmaker.
So if you are going to sell them make sure that the time you have spent, and the materilas you have used are reflected in the cost of the card.
Click here to read or post comments
Crossover Card
by Carol
(Teesside)


Crossover Card
Made once again from inspiration from Christina's tutorial video. They are so easy to follow. There are a few different ideas to this type of card which makes it so versatile. Thanks Christina
Christina says ...
The Crossover Card is a new card that has been added to the Video Tutorials section and is very easy to do.
And as Carol says the instructions can be adapted to make different styles from the same method.
It is one that you can have some fun with and it will suit any age group and occasion.
Get the "Bling" out for all your girly cards and add gemstones flowers and ribbons for a very feminine look.
Click here to read or post comments
Card Mix
by Carol Parker
(Teesside)

|

|

|

|
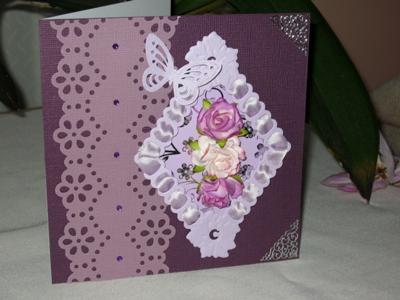
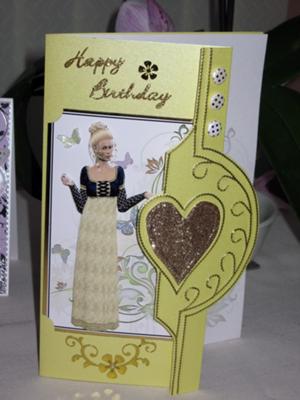
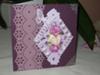
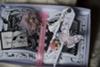
I have a mixture of cards here which have been made with a diamond shaped Joy Craft die. I have then added ribbon through the eyelets and mounted onto the card using foam pads.
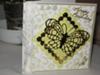
I used a deep edging punch on the purple card along with a butterfly punch which I glittered around the edge of the wings.
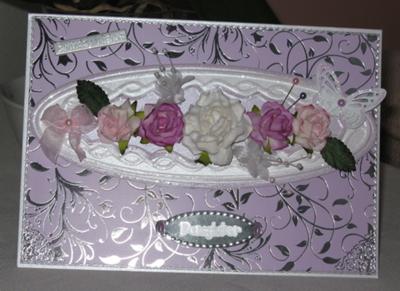
The square purple card is Core’dinations. The corsage is made on an embossing board by the Glitter Girls and I used pearlescent card and card stock which is by Hunkydory.
Embossing boards are very versatile and ideal if you don’t possess a die cutting machine.
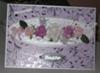
Gems and paper flowers adorn these cards.
The corsage card has same flowers along with silk flowers and butterfly and the addition of coloured pins and bow for decoration.
This card has 3 layers of pearlescent card to make the corsage part of the card which I then glittered around the edges and added to the A5 card using foam pads.
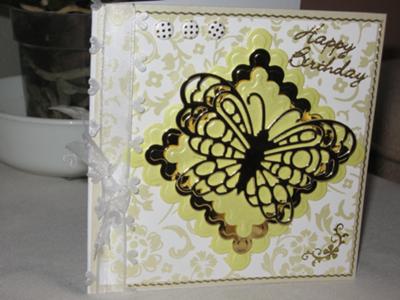
Square nesties were used on the butterfly card to mat and layer, along with a Marianne Creatables butterfly die in mirri card.
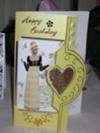
The yellow border card is A4 folded in half and the border was added to the front edge of the card and folded back.
The heart was cut around half way to make it stand out. This was then embellished with peel-offs to exaggerate the embossing and card candi for decoration.
Christina says ...
What a wonderful collection of different techniques. Each and every one is lovely, but my special favourites are always the ones with the addition of the flowers.
They always add that feminine touch to any design and I love 'em.
The technique that Carol has used to make the Yellow Heart card can be found in the Tutorials and it will take you step by step to create this Flip Card
Click here to read or post comments
Wedding Card Creation
by Carol Parker
(Teesside)

|


|

|
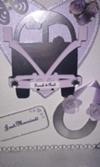
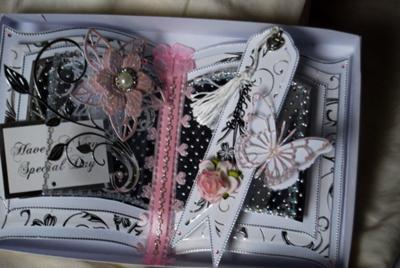
I have not long finished this wedding card for my son's wedding in a couple of months.
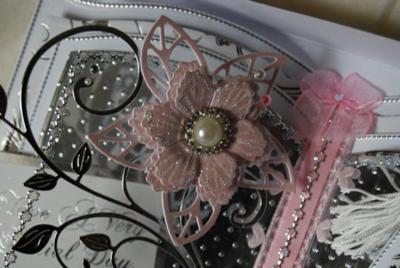
Basically it was made on an embossing board and I have used a flower die by Marianne for the embellishment, and a flourish die by Cheery Lynn.
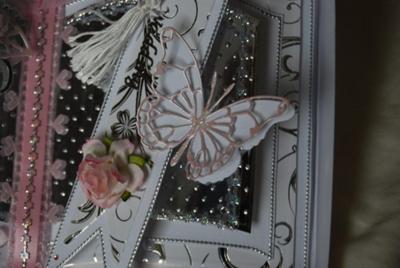
The cardstock is Hunkydory and is Centura Snow White. The silver card was embossed with a Swiss dot folder and the butterfly die is by Memory Box. The embellishments have been added onto acetate.
A rose flower has been added to the bookmark with glue gel. The tassle, ribbon, peeloffs and charm was just from my stash.
I really love this type of book card which started my cardmaking passion. It took me a couple of days as I kept adding bits and bobs.
Christina says ...
The Bookatrix Embossing Borad by the Glitter Girls is an all time favorite and makes a truly stunning card ... and this is no exception.
It looks really classy and I am sure it will be a treasured "Keepsake" and one they will look back at in the years to come.
I love the colour scheme with just a splash of the pink and by adding it to a box you have made it even more special.
I hope you have a lovely day when the wedding is with you and I wish them every happiness for their future too. xx
Click here to read or post comments
Twisted easel card by Carol
by Carol Parker
(Cleveland)
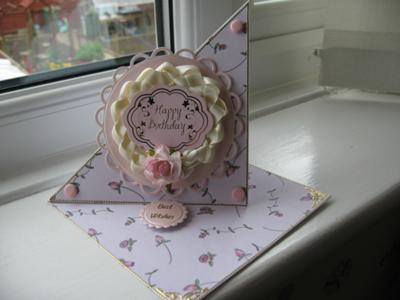

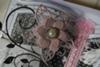
I am a big fan of the easel card and this is a 6"x6" and layered with backing paper from a PolkaDoodles CD.
The scalloped circle is a Spellbinders die onto which I have added woven ribbon, which I did myself for a different twist, and I added a sentiment.
I have decorated with Card Candi and the stopper is also made with the Spellbinders Scallop Circle die.
I have glittered the edges of the paper rose and finished the card off with peel offs.
Christina says ...
A very pretty card and the easel is so easy to make. I recognise that paper as I have the same CD and the papers on it are just gorgeous.
The ribbon technique looks really well on the card. There are many tutorials on the various easel cards and how to get the same look with the ribbon in the Video section in the NavBar to your left.
Have a try and then you can add this lovely effect to your cards just as Carol has done on hers.
Click here to read or post comments
Floral Spellbinders Card
by Carol
(Cleveland UK)
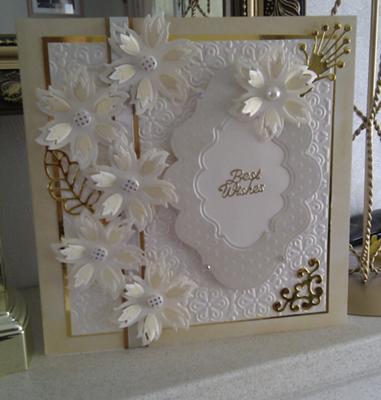

This card is 8x8 and the edges of the card have been distressed with Antique Linen.
I have used Labels 20 for the focal point of the card making an aperture with a smaller die and attached it to card using foam pads.
The flowers have been cut using Spellbinders Aster Topper die and inked with Antique Linen whilst in the die. The smallest die has been used.
A bit of matting and layering with gold mirri card and embossed card using one of the Spellbinders folders.
Ribbons, card candi and gems are used to decorate. The corner is cut from Parisian set of dies.
Marianne designs for the leaves have been used.
I love Spellbinders dies and got hooked by Christinas' tutorials with Spellbinders.
Christina says ...
What a beautiful card and how kind of you to give me credit for the inspiration.
But it's not me it is surely the Spellbinders as it would be very hard to make a bad card with these wonderful dies.
I love the colour you have chosen and the flowers are lovely and for me flowers always finish a card off perfectly.
If you are looking for some ideas with Spellbinders then take a look at the Spellbinders series in the Video Tutorials section in the NavBar to your left.
Click here to read or post comments
Swing Card
by Carol
(Teesside, UK)
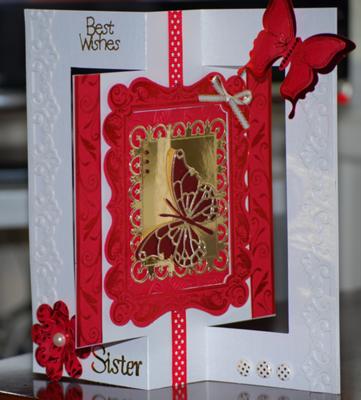

This swing card was made using Centura Pearl cardstock A4 size in Snow White.
The edging on the card was made using Spellbinders Parisian die.
The focal point of the swing part of the card encompasses Spellbinders Fleur de Lys rectangle die upon which a butterfly was mounted using foam pads. The butterfly die is by memory box.
Kanban border strips, frame, flower and butterfly embellishments adorn the corners of the card and polka dot ribbon used. Gems and Card Candi are added for decoration.
This was made for my sister for her birthday and she was delighted with it.
The instructions for this card were interpreted from Christina's tutorial with a little variation.
Christina's instructions are very clear so that anyone, even a novice, can make this type of card. Thanks Christina :-)
Christina says ...
You are more than welcome Carol ... and everybody else ... and I am happy that you have used it to suit yourself.
The card is beautiful and you must be so proud of it.
I am not surprised that your sister loved it, and I am sure she will keep it for a long time.
It is a great compliment to me that you visit my website and enjoy what you see... and I hope you will continue to visit and send the cards to the Gallery so that every body will be inspired to try this wonderful hobby.
The Centura Pearl cardsock is available from Crafters Companion and they have a wonderful selection of colours as well as the Snow White.
Not only is this card beautiful for making cards but if you flip it over, and use the plain reverse side, it is excellent for stamping on too.
The Card Candi is from Craftwork Cards and comes in many colours and patterns.
Click here to read or post comments
Thinking of You
by Carol
(Cleveland)
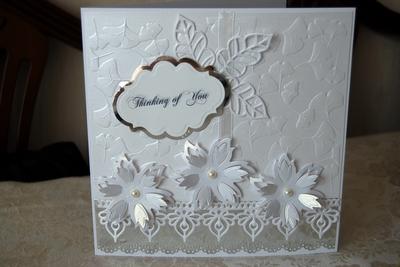

Here is a card sent to a lady who sadly lost her husband.
It is 8" x 8" and a few Spellbinders dies have been used along with a border punch.
The background has been used using a Docraft embossing folder which is the first time I have used it and I do like it.
The flowers are the Aster die by Spellbinders and the middle flower die has been used and adorned with pearls.
The leaves are a Marianne die.
Labels 20 has been used for the sentiment with a silver "shadow" has been used just by tracing round the die used for the sentiment and cutting out.
The intricate border is also a Spellbinders die which a Persian Accents die. Ribbon was used to adorn the card.
Punched mirri card was added to bottom of card with the Persian Border being placed on top. The flowers are attached using foam pads for dimension.
The ribbon was put in the centre of the card where the card joined as 2 pieces were used as the folder is only A6 size. A little bow was added to the top of the ribbon.
I am pleased with the way the card has turned out and have had lots of positive comments.
Christina says ...
Sympathy cards are sometinh I think we all dread making but sdaly it is an occasion that does come around and we have to deal with it.
And this is a beautiful way to express the sympathy that you feel in an elegant and subdued way.
White on white never goes amiss and the "Thinking Of You" sentiment says it all.
The Faux Nestie technique that Carol has used for her sentiment is explained fully in the Techniques section and extends the use of your dies even further for you.
Click here to read or post comments
Baby boy christening card
by Carol
(Cleveland, UK)


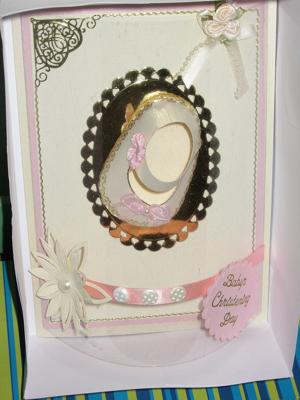
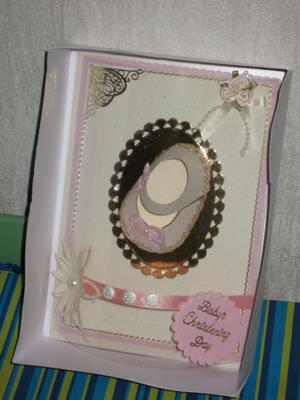
Christening Card
This is a card made using the bookatrix board which is such a versatile board as cards can be made for all occasions.
I combined it with spellbinder dies lacy oval and decorative labels eight with the cross from Marianne.
Really such a simple type of card to put together but they can give such lovely results when decorated with ribbon, gems, flowers etc.
Christina says ...
Very pretty card and I love the color scheme you have chosen. It makes the perfect Christening Card but could easily be adapted to suit many other occasions.
If you are new to cardmaking the Bookatrix board is made by the Glitter Girls and is a patented concept of channels that allow you to find the line you want to emboss without the aid of a light box.
The channels to the pages are in decreasing layers to look like pages and then once you have embossed the ones you want they need to be neatly cut out and assembled into the book.
Just another way for you to create the book pages and decorate them to suit your occasion
Click here to read or post comments


Recent Articles
-
Memory Book
Oct 15, 22 09:17 AM
 Make a memory book, fun to make and even lovelier to give.
 -
Die cut letters.
Jul 19, 21 10:12 AM
 Add that personal touch with die cut letters, add names or sentiment as you please.
 -
Diaper Fold Card.
Jul 19, 21 09:34 AM
Create this fun Diaper Fold Card...and no need for a pin!
Search
