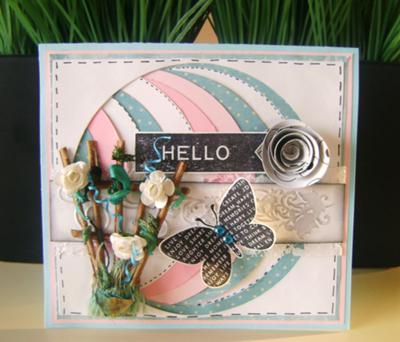
Circle layered Card
by Naomi Edwards
(Souris, PE, Canada)

Hi! My name is Naomi Edwards and I love making cards, why? I love to make others feel special and this is one way I can do just that!
I have a small number of followers that support me over at Creative Bug on the Loose. They are so loyal and supportive which inspires me every day.
This card was made when taking a break due to illness, which was very surprising to me, and just made me aware that sometimes we have to step back from creating to allow for new ideas!
How was this card made?
◦Make your card 5" by 5" (I used blue cardstock)
◦Cut a piece of pink card 1/4 " smaller for a mat
◦Cut a piece of pattern card , again 1/4" smaller
◦Cut a piece of white card 1/4" smaller
Layer the pink paper and pattern paper on top of your blue card
Now with the white card you will cut out a 4 1/4" circle , place the circle aside, you will be using the negative.
What I did next was cut out 8 more circles the same size as the white, 41/4" and layered them all as seen in the picture, I glued each one together and placed them underneath the white negative piece, starting from the lower right corner.
The circles will extend over the right top side and you will have to trim once you have postiioned it the way you like, now attach to your card!
The rest is up to you!
I hope you are inspired and confident enough to give this a try!
www.scrapbookingforbeginners-naomi.blogspot.com
Christina says ...
I love this idea and the colours all blend well together. The card is just beautiful.
Thank you for the detailed explanation on the making of the card and I am sure that many people will follow them well.
This is a card that would be suitable for any occasion and all that is needed is a change of sentiment to suit.
And would also be fine for any male recipients that you may want to send it to.


