Blue Wedding Card
by Ann Lauzon
(Calgary, Alberta, Canada)


Julie's Wedding Card
I'm a senior citizen who loves to do all sorts of crafts. I was into making gift boxes when a friend suggested that I try card-making, that was about four months ago.
At first I wasn't too interested, until I came across Chistina on You Tube and saw all the beautiful cards that she makes, then I was hooked.
I finally purchased all the Spellbinders that she suggests that we get, and this is my first creation at using them.
One of my grand-daughters is getting married, so this card is for her. I used her favorite colour, which is light blue, and white for purity.
The card is made of a pearlized cardstock 8 1/2x 11 inches folded in half. I then added some Spellbinders Embellishments,and glittered them up with Crystal Stickles.
The glitter is what makes the white flowers look pink in the picture I also added some 1/4 inch white and silver ribbon down the left hand side. I printed the sentiment off on my computer.
Christina says ...
What can I say except "WOW" This card is gorgeous and I am sure your grand-daughter is going to just love it. What a Keepsake for her to treasure and look back on.
I am so happy that you enjoyed the Spellbinder Videos and that you bought the dies.....
I wish I was on a commision from that company I would be worth a small fortune by now with the number of folks who have told me that same thing.
But you prove my poin that you can make abeautiful card from these lovely dies even if ou are brand new to cardmaking.
Thank you for sending it in and also for your detailed description of how you made it... I hoep you will send in many more.
If you are just starting out with Spellbinders then why not take a look at the video that will help you to choose a good basic starter set.
Starting your Spellbinder Collection can be found in the Tutorials along with several more on ways to use all of the sets.
Click here to read or post comments
The Pink Collection Pleated Card
by Ann Lauzon
(Calgary, Alberta, Canada)

The Pink Collection Pleated Card


|


|


|
I made this card after watching Christina's tutorial on how to do it.
I call it the Pink Collection because that is the name of the paper that I printed off from Christinas' Freebies page.
So Christina, I made this card for you ... I hope you like it.
The base of the card is 8 x 12 inches of white cardstock, the Thinking of You paper is 5 1/2 x 7 1/2 inches, and I used the largest Spellbinder's Labels 20 die to cut out the center.
The pinwheel is made from peach parchment paper, and so are the two tiny hand made roses, the third rose is just pink copy paper, and so is the large rose.
The leaves are from Spellbinder's and the small twigs are from a Martha Stewart punch. I used Icicle Stickles for the glitter, then added a peach bow, and a white, pink and peach pearl to finish it off.
Oh, the little heart in the bottom right hand corner is hiding a little spot that isn't supposed to be there... lol
I almost forgot to tell you that I inked one of the tiny peach roses with some yellow ink, and the other one with some pink pearl ink, and finally the large and small roses with a reddish coloured ink.
I followed Christina's instructions on how to make the large paper rose, and then used the second smallest Spellbinder's Cirle Die and a 1/2 punch to make the small roses.
I hope this is clear to everyone, and please excuse my ugly finger nails.
Christina says ...
Those papers have been FREE on the website for everyone to use for ages and this is the FIRST TIME any one has told me that they have used them and shown me what they have done with them.
So thank you very very much for this and I am so touched by your card... and I think it is absolutely gorgeous.
Oh! this gives me a big lump in my throat ... what more can I say.
Click here to read or post comments
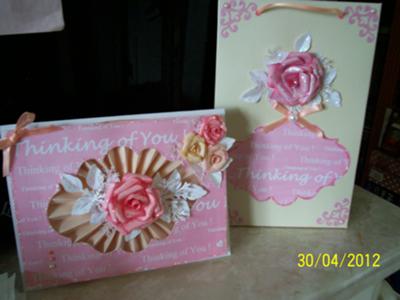
The Pink Collection Special Card Box
by Ann Lauzon
(Calgary, Alberta , Canada)

The Pink Collection Special Card Box


|

|
I used two 8 1/4x 11 3/4 inch pearlized cream cardstock (I didn't have any peach)and followed Christina's instructions on how to make a Special Card Box.
I then added some Spellbinder's pink pearlized Parisan Accents to each of the corners, and put a peach pearl onto the top of them.
On the front I used the Spellbinder's Labels 20 largest die cut out that I had left over from the card that I had already made.
I added a large hand made pink pearlized cardstock rose, and some Spellbinder's leaves.
The twigs are made by a Martha Stewart punch.I used some pink eyelets and some 1/8 inch peach ribbon for the handles.
I then added a peach bow and put a large white pearl in the center of it with some wet glue. The glitter is from Ranger's Icicles Stickles.
This box is to go with The Pink Collection Pleated Card that I made previously.
Christina says ...
The Special Card box is just perfect for the card and I love how you have carried the theme through.
It is well worth spending time making these extra bits especially when you have made a card as gorgeous as the one that Ann has made.
The instructions to make the card are in the Video Tutorials and they are very easy to follow.
Give it a go and you to will be able to make a card like Anns.
Then when you need a box to give the card there are instructions for that in the Easy Projects
Click here to read or post comments
Handmade Rose Card Box
by Ann Lauzon
(Calgary, Alberta, Canada)

Finished Handmade Rose Card Box


|


|


|
Lately I've been making delicate cards, but had no way to mail, or post them. I happened to find an old chocolate box from Christmas.
My Pink Collection Pleated Card fit in it perfectly, except that it was too tall. I needed a deeper box to fit these special kind of cards.
So, this is what I came up with....
for the Bottom of the box I used a 10x12 inch piece of cardstock to make a template, which I scored at 1 1/2 inches around, then I folded them and at the two long ends where there are small squares, I cut out a piece which looks like a triangle. I then glued the little tabs to the sides of the box.
For the Top of the box I used a 11 3/8x9 1/4 inch piece of cardstock which I scored at one inch around, and did the same thing to it as for the Bottom.
The Finished Box is what I came up with, and my card fits into it perfectly, I can even wrap it (card) in some tissue paper to protect it even more, and decorate it(box) as I wish.
The only thing I would suggest is; if you are mailing it then use extra thick cardstock or glue two pieces together to make it stronger.
Christina says ...
Making a box for your cards is so important if you are going to give it away ... (or sell) and if you have taken the time to create something special then the box should be the same.
It can then be decorated to match the card and maybe the top could have acetate in it so that the card is visible through the lid.
You will find several sets of instructions to make boxes of different sizes in the Papercrafts section in the NavBar to your left.
There are also two in the Video Tutorials to show you how to make boxes for and A5 (5 x 7") (Making Boxes) and also one for the smaller 15cms (6") square cards (Making Square Boxes)
Click here to read or post comments
Alicia's Birthday Card
by Ann Lauzon
(Calgary, Alberta,Canada)

Ballerina Birthday Card


|


|
I made this Ballerina Card for my Great Grand-daughter who takes ballet lessons for coordination because she has cerebal palsey. She will be 11 at the end of May.
I used a bright pink (her favorite colour)8 1/2x11 inch cardstock, folded in half for the base.
I used a sheet of white cardstock and punched out hearts all around using two of Martha Stewart's punches.
I printed the ballerina from "Paintbox Poppets" by Christine Haworth CD, and wet glued it to the heart paper.
I added some English Country Roses that I printed from "Puppies & Kittens" by Joanna Sheen and Giordano CD.
I printed the sentiment onto pink copy paper,and then cut it out with a Spellbinder's Heart Die, and stuck it on with a large foam dot.
Finally I glittered it all using Ranger's Crystal Stickles.
For the insert I used a 5 1/2x8 inch white cardstock, which I punched out small hearts on two sides,using a Martha Stewart punch.
I then used double sided tape and fastened it to the inside. I printed the Ballerina from the "Paintbox Poppets" again, and attached her with some foam dots.
I printed the sentiment out onto white copy paper, cut it with a Spellbinder's Heart Die, and wet glued it to a Spellbinder's Scalloped Heart shape, which I foam dotted onto the insert just over the Ballerina.
Lastly, I glittered it with Ranger's Icicle and Crystal Stickles.
Christina says ...
What a beautiful card and the image is so right for a young girl. I am sure tha Alicia is going to be delighted with it and will treasure this "Keepsake" for many years to come.
So Happy Birthday Alicia from everybody at Card Making Magic. xxx
Click here to read or post comments
A Puppie Birthday Card
by Ann Lauzon
(Calgary, Alberta, Canada)


A Puppie Birthday Card
Another birthday card, for another grand-daughter.
The base of this card is 11x6 7/8 inches pink cardstock.
I printed the picture from Joanna Sheen and Giordano "Puppies & Kittens" CD, I then glued it onto the base with wet glue.
I also printed the decoupage pieces from the same CD, which I stuck on with small foam dots, and glittered with Ranger's Crystal Stickes.
The frame is made from Spellbinder's Lattice Rectangles largest die. It was a piece that I had left over from another project. I'm glad that I kept it because it sure came in handy. I stuck it on with double-sided tape.
Now everybody say "awww, isn't that cute", lol.
Christina says ...
Well let me be the first to say "Awwww isn't he cute ..." because that is exactly what it is, quite makes you want a puppy ... (not)
I love the colours and he looks lovely peeping over the fence. So this will have been another satisfied Grand daughter then ... Yes??
Click here to read or post comments
It's a Love thing 1, 2, 3
by Ann Lauzon
(Calgary, Alberta, Canada)

It's a Love thing #1


|


|


|
I saw the basic idea for this card on You Tube. I changed it around a little to my liking.
I started out with a piece of white 8 1/2x11 inch cardstock folded in half. Using a ruler(not metal as I can't find one)I measured from the fold down to the bottom on an angle on each side to make a triangle shape with a pencil.
I then used my paper trimmer and cut away the outside pieces. I used a small finger dauber and some "Rose Bud" colour ink to shade around the edges.
I used a small Martha Stewart edger heart punch for the border, and glued it on the back side of the triangle with wet glue.
The children I got FREE from Dover Publishers Clip Art, which I printed off on my computer and glued on with wet glue.
I stamped the sentiment onto a scrap of white cardstock using the same "Rose Bud" ink, then punched it out with a round scalloped Fiskar's punch. I affixed it with a large foam dot.
I thought my card was finished (#1) until my husband said it was lacking something.
So, back to the drawing board. I then added a piece of 6x4 1/4 inch blue cardstock to the triangle with double-sided tape (#2).
But to me it still needed something, so I added a large Martha Stewart punched heart to each side, glittered it up with Ranger's Crystal Stickles.
At last finished, picture #3
Christina says ...
And a very pretty effect it is too. I like the shape that you have come up with ... it makes the card so interesting.
It is always good to try different things as that is what keeps the MoJo working when you come to make the card.
There are lots of Ideas and Projects and they are all in the NavBar to the left.
Many of these ideas have Video Tutorials as well so if you want to make cards as pretty as Ann then make yourself a cuppa and browse around.
You are sure to find something that catches your eye
Click here to read or post comments
Birthday Money Card
by Ann Lauzon
(Calgary, Alberta, Canada)

Glittered Birthday Money Card


|


|
I used a piece of 6 1/2 x 10 1/2 inch royal blue glitter paper, which I purchased at a dollar store.
I scored it at 3 1/2 and 7 inches, then folded the bottom part up, and taped it with double sided tape.
I then folded the top part down, this gives you an envelope which you can put a gift card, cheque etc. into.
I decorated the top with some store bought border stickers, Spellbinders corner die, and the second smallest Spellbinders Labels 20, also the sentiment is on Spellbinder's smallest Label 8.
I also used an EK Sucess wavy border punch on the bottom of the flap to give it a different look.
The inside is decorated with Sissix Florishes and Spellbinder's third smallest Lacey Ovals die, and also a piece of sticker glitter ribbon.
I then put a velcro circle in the lower middle to hold it closed. I then glittered it with Ranger's Crystal Stickles.
Christina says ...
A very pretty and practical solution to sending a gift of money that can seem so impersonal when just handed over.
This gives a sense of excitement to the gift as the recipient opens it up to find that money or gift voucher inside for them to use as they wish.
It is also good to be used for an invitation too and I am sure that you can come up with lots more ways to put this idea to good use.
And if the concept is new to you then you will find all the instructions to make this card in the Papercrafts
Just look for Gift Envelope for step by step instructions so that you can make this fro your self just as Ann has done here.
Click here to read or post comments
My First Bow Card - Inspired by Christina
by Ann Lauzon
(Calgary, Alberta, Canada)


My First Bow Card - Inspired by Christina
I was surfing card-making-magic when I came across the bow making tutorial, and seeing as how I always have problems with making bows, I decided to watch(and learn)it. So, this card is the result of that one bow.
I used a 8.5 x 11" piece of pearlized card stock to which I printed a leaf design from Jane Shasky's "From the heart of the garden" CD.
I then folded it in half length wise.I coloured a digi basket with tulips with my Copic markers, and added it to a Spellbinders Floral Die.
I also added a floral flourish, both cut out of white pearlized card stock.
Next I wrapped a length of green ribbon around the middle of the card front, and then added my "Magnificent Bow" to it.
Christina says ...
And what a magnificent bow it is and I love the shade of green ... it goes really well with the flowers.
Ribbons are such an inexpensive way to embellish cards and the result is always good.
Click here to read or post comments
My First Mini Corsage Card
by Ann Lauzon
(Calgary, Alberta,Canada)


My First Mini Corsage Card
I made this card after watching Christina's video tutorial on how to make mini corsages.
I cut a piece of white cardstock 6x12" and embossed it with a Cuttlebug embossing folder. Next I folded it in half to make a 6x61/2" card base.
I then layered it with a 51/2x6" backing paper which was left over from another project.
I used some white pearlized card stock to make the base for the flowers, and also for the sentiment.
The base was cut out with Spellbinders Label 20, and the sentiment was cut out with Spellbinders big scalloped ovals. I used silk flowers which I purchased at a loonie store (pound shop, dollar store) that I had in my stash.
The purple and green butterflies were cut out with some Martha Stewart punches that I have. The white butterfly is store bought, and also the purple flower down near the bottom of the card.
Lastly, I added a yellow bow with a purple square rhinestone in the center of it.
Christina says ...
What a pretty card and the colours are so vibrant.
The corsage is lovely and adds something special to your card, and the butterflies have just flown in from the garden and landed on the front.
I am sure that whoever is lucky enough to get this card will be delighted with it and will treasure it for a long time.
Click here to read or post comments
Lilac Birthday Card
by Ann Lauzon
(Calgary, Alberta, Canada)


Lilac Birthday Card
I printed a lilac pattern onto a sheet of 81/2"x11" pearlized cardstock from Jane Shasky's "From the Heart of the Garden" CD, and folded it in half.
I rounded the corners with a Martha Stewart corner punch, then added a purple pearlized scalloped oval that I cut out using the second smallest Spellbinders Grand Scallop Ovals.
Next I cut out a white pearlized Floral Oval using the largest die from Spellbinders Floral Ovals Dies and adhered it to the purple scalloped oval with round foam dots.
Then I cut out a pink basket and a cream top for it with Spellbinders Heartfelt Creations Decorative Layered Basket Dies. I glued the two together using a wet glue. I then added some silk flowers that I had in my stash, and a multi-coloured bow. I adhered the basket with more foam dots.
The sentiment is a free digi that I downloaded onto my computer, and then printed onto white pearlized card stock, and cut out with a Spellbinders Grommet Tag Die.
I added a piece of floral doily motifs to the top and bottom of the tag,which I cut out with Spellbinders Floral Doily Motifs Die. Then I taped a piece of weather stripping underneath it with double sided tape to make it protrude off of the card.
Finally, I added some purple patterned glass embellishments around the outside of the large scalloped oval, and some small ones to the sentiment, then glittered the whole thing with Rangers Crystal Stickles.
Christina says ...
What a very inventive idea for this card and I love how you have filled the basket with the flowers.
It looks so effective and is another way to add the corsage to your cards. Flowers always make a card look extra special for me and I like to use them a lot in my designs.
Click here to read or post comments
Flowers and Butterflies Birthday Card
by Ann Lauzon
(Calgary, Alberta, Canada)


Flowers and Butterflies
I thought I would do something a little different this time, so I came up with this decoupage flower card.
The base is 8 1/8"x 10 1/8" pearlized cardstock that I added a pattern to from Jane Shasky's "Flowers from the Garden" CD. I rounded the corners with a Martha Stewart corner punch, and folded it in half.
The mauve and the cream backings are part of the decoupage sheet, along with the flower pieces, which I fussy cut with my scissors.
I printed them off of the same CD as the patterned paper. I adhered the mauve piece with double sided tape, then added the cream coloured piece with double sided foam strips. I layered the flower pieces in the same way, but with foam dots, some thicker then the other.
I punched out the large butterfly bottom with an EK Success punch and the top part with a Martha Stewart punch.
I used different shades of glitter paper for it. I punched out the small butterfly with another Martha Stewart punch, again on dark glitter paper.
I tried to make a double stranded bow with a piece of sheer ribbon, and a piece of satin ribbon, but it didn't turn out like Christina's. lol.
I printed the sentiment off of my computer, which was a free digi onto some white pearlized cardstock, stuck a piece of weather stripping underneath with double sided tape, to give it a raised looked.
Then I tucked the ends into a Spellbinders Romantic Rectangles second smallest die. I then added a large purple rhinestone to the bow, a medium one on the large flower, and some small ones on the butterflies,and the sentiment.
Last, but not least I glittered it all with some Rangers Crystal Stickles.
Christina says ...
Another lovely card and thank you for such detailed information on how it was created. I am sure that many people will appreciate the help you have given them
Click here to read or post comments
Pretty in Pink Birthday Card
by Ann Lauzon
(Calgary, Alberta, Canada)


Pretty in Pink Birthday Card
I made this card for one of my grand daughters who loves pink, and who's birthday is in June; therefore the rose buds (June's Birth Flower).
I used a 81/2"x 11" piece of white pearlized cardstock to which I printed a pattern on from Jane Shasky's "From the Heart of the Garden" CD, and folded it in half.
I rounded the corners using a Martha Stewart corner punch.
I cut out a pearlized cream rectangle from Spellbinders Romantic Rectangle using the largest die.
I adhered it to the base with some large round foam dots. I then added the silk pink rose buds etc. which I purchased at the loonie store(pound shop, dollar store), with hot glue from my glue gun.
The bow is made from a piece of satin ribbon with a lovely silver design running along each side, to which I added a white pearl(June's Birth Stone)with a gold rim.
The large butterfly's pink bottom is punched out with an EK Success punch, and the cream top is punched out with a Martha Stewart punch, both on pearlized cardstock which I wet glued together.
The small butterfly is punched out with a three different design EK Success punch, also on pink and cream pearlized cardstock which I also glued together.
The sentiment is a free digi that I printed off of my computer onto cream pearlized cardstock, and cut out using the second smallest die from Spellbinders Romantic Rectangles.
I adhered it to the base with large round foam dots.
I added a small wooden "ladybug" to a leaf, and some small pink and white gem butterflies to each of the four corners plus a couple of tiny gem flowers here and there.
The large butterfly has some pink rhinestones on it, and small butterfly has some white ones on it.
Lastly, I glittered the whole thing with Rangers Crystal Stickles.
Christina says ...
Your Grand daughter is a girl after my own heart and this cards has all the elements that I love ... flowers, ribbons and pearls !!
And to top it all it's pink .... it's wonderful and thank you for sharing it with us
Click here to read or post comments
A Little Birdie Told Me Birthday Card
by Ann Lauzon
(Calgary, Alberta, Canada)


A Little Birdie Told Me Birthday Card
After being inspired by Christina, I decided to make yet another mini corsage birthday card.
This one is 81/2"x 11" pearlized cardstock which I printed a blue pattern on from Christine Haworth's "Paintbox Poppets" cd and folded in half.
I cut out two white pearlized strips with Spellbinders Floral Accents die and stuck them side by side with some wet glue.
Next I added a paper doily, which I had in my stash with large round foam dots. To this I added the Spellbinders largest Floral Oval die cut out on cream cardstock.
I cut the smallest bird from Spellbinders Bird Sanctuary dies onto blue paper, coloured his breast with a orange Copic Marker, and glittered his wing and tail with Rangers Crystal Stickles.
Then I added some silk flowers from my stash, and a Monarch butterfly that I made using an EK Success punch for the bottom and a Martha Stewart punch for the top.
I glued the two together using a wet glue. I added a small dark blue bow, with a dark blue pearl on it at the bottom.
I printed the sentiment off of my computer which was a free digi. I added it to a Floral Motif and put small dark blue pearls all around it.
I did the same thing, but with larger dark blue pearls on the strips of the Floral Accents.
Lastly, I glittered the whole thing with Rangers Crystal Stickles.
Christina says ...
What a really beautiful card and the colour is lovely. Doilies are such an inexpensive way to dress up a card and these look so pretty.
I am so glad that many people are enjoying making the flower corsages for them selves ... and of course many more are buying them ready made from My Shop
Thank you to everybody that visits my little shop xx
Click here to read or post comments
Joy Birthday Card
by Ann Lauzon
(Calgary, Alberta, Canada)


Joy Birthday Card
The story behind this card is; I bought a book called Annie's Attic Copic Coloring Guide Level 2:Nature, and as I was flipping through it I came across a card with these Nuns on it.
For some reason I just had to have this stamp; which is a digi from Mo's Digital Pencil, and as you can see, I bought it.
Now to my card, it is a piece of 7" X 11" dark brown cardstock which I folded in half. I then took a piece of 51/8" x 55/8" tan cardstock and embossed it with one of my cuttlebug embossing folders.
I adhered it with some double sided tape to the base card. I then cut another piece of the dark brown cardstock 47/8" x 5" and adhered it the same way. I rounded all the corners using a small EK Success corner punch.
I printed the image onto a piece of off - white cardstock and cut it to measure 43/8" x 41/2".
I then coloured it with my Copic Markers, and adhered it to the rest of the card with double sided tape.
I printed the sentiment off of my computer. I purchased it from Tiffany's Dooles.com. I cut it out with my pinking shears and then inked around it with some Brillance Gold Ink.
I then adhered it with some double sided foam strips.
I think this would be a very nice masculine birthday card...Yes??
Christina says ...
I love this card ... it's wonderful and the image is fabulous.
I love Mo's Digital Pencil. There are so many wonderful images there to choose from and you are sure to be spoiled for choice.
Your colouring is excellent and it brings the image to life. The folds you have created in th fabric look lovely.
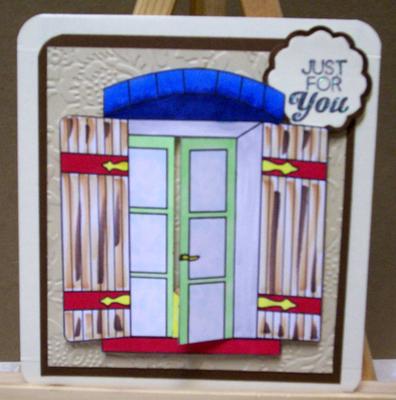
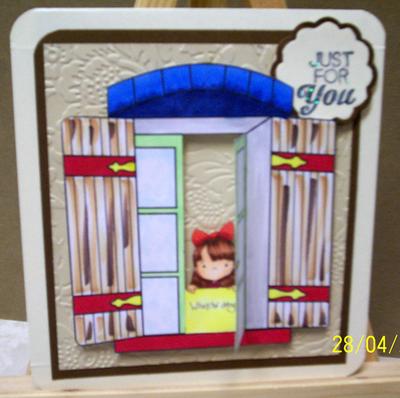
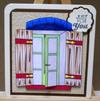
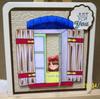
"Whatcha' Doing" Window Birthday Card
by Ann Lauzon
(Calgary, Alberta , Canada)


|

|


|
I was looking for something to colour with my Copic markers, and found this window Digi in my stash. Well, then what to do with it but make a card...
I cut the base from cream card stock which measures 5"x 11". I folded it in half length wise. I rounded the corners with a small EK Success corner punch. I then added a piece of 41/2" x 5" dark brown card stock to it with double sided tape.
Next I embossed a piece of 41/4" x 45/8" tan card stock with a Cuttlebug Embossing folder and adhered it to the dark brown piece with double sided tape.
Next I took my window Digi stamp and cut a line down the middle of the window frame, and across the right hand side at the top and bottom using a craft knife. I also drew a handle on the right hand side of the window frame.
I printed off "Whatcha' Doing" Digi stamp from Tiddly Inks which I purchased from Christy.
Coloured her and fussy cut her out with my scissors and adhered her to the back of the window Digi with double sided tape. I adhered the whole thing to the tan card stock using large round foam dots.
I stamped the sentiment onto a piece of cream card stock, cut it out using the smallest die from Spellbinders Scalloped Circles Dies. I then coloured the edges with a dark brown Copic marker, and then went over the words with Pinflair's Glue for Glitter glue and sprinkled some crystal glitter over it.
Christina says ...
Well how cute is this ?? Very clever and I love the character peeping through the window.
This would be absolutely perfect for a childs card and they would be so happy to open and close the window.
Pink Lace, Roses & Butterflies Candle Gift Box
by Ann Lauzon
(Calgary, Alberta, Canada)


Pink Lace, Roses & Butterflies Candle Gift Box
I watched Christina's video tutorial on how to make these "Candle Gift Boxes."
I ran out to Ikea and bought a half dozen or so of the candles, came home and started decorating them.
This one is for my grand daughter who is to receive the "Pretty in Pink Birthday Card" next month.
I followed Christina's instructions on how to decorate the candles, and then on how to make the gift box.
For The Box: I used pink pearlized cardstock for the bottom of the box, and white pearlized card stock for the lid.
I then added some pink lace from my stash with Aleen's Fast Grab wet glue. The roses are made from Spellbinders Bitty Blossoms Dies, the leaves are also cut from Spellbinders Foliage Dies.
The twigs are from a Martha Stewart punch, and the butterflies are from a EK Success Triple Design Butterflies punch. The sentiment is from Jane Shasky's "From the Heart of the Garden" CD, and the bling is from the loonie store(pound shop, dollar store).
For The Candles: I used some different shades of pink designer paper, added some blossoms from Spellbinders Bitty Blossoms Dies, leaves from Spellbinders Foliage Dies, and twigs from Martha Stewart's punch.
All have been adhered with Aleen's Fast Grab wet glue. I then glittered the whole thing with Ranger's Crystal Stickles.
Christina says ...
Oh "Wow" that is gorgeous and the recipient will be over the moon with her gift. It is so pretty in the pink and lace and a fabulous way to dress up some very inexpensive candles from Ikea.
It is very humbling to see some of my ideas and tutorials being put to good use by others and I love what you all come up with.
Hugs xx
Click here to read or post comments
Pretty Birds Thank You Card
by Ann Lauzon
(Calgary, Alberta, Canada)

Pretty Birds Thank You Card


|


|
I was browsing through Jane Shasky's "From the Heart of the Garden" CD when I came across this pretty topper page, which I printed out onto white cardstock.
The base of the card is a piece of pretty blue cardstock measuring 6 5/8" x 10" and folded in half.
I cut out two large rectangles and two medium rectangles using Spellbinders Romantic Rectangles Dies. To one of the large one's I adhered the large topper picture using double sided tape.
Then I adhered the whole thing with double sided tape to the front of the card. I then added some store bought glittered flowers to the top two corners of the rectangle.
For the inside of the card I adhered the other large rectangle to the right hand side of the card with double sided tape, and then added the middle rectangle (which I inked the edges with brown ink,) to it using large round foam dots.
I printed the sentiment off of my computer. I added some teal coloured store bought flowers to each corner. I fussy cut the two birds out with my scissors, and adhered them on with some small round foam dots.
For the inside left of the card I used the other medium rectangle which I adhered with double sided tape again, and then added a small topper picture to it.
I didn't add any glitter to it as I thought it was pretty enough without it.
Christina says ...
This is such a pretty card and I love the mix of the colours you have used. They all go so well together.
The Spellbinders have been put to good use. It's surprising how many different ways a die can be used when you start to think differently about each individual shape.
It's also surprising how quickly your collection of these dies grows once you start using them and there is always just one more that you need to have
Click here to read or post comments
Fairy Birthday Card
by Ann Lauzon
(Calgary, Alberta, Canada)


Fairy Birthday Card
I made this card for my great grand daughter, who will be eight soon, and loves fairies, and also pink.
The base of the card is 61/4 X 81/2" bright yellow cardstock which I folded in half. The pink matting is a piece of patterned cardstock cut out using the largest die from Spellbinders Romantic Rectangles.
The small yellow piece was cut out using the second largest die from the same Spellbinders set, which I embossed with Spellbinders Grand Impressablities Sea Flowers.
The fairy is a free digi from Precious Moments which I printed off of my computer. I coloured her with my Copic Markers, and added some Rangers Crystal Stickles to her wings. I also added some glitter to the strawberry and flowers, etc.
I also put a yellow rhinestone in the center of the largest flower. Then I adhered her with some small round foam dots, and some Pinflair Glue Gel.
I printed the sentiment onto a light yellow piece of cardstock, and cut it out using the second smallest die from Spellbinders Marvelous Squares. I added some glitter around the edge of it, and then adhered it with some more small round foam dots.
Christina says ...
This card is delightful and I am sure that your Great Grand Daughter will love it.
I love to make cards for girls ... especially little ones who love fairies and pink ... what more could any card maker want.
Click here to read or post comments
Danny's Birthday Card
by Ann Lauzon
(Calgary, Alberta, Canada)


Danny's Birthday Card
I ordered some Spellbinders and they came today, sooo, I just had to try some of them out.
This card is for my son Danny, who loves horses and would probably still be riding if he hadn't got thrown and ended up with two broken collar bones.
He still works at looking after horses at the race track. Once a jockey, always a jockey.
Now for the card. The base is white cardstock measuring 11" x 71/2" folded in half.
The picture is a free clip art from Dover Publications which I coloured with my Copic Markers, and cut out with my scissors.
Next I mounted it onto some white cardstock which I cut out using my "New" Spellbinders 5x7 Enchanted Labels 28.
Then I mounted it onto a piece of blue cardstock which I cut out with my "New" Spellbinders 5x7 Matting Basics B, largest die.
I printed the sentiment off of my computer, and cut it out with the third smallest Spellbinders Classic Ovals Large die.
I cut it to fit at the bottom of the Enchanted Labels 28. Finally I added a tiny store bought black bow to which I added a small blue pearl.
The topper, the Enchanted Label 28 and the sentiment where all adhered with double sided foam tape. The blue mat was adhered with double sided tape.
Christina says ...
Don't you just love that Enchanted Labels die it is so gorgeous and one of my all time favorites.
You have used it to great effect on this card and I am sure Danny will have loved it on his birthday and I do hope that he is well fixed now after his fall.
Boobie Love Get Well Card
by Ann Lauzon
(Calgary, Alberta, Canada)


Boobie Love Get Well Card
After seeing a freebie which Christina shared on Facebook, I went to "Saturated Canary" and downloaded it to make this card.
The artist of "Boobie Love" is Krista Smith to whom I give credit to.
The base is white cardstock which measures 11" x 13" which I folded in half.
For the pink matting I used some of Christina's "Pink Collection" paper which measures 5" x 6"
I also used some of her pink and white striped paper for the design behind the girl. I then covered it with a piece of pink vellum, and cut them both out with Spellbinders Labels Twenty largest die. I adhered the vellum onto the paper with vellum tape.
I coloured the girl with my Copic Markers, and adhered her with small round foam dots.
Next I added some roses made from Spellbinders Bitty Blossoms, and leaves from Spellbinders Foliage Dies, and the twiggs are from a Martha Stewart punch.
I made a mini corsage pin with a Breast Cancer Symbol attached to it and slipped it in amongst the flowers.
The sentiment is a digi that I printed off of my computer, and also adhered with small round foam dots.
I made a Breast Cancer Symbol with pink ribbon and added a butterfly to it, which I punched out using a EK Success triple butterfly punch. I added some pink rhinestones on the butterfly, and to the largest rose.
Finally, I glittered the sentiment, the leaves, the roses, the butterfly and the Breast Cancer Symbol on her shirt with Ranger's Crystal Stickles Glitter Glue.
I have sold some of my cards to neighbours and friends, but this card is NOT FOR SALE.
Christina says ...
I love this image and that is why i wanted to tell everybody about it on the Blog.
I went to the Saturated Canary website and ended up buying loads of the characters that Krista has drawn as they are all so delightful.
They all have lovely big eyes and an abundance of hair and they are simply irresistible and a pleasure to colour.
This image is free and named Boobie Love and for Breast Cancer Sufferers and supporters... so pop over to Saturated Canary, and download yours to show your support too.
Click here to read or post comments
Butterflies & Lace Book Birthday Card
by Ann Lauzon
(Calgary, Alberta, Canada)

Butterflies & Lace Book Birthday Card


|


|


|


|
After finally aquiring the Spellbinders Grand Labels Four, I decided to give Christina's "Book Card" a go.
I followed her instructions on the video tutorial, but added a few of my own ideas to it.
The card and candle gift box set are for my neighbour and friend (for her birthday) who loves Hunter Green.
The faux largest die is a very dark green, to which I added some Hunter Green lace.
The largest die is a pearlized Mint Green, the second largest die is a pearlized dark green, and so on. I then added a piece of sparkly green ribbon tape down the middle of the book.
For the embellishments I used some white pearlized cardstock flower flourishes, which I cut out with Spellbinders Fantastic Flourish One Die.
Next I cut out the smaller of the two butterflies from Spellbinders Wings of Hope Die set using a shimmer pastel green cardstock. I then glued a lime green gem in the middle of it.
The three small white butterflies are punched out using a EK Success triple butterfly punch on white pearlized cardstock.
I typed the sentiment onto my computer, and printed it out onto another piece of the white pearlized cardstock.
Then I cut it out with the second largest die from Spellbinders Floral Ovals. I added some Rangers Crystal Stickles here and there to glitter it up a bit.
I made a plate stand from a card kit that I purchased from "Paper Creators". I hope that's alright with Debbie Gibbons.
But, because of the lace around the bottom of the card, it would not sit in the stand. Sooo, I made a spine down the middle of it (the stand), and glued it to the back of the card.
Voila, it now stands by itself. Where there's a will there's a way. LOL
Oh, I almost forgot about the card box that I made for it. I followed Christina's instructions on how to make a card gift box.
The bottom is made from the dark green cardstock, and the lid is made from a piece of floral card that I had in my stash.
I put a store bought Hunter Green ribbon on it and stuck a store bought butterfly into the middle of it.
Christina says ...
Wow .... this whole set is just gorgeous and you must be delighted with what you have created. Your friend is going to be overjoyed with her gift as it is so very personal.
I am sure that Debbie from Paper Creators will be delighted with the innovative way in which you have used the plate stand and the idea is sure to be used by others too.
It is a lovely gift set and one that you should be truly proud of.
Now if you would like to copy Anns' Ideas then you will find them all in the Video Tutorials in the NavBar to your left.
Each comes with detailed instructions for you to create the same kind of thing for your own friends and it makes an excellent Christmas Present.
The candles are not expensive either and there are some lovely smelling ones from Ikea.
Click here to read or post comments
Plain But Pretty Hinged Birthday Card
by Ann Lauzon
(Calgary, Alberta, Canada)

Plain But Pretty Hinged Birthday Card


|


|
After watching Christina's Hinged Card video tutorial I decided to give it a try.
I followed her instructions as to the number of pieces to cut out with the Spellbinders 5x7 Matting dies, and embossed the smallest piece with a Cuttlebug Polka Dot Folder.
I embellished it with the second largest die from Spellbinders Marvelous Squares and pink cardstock. I adhered this to the polka dot piece with foam tape.
Next I cut out a white piece using the third largest die from the same set. I then ran this through my Grand Calibur using the same polka dot embossing folder.
I tucked the corners of the white piece into the slot of the bottom piece, and it stayed there without using any kind of adhesive.
I typed the sentiment onto my computer, and then printed it onto some pink cardstock. I cut it out with Spellbinders Floral Doily Accent, and adhered it with some large round foam dots that I bought at Michael's.
The bow is some pink sheer ribbon that I had in my stash. I added a darker pink bauble to the middle of it. The light makes it look as if it is orange, but it is Pink.
The butterfly is from a triple butterfly punch from EK Success which I punched out onto pink cardstock.
I covered the inside with some pretty pink floral paper. Then I typed the sentiment onto my computer, and printed it onto some white cardstock which I cut out using the second largest die from Spellbinders Marvelous Squares.
I embossed it as before, but instead of adhering it as a square, I turned it to make a diamond shape, and adhered it with some foam tape.
The card actually looks prettier in real life.
Christina says ...
A really pretty card and one in my favorite colour. Hinged Cards are so easy to make and yet the style is so effective and can be dressed up in any way you would like.
There is a video on how to make the card that Ann has featured and you will find it in the Video Tutorials in the NavBar to your left.
Paper Creator Cards
by Ann Lauzon
(Calgary, Alberta, Canada)

Paper Creator Cards - Butterfly Plate


|


|


|


|
Last year some time, Christina mentioned Paper Creator in one of her tutorials, and being a woman, I was wondering what it was all about. Curiosity lol.
To my surprise I found all these wonderful card kits that you could buy really cheap.
Well, I went on a spending spree, and the owner (Debbie Gibbons) sent me an email as to what I was going to do with so many card kits. lol We got to chatting, and have become friends.
So, I thought I would share a few of her card kits that I have made and embellished, and much to my surprise have sold.
Christina says ...
Debbie will be delighted with all the cards you have featured here and they are all fantastic.
There are many many kits and characters that you can buy from Paper Creators that you will never be stuck for an idea again.... and they cover many occasions that the card maker will need.
Every month Debbie has a challenge on her Blog that you can join in with and if your card is the winner then you will receive a £10 voucher to spend in her shop.
Your prize will go a long way and you will be so pleased with what you get. There are links to Paper Creators on Flowers, Ribbons and Pearls for you.
Stenciled Teddy Card
by Ann Lauzon
(Calgary, Alberta, Canada)


Stenciled Teddy Card
I have a girl friend who loves bears, espcially Teddy Bears. So when I came across this huge teddy bear stencil(8x8"), I got a brain wave to make a card from it for her.
First I stenciled one bear onto white cardstock and coloured it in with some ink and a dauber, then I made another bear and did the same thing.
I adhered the two together at the top with some wet glue, added a pink rhinestone to the bow.
I faux cut an oval using the largest die from Spellbinders Classic Ovals Large, onto a gold sort of zebra patterned paper. I cut out using my scissors and adhered it to the middle of the tummy using double sided tape.
I typed out the sentiment onto my computer, and printed it onto some white cardstock, which I embossed using a Cuttlebug Polka Dot embossing folder.
Then I cut it out using the second largest die from Spellbinders Floral Ovals, and adhered it with some foam tape.
Christina says ...
Neat idea and one I am sure that your friend is going to love... Her very own special Teddy bear card made with love.
Filigree Hinged Anniversary Card
by Ann Lauzon
(Calgary, Alberta, Canada)


Filigree Hinged Anniversary Card
I never had such a hard time making a card as I did this one. I watched Christina's video tutorial on how to make a filigree hinged card over and over, and still couldn't get it right.
Finally I emailed Christina, and she kindly sent me some written instructions and also told me to watch the video again, which I did and finally got it right.
So, now for the card:
The base is white cardstock which I cut out using the largest die from Spellbinders 5x7 Enchanted Labels 28.
I used the same die to cut out 3 more pieces using some pretty blue designer paper, which I embossed with Cuttlebug's D'vine Swirls embossing folder.
I used these for the front of the card and the inserts after trimming off the corner pieces, as Christina did in her video.
I placed a piece of shimmery silver ribbon around the middle of the blue topper, but didn't like it as the ends frayed too much, and I couldn't use it to make a matching bow. So, I went a different route.
I cut out a piece of white cardstock with the second largest die from Spellbinders Fleur de Lis Squares and embossed it as before.
I adhered this to the middle of the card with some foam tape. To this I added the sentiment which I typed on my computer and printed off onto some white cardstock.
Then I cut it out with the smallest die from Spellbinders 5x7 Enchanted Labels 28. To the back of it I wet glued two pieces of the blue corner designs which I had removed earlier.
I stuck a piece of weather stripping under it to give it the raised look. I added a little rose to each end of it.
Then came the flowers which I had bought at the loonie store(pound shop, dollar store) a long time ago and were in my stash. I used my hot glue gun to adhere them.
Finally I added some pearl flourishes to the top and bottom as filler.
Christina says ...
And wasn't it worth all that effort in making it ... it is a real credit to you and I love the blue that you have used... and how you have used the little pieces that were cut off ... waste not want not !!
I try to keep all the instructions easy to follow but sometimes there are just bits that elude you.
Please don't struggle on and think you can't do it. You Can and if I can help you further with anything then I will ... gladly.
There is no such thing as a stupid question ... if you don't know something then it is up to the teacher to help you understand what is needed.
And there are most likely others asking the same question but just glad that someone else had asked it first.
Click here to read or post comments
Wishing You Well Bendi Fold Card
by Ann Lauzon
(Calgary, Alberta, Canada)

Front View


|


|


|


|
This is an unusual and unique card, so I thought that I would share it with you.
I came across it on Splitcoaststampers, and if you want to make one, that is where you will have to look, because my instructions would take forever to explain.
It is called a Bendi Fold Card, and the author of it is Bibiana Martinez-Ziegler. She has a step by step tutorial on how to make it, and you can print it out for future reference.
I did mine a little different then hers. I hope you enjoy it.
Christina says ...
Now that is a card with a difference and it looks really good. I am sure that many of you will be popping over to Splitcoast Stampers to grab the instructions.
This is the kind of card that would fascinate children as they open it up to peep inside.
Low Lighted Butterfly Card
by Ann Lauzon
(Calgary, Alberta, Canada)


Low Lighted Butterfly Card
I came across this technique on Stamp TV, and thought I would give it a go.
The base is white cardstock 81/2"x 11" folded in half.
I used Versa Mark to stamp the butterflies onto a piece of black cardstock, and heat embossed them with white embossing powder.
Then I used a stylus to dip into some bleach and applied it to the designs on the butterflies wings. This is called low lighting. I rounded the corners with a Martha Stewart corner punch.
I matted the base with a piece of black cardstock which I cut out with the largest die from Spellbinders Grand Large Labels.
To this I added a piece of white cardstock which I cut out with the second largest die from the same set, embossed with a Cuttlebug Embossing Folder called"Poppy" by Anna Griffin.
I cut out two strips of black cardstock using Spellbinders Floral Doily Accents die,and adhered everything including the matted pieces with Collall wet photo glue.
I stamped the sentiment on white cardstock using Momento Black Tuxedo ink, then cut it out using Spellbinders Floral Doily Accents, and matted it onto a piece of black cardstock which I cut out with Spellbinders Moroccan Accents. I used some large round foam dots to give it some leverage.
Next came the bow, which I made double with some black and white polyester ribbon that I purchased at Michael's. I added a large crystal gem stone to hide the knot.
Lastly I added some self stick crystal gems to the middle of the floral doily accents strips, and placed three of the same gems on three sides of the card to finish it off.
I think the result is very pretty.
Christina says ...
I agree with you Ann this card is very pretty and the black and white is so effective.
There are many different effects you can get working with Bleach but you need to be careful as it can burn your skin.
It can make a mess if you spill it onto anything and ask me how I know this ???? .... Because I have ruined a pair of trousers by wiping my fingers on them when I was using this technique ... stupid girl!!
Click here to read or post comments
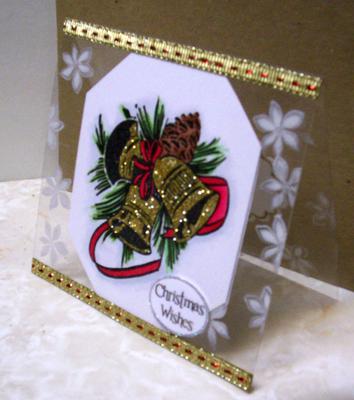
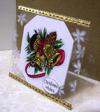
Sizzix Acetate Christmas Card
by Ann Lauzon
(Calgary, Alberta, Canada)

Sizzix Acetate Christmas Card


|

|
Over the years I have aquired a number of Sizzix Embossing Folders.
Recently I was reorganizing some of my "goodies", and decided to put the folders into plastic sleeves instead of the bulky acetate packages that they come in.
Being a true collector of everything,(lol) I didn't throw those packages away.
Then today, I got a bright idea... cut the top and bottom off of the package...then cut along the line that seals it together...voila an acetate card already scored and folded. The size depends on how much you cut off of each end.
My card measures 5 1/8"X4 3/4". I stamped the bells onto white cardstock ... coloured them with Copic Markers ... glittered them with Martha Stewart Extra Fine Gold Glitter, and then fussy cut them into the shape that I wanted(I didn't have a Spellbinder that was this shape)
I adhered it to the front of the acetate with double sided Score Tape, and did the same inside to hide the workings of the front. I added some 1/4" wide gold with red ribbon around the top and the bottom.
The sentiment is one that I printed off my computer and glittered. I stamped the tiny poinsettias which are from Penny Black Winter Wonders Stamp set with White Stazon Ink randomly here and there to finish it off.
Christina says ...
Well that is truly dedicated, frugal carting and such a beautiful card as the result.
It is always a good idea to look at items in another way and see what you can come up with and surprise yourself with the finished goods.
This card would look lovely at on anybodies mantle shelf for Christmas and then keep it as a treasure for some time.
I would love to be on your Christmas list .....
Click here to read or post comments
Modified Tri Shutter Card
by Ann Lauzon
(Calgary, Alberta, Canada)


Modified Tri Shutter Card
My son's birthday was coming and I wanted to make him a special card, so I started looking around for ideas.
My son is quite religious, so I was looking for something along that line.
Someone had sent me this picture on Facebook, and I saved it. Now I know why, lol.
I subscribe to Splitcoast Stampers and get a weekly email from them. One week they had a tutorial on how to make a "Modified Tri Shutter Card" submitted to them by Kim Score.
I followed the instructions and this is the card that I came up with. The base is pearlized cream cardstock, then I added some black, and cut some "letters" out on the same cream cardstock.
I printed the picture off of my computer onto copy paper, and then heat embossed it with clear embossing powder. It came out nice and shiny just as if I had printed it onto photo paper. I bought the little silver cross at Micheal's and attached it with a small foam pad.
My son was absolutely thrilled with it.
Christina says ...
This card is so inventive and I am sure your son was delighted with it.
Making cards for men is something that we all struggle with but knowing sometime makes it a little easier as you can then do what Ann has done and choose something that will please them.
I think you have the blend just right for this card and it is one your son is sure to treasure for some time
Click here to read or post comments
Hinged Snowflake Christmas Card
by Ann Lauzon
(Calgary, Alberta, Canada)

Hinged Snowflake Christmas Card


|


|


|
This card doesn't have a story behind it. The picture is a free digi that I found on the web a long time ago ... coloured it with my Copic Markers, and then put it away in my stash.
I came across it the other day, and decided to give it a go.
Once I started to make the hinged card base, things started to fall into place.
The base is two pieces of white cardstock which I cut out using the largest die from Spellbinders Grand Labels Dies.
I then attached the two pieces together using a small piece of card folded in half and glued with wet glue. I've confused you, then watch Christina's video tutorial on "Create A Hinged Card"
Next I cut three pieces of blue cardstock using the second largest die from Spellbinders Grand Rectangles. These I glued to the front and inside of the base.
Then I cut three pieces of white pearlized cardstock using the second largest die from Spellbinders Grand Labels, and embossed them with a polka dots folder from Cuttlebug.
I adhered these to the front and insides with Pinflair Photo wet glue. After that I glued my image to the front polka dots card using the same wet glue.
Next I made the frame using the instructions from Christina's video tutorial "Create a Frame with Spellbinders
I just wish that I had made the frame a little fancier ... next time
The frame is adhered with some foam tape.
I added a snowflake made from satin which I purchased at a ( pound, loonie, dollar)shop..store to each corner of the frame.
I glittered them up with some Stickles Glitter Glue made by Ranger. The sentiments are digis that I got off of the web, I can't remember from who. It might have been Tiddley Inks, but I'm not sure. I added some glitter to them, and adhered them with double sided Score Tape.
I forgot to mention that I put a piece of 2" wired light blue ribbon sparkled with snowflakes around the middle of the blue and white polka dots on the inside, before gluing them down.
If you look at the inside picture, you can see that there is room to slide a gift card down behind the ribbon.
Christina says ...
It is always wonderful for me to hear that people have found my video tutorials handy and go on to make lovely cards as this one proves.
Both of the tutorials that Ann has followed are in the NavBar to your left along with many many more on lots of different types of cards and ideas.
Then once you have the basic idea you can go on to add your won slant on things just as Ann has done and make for your self wonderful designs that you will be happy to give.
Click here to read or post comments
Hinged Ice Skates Christmas Card
by Ann Lauzon
(Calgary, Alberta, Canada)

Skate Card using a flash on my camera


|


|
I saw a Christmas card being displayed with these pretty ice skates on it at my craft store, and just had to try it.
The base is made with the largest Spellbinders Grand Large Labels
The background layer is made using the second largest of the same die set.
I cut three of these, one for the front, and two for the inside on cream shimmer cardstock and embossed them using a snowflake swirl embossing folder.
I put a piece of red satin ribbon around the front panel, then I cut a piece of red glitter cardstock using the largest die from Spellbinders Ornate Squares. I adhered this to the front of the panel with foam tape.
Next I cut a piece of white cardstock and placed this onto a sheet of Scor-Tape, placed the ice skate die on to it and ran it through my Big Kick.
I then removed the backing from the tape and sprinkled it with Martha Stewart Snow Glitter, and burnished it with my finger. I did the same with the heels and blades, using black glitter and silver glitter. I adhered the skates to the Ornate Square with foam tape.
I used some red Stickles Glue to highlight the skate laces and around the top of the skate. Next I added a red sparkly pom pom to the toe of each skate, and a red bow which I cut out using a Martha Stewart punch to the top. I added a rhinestone to the middle of each bow.
I adhered the cream panel to the front of the base using Tombow wet glue.
I used a piece of silver glitter cardstock and cut out some letters using a QuicKutz Lemon Drop die. I adhered them to the top and bottom of the card using Tombow wet glue.
Lastly, I made a double bow using the same red satin ribbon that I bought from Michael's , adhered it with some hot glue using my glue gun. Then I added a large glitter stone to the middle of the bow to hide the knot.
All in all a very pretty card, which I'm going to give to my grand daughter Kali, who has a keepsake box that she saves all of things that I make for her in.
Christina says ...
How wonderful is this card and I am not surprised that your Grand daughter will keep it in her treasure box ... it is simply beautiful.
I really love that Grand Labels die for base cards as it gives you more than enough room to add pretty stuff to the front.
The design of the die is bit out of the norm from just a plain square or rectangle card, and the effect is just right for any occasion.
Click here to read or post comments
Frilly Origami Box
by Ann Lauzon
(Calgary, Alberta, Canada)

Frilly Origami Box Top


|


|
One day I was going through Christina's tutorials and came across a tutorial on how to make an origami box.
I really liked the look of hers, and it seem pretty easy to make. So... now for my version of Christina's Origami Box...
I did all the things that Christina shows you how to do, except I embellished mine differently.
I used some pretty frilly pink lace that I've had in my stash forever and a day, because it only cost $1.50 for a spool of it, that tells you how old it is.
For the lid top I used four layers of cardstock ending with the pretty floral one in the middle, to which I hot glued some more of the pink lace.
I added a string of (pound shop, dollar store, loonie store) bling all the way around the outside of it.
I also added a blue, pink and yellow hand made rose that I made using my retro punch from EK Susess to the top left hand corner.
The top right hand corner has a pink double bow with another hand made rose on it to hide the knot.
The bottom left corner has a pink vellum butterfly on it which I punched out using a Martha Stewart monarch butterfly punch. I added some more of the cheap bling for it's body.
Seeing as how this box is going to be a gift box for a friend of mine who loves birds...I added a white dove which I believe I cut out from one of my Spellbinder dies...sorry, I can't remember what it is called.
I printed the sentiment from a CD called Shirley Barber Projects which I purchased from Joanna Sheen.com, and added some more of the cheap bling around it.
I placed some rhinestones and coloured gems on the roses and on the dove.
The handle is some little daisy like flowers pink ribbon, which I purchased at Michaels.
I glittered the roses, the butterfly and the dove with Rangers Stickles Star Dust glitter glue.
Christina says ...
This is so very pretty and your friend is going to love it with all the girly hings you have added to it ... and those flowers are lovely.
I can't tell you how many people have had a go at this project and then written to me to tell me how delighted they are with the results.
It is good for any occasion and can be filled with just about anything and if you use the same size card as I have it is surprising how big the finished box is.
Love it and thank you for sharing the photo xx
Click here to read or post comments
Bunny Floating Decoupaged Swivel Card
by Ann Lauzon
(Calgary, Alberta, Canada)

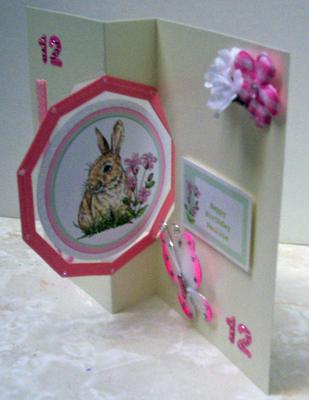
Bunny Floating Decoupaged Swivel Card


|


|


|


|
I happened to come across this card while I was browsing on Joanna Sheen.com. The original was done by Sheila Weaver.
I made the one that she did, but for this card I used my own techniques and ideas which I found was much simpler.
I cut a piece of cream shimmer cardstock 6 1/8"x 8 1/2",and then scored it at 3" and at 4 1/4".I mountain folded the first crease, and valley folded the second line.
Then I opened it out and laid the point of the largest die from Spellbinders Decagons on the first(3") score line,making sure the point at the bottom was also on the same score line.
I then ran this through my Grand Calibur starting at the right hand side and running it just to the valley fold line.
Then I ran it through again this time from the left hand side just up to the mountain fold line.That leaves you with a 1 1/4" piece in the middle(the swivel).
Next I cut a piece of the acetate that my Spellbinders dies come in(waste not want not) using the largest decagon die again and attached it to the swivel with extra sticky red double sided tape.
Then I made two frames(one for each side)using the largest and second largest decagon dies, and adhered them to the acetate front and back,once again with the sticky tape.
I printed the image off of a cd called The Digistamp CD by Jayne Netley Mayhew and cut it out using the second largest die from Spellbinders Standard Circles(LG).The sentiment was also on the same cd.
I then added some pink number 12's to the card (as my Great Grand Daughter will be that age on April 2,and this card is for her) some flowers that I had in my "stash" and also a large organza pink butterfly.
I sparkled it all up with Ranger Stickles Glitter Glue. I also added a short strip of pink glitter tape ribbon on the one side.
I should have added a picture of it when it was closed, but I didn't think of it..sorrie
Christina says ...
This is a very pretty card and one I am sure that will be treasured by your Great-grand-daughter
If you would like to make unusual shaped cards as Ann has done you will find many with step by step instructions in the Video Tutorials in the NavBar to your left.
Two that are very similar to this are the Flip Card and the Shutter Card
Both of these cards also have the written instructions if you prefer to learn by reading
Click here to read or post comments
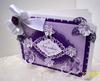
Purple Rose
by Ann Lauzon
(Calgary, Alberta , Canada)
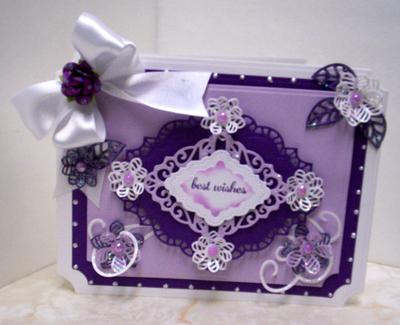
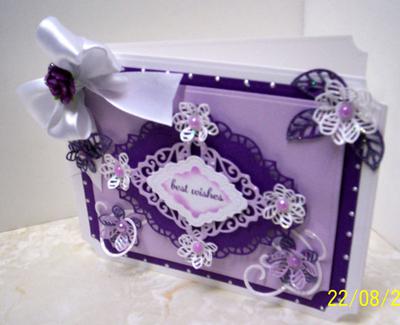
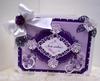

|

|
There really isn't any story behind this card. I just started to make it for something to do.
This card is of Christina's hinged style card, that I layered up with some dark purple and some mauve cardstock.
The focal point is made from some of Sue Wilson's dies called California Collection - Decorated Frames Set B, and San Francisco. The flowers and leaves are called Finishing Touches - Faux Quilled Blooms.
I stamped a sentiment from Stampin Up, and inked around it while it was still in the die with some light purple ink.
The dots around the outside of the card were made with Rangers' Liquid Silver Pearls.
The flourishes are from The Bella Rose die set which I cut up to fit. I'm not sure who makes it.
I tried to make Christina's Chocolate Box Bow with white satin ribbon, but it didn't turn out so good. LOL.
The purple rose is from Michael's as is my cardstock.
Lastly I glittered the flowers and leaves using a Sakura Glue Pen and then adding some Martha Stewart Glitter.
I also added a Mauve " Mother of Pearl" pearl into the center of each flower.
Christina says ...
Very pretty card and I love the regal shade of purple you used and the flowers make it something special.
Click here to read or post comments


Recent Articles
-
Memory Book
Oct 15, 22 09:17 AM
 Make a memory book, fun to make and even lovelier to give.
 -
Die cut letters.
Jul 19, 21 10:12 AM
 Add that personal touch with die cut letters, add names or sentiment as you please.
 -
Diaper Fold Card.
Jul 19, 21 09:34 AM
Create this fun Diaper Fold Card...and no need for a pin!
Search
