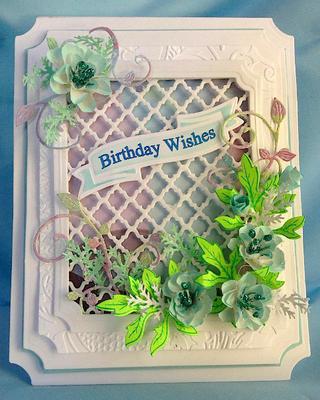
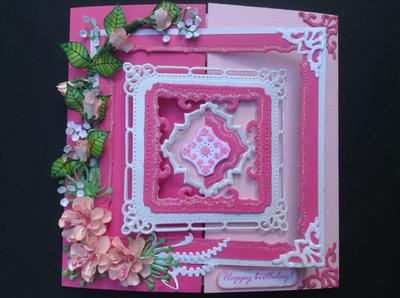
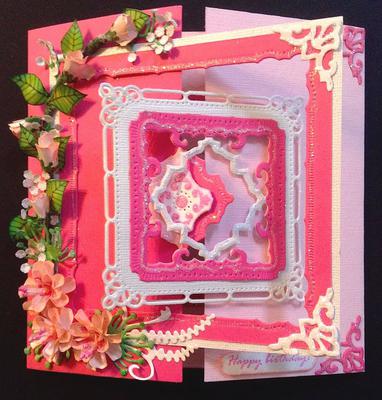
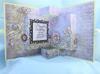
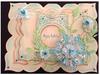
Frames and Lattice Birthday
by Emlie
(USA)

|


|
Follow Christina’s videos to make this hinge card and the frames.
The 4 flowers are cut out with Rose Creations Dies #1 and #2. Assemble flowers using hot Glue. Make 2 buds for the bottom spray. Set aside.
Cut 3 Cheery Lyn “Mini Fanciful Flourish” out of DSP and glitter. Leaves are from Heartfelt Creations Delicate Aster Stamps and Dies.
I punched Martha Stewart “Branch Punch” in White and Sage Shadow and glittered them in Dazzling Diamonds.
The Greeting was cut out of White Card stock using Fancy Tags 3. Before removing the cardstock from the die I used my blending tool to add color to the embossed areas. Adhere to card front using Foam Tape.
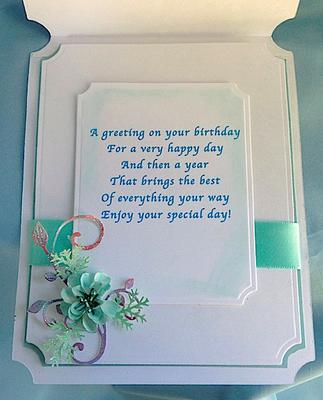
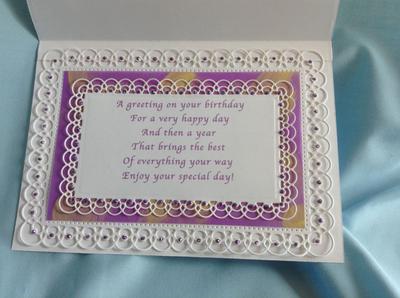
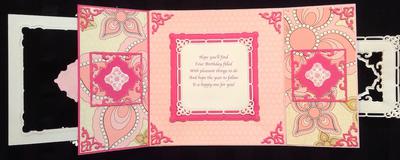
The words on the inside of the card were cut out using Grand Labels 4 - die #1. While the cardstock is still in the Die, use your blending tool to add color around the edge of the die. Adhere flat to the card.
Cut Flourishes, Branches and flower the same way you did on the card front. Adhere to inside of card as shown.
Christina says ...
This is such a beautiful card and one you should be really proud of. It is well made and the colours you have chosen are lovely.
I am sure it is one that the recipient will treasure for years to come as a keepsake of a really special birthday.
The video tutorials can be found in the NavBar to your left and you will find how to create this style of card there plus many many more for you to try.
Click here to read or post comments
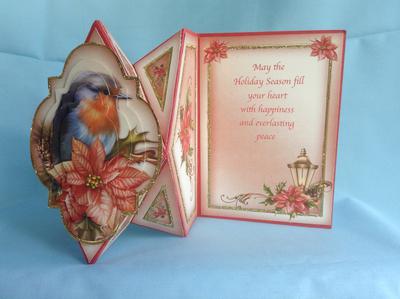
Sympathy Card inspired by Christina
by Emlie
(Fresno, CA, USA)

Sympathy card Outside


|


|
A friend of mine just lost her mother. She was 104. I wanted to make a special card for her. I loved Christina's frames and lattice so I patterned my card after hers.
I made a 5" x 7"Hinge card using white, lavender and green cardstock. I used Spellbinders Matting Basics A & B, Ribbon Banners and Fancy Lattice.
The layers are separated with foam tape.
The birds are from Heartfelt Creations Garden Romance Dies. The embossed layers are from Cuttlebug “Brocade Window” Embossing Plus Folder and Lace Door Embossing Plus Folder.
The flowers are from Martha Stewarts Hydrangea punches. I used Marianne Creatables Decorative Elegance; Marianne Creatables Seed and Head Leaves around the flowers.
I used my blending tool on the edges of the birds, tag, Brocade window and lace door. I added glitter the flowers, seed leaves and the lavender accent leaves on the bottom flowers.
Christina says ...
What a grand age to live to and I am sure that the card would have been well received by the lady herself.
Making Sympathy cards is not some thing we look forward to but it is a sad fact of life and this card is so beautiful for such an occasion.
The colors are perfect and those flowers really make the card something extra special.
Click here to read or post comments
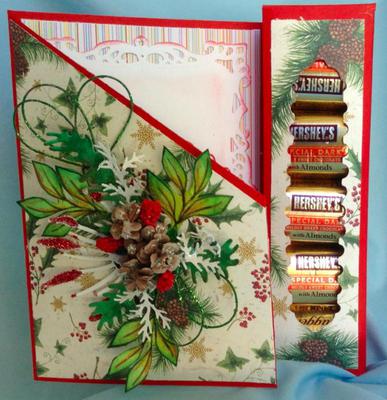
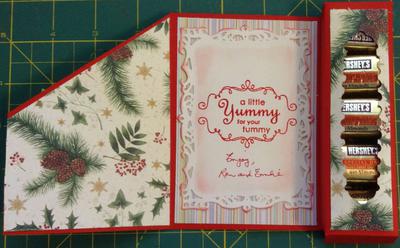
Christmas Treat Box Card
by Emlie
(USA)


|

|
I used an 8” x 12” red cardstock for the base, Brown for the pine cones, Green and White Cardstock for the leaves and Branches; 2 different sheets of DSP for card and box.
Cut DSP 1 ¼” x 4 ¾”and adhere to box. Make a template to cut the opening on the box by cutting a piece of thin cardstock 5” x 1 ½”. Draw a line ½” from each end. I placed the edge of the 5” x 7” Enchanted Labels 28 Die #1 on the ½’ line.
Tape in place and die cut. Move the die to the opposite end and repeat. Tape the template in the inside of the box and cut it out using the template as your guide.
I saved the template so I could use it again. Form the box and tape together using Red Line Tape. Add DSP to the card section.
Directions to make the Pinecone Spray: Use Punch Bunch Mini Pear Punch to make 17 mini pear shapes. Shape with your Flower Forming Toolkit.
Row 1 - Center of the pinecone: Cut a piece of floral wire 1” long and dip the tip in hot glue. Roll 1 pear around the wire. Put a drop of hot glue on the wrapped pear and wrap the 2nd pear around the first one to make the center of the pinecone.
Row 2: Evenly space 3 pears around the center. Dip each stem of the pear in hot glue and adhere it to the wire so that it is the same height as the center of the cone.
Row 3: Evenly space 5 petals around row 2, but move them down just a tiny bit
Row 4: Adhere 7 petals around Row 3, but move them down a tiny bit.
To finish the Pinecone, use your tweezers’ to bend the petals out to shape the cone. Remove all glue webs.
Sponge the edges using Cloud White Chalk Ink. Add Stickles Frosted Lace to some of the edges for glitter.
Pine Cone Spray: Cut 2 of Marianne Creatables pine branches; cut 1 of the seed leaves and glitter the seed ends in red stickles.
I used digi leaves run on green cardstock and used shades of green and yellow to add shading to the leaves.
I used a red colored pencil to add the red color to the veins. Assemble the spray using hot glue. Cut 5 loops from a wired ornament and adhere to the spray.
Christina says ...
This little gift is such an easy way to give small items and of course what you fill it with is up to you.
I made lots of these for Christmas and filled them with chocolates, tealight candles, small scented soaps or bath cubes.
The instructions to make this are in video format and you will find them in the Video Tutorials in the NavBar to your left.
Scroll to Tealight Candle Card Tutorial and have fun ... it really is easy to do.
Click here to read or post comments
Beauties from Emlie
by Emlie
(California, USA)


|

|
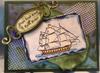
Making cards for men are always a challenge. So, today I decided to take the challenge. My theme is "Old Ship". While I made this card into a "Get Well Card" you can use it for any occasion.
My card is 4 1/4" x 5 1/2". I used dark green cardstock for the base. Cut "Blue Wave’s DSP" using Spellbinders A-2 Matting Basics B
Sponge the edges in "Brilliance Pearlescent Ivy Ink". Swipe the tip of the ink over the paper to add more green. Adhere to card base.
Cut Spellbinders Labels 25, Die # 4 out of Green DSP. Sponge edges in Brilliance Pearlescent Ivy Ink. Swipe the tip of the ink over the paper to add more green. Adhere to card as shown using Dimensionals.
The Old Ship is from Doodle Pantry. Size, color and cut out leaving enough room so that you can tear the edges. Cut out a piece of Navy cardstock 3 5/8” x 2 3/8”. Adhere ship to the Navy. Antique the edges and adhere flat over the green layer.
Run Computer generated words on white cardstock. Emboss and die cut using Spellbinders Fancy Tags. Sponge edges in Brilliance Pearlescent Ivy Ink. Swipe the tip of the ink over the paper to add more green.
Die cut tag again out of Night of Navy cardstock. Hand cut though the middle of the center portion only. Leave the ends uncut.
Spread the centerpieces apart and adhere the white tag over the Blue so that the blue frames the white as shown on card front. Sponge the edges in Brilliance Pearlescent Ivy Ink. Adhere to card front using Dimensionals
Christina says ...
Making cards for men can be quite a challenge especially if you are a frilly card maker ... like me.
But this card fits the bill beautifully and I am sure that your recipient thought so too.
The ship is a really good choice and even better if sailing happens to be one of his hobbies.
Click here to read or post comments
Sailing Ship Spinner Card
by Emlie
(Fresno, CA, USA)
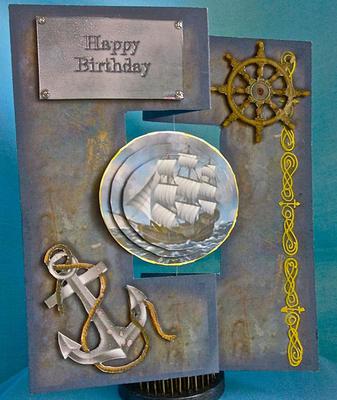

I downloaded the digital images from “Craftsuprint”.
When I ran a sample of the card front it was quite large so I resized the images to 82%.
Run the card front image on glossy cardstock; turn the cardstock over, and run the Card back image on the matte side of the cardstock. Run the Ships, Anchor, Wheel and Happy Birthday on the glossy Cardstock.
Since I used only 1 sheet of paper for the card base I needed to cover the strings. So, I did a copy and paste on the back of the card and ran those pieces along with the verse on matte cardstock.
Go around the oval edges of the largest ship and the verse with a Gold gel pen. Cut out all the pieces using a paper cutter, scissors and Exacto knife.
Spritz the Anchor and Happy Birthday Plaque with Frost Shimmer Spritz. Score the lines and fold so you have a mountain and valley fold.
To make the spinner: Working on the back of the card, mark the center between the folds. Lay a piece of Red Line Tape along the centerline. Take a piece of regular thread, approximately 10” long.
Lay the tread along the tape, leaving about ½” extending beyond the top of the card and press it into the tape.
Add another piece of red line tape over the thread and loop the end over the tape and press in place next to the original string.
The loop keeps the thread from slipping out. Pull the other end of the string tight and tape in place on the bottom of the card the same way you did for the top. Adhere the paper you cut to cover the strings.
Adhere a piece of Red Line Tape down the center back of the verse. Center the oval verse on the string and press the string into the tape.
Add another piece of Red Line Tape over the string and press it into the string to secure it. Add ATG tape around the edges of the largest ship and adhere over the oval. Line up the edges carefully.
Telescope the last 2 ships using Dimensionals. Carefully stack the 3 ships together matching the waters edge, the bow of the boat and the tip of the mast. Add the wheel, anchor and Birthday Plaque in place on the card front.
Spin the ship section around the strings 20 times. Hold it as you close the card and place the ships so they sit on top of both layers of the card.
When you open the card the ships will spin around. Place closed card into envelope to mail. When the card is opened the ships will spin.
Christina says ...
Unusual card and ideal for the men in your life ... who we all find notoriously difficult to make cards for.
But this fits the bill and is sure to please any one who is lucky enough to get it for their birthday.
There is a similar version to make this card and you will find it under Pop out card and there is also another version of the Spinner Card and both are in the Sitemap/Projects Section
Click here to read or post comments
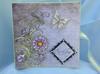
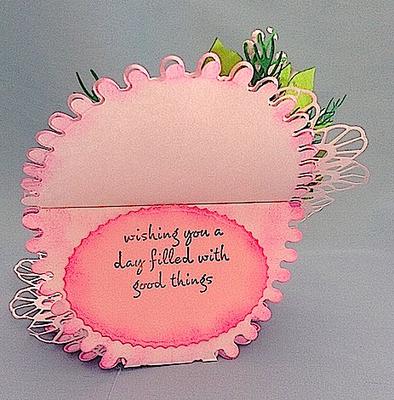
Doily Flower with Scallops
by Emlie
(California, USA)


|


|
See Christina’s video on how to make a hinge card.
Emboss and Die Cut 2 of the 5” x 7” Detailed Scallops out of white cardstock (1 for the outside and 1 for the inside)
Place a small dot of Lavender Stickles on the embossed dot on each scallop as shown in completed picture.
Cut Lavender Vellum 5 7/16” x 3 7/16”. Using “Thatched Straw Chalk Ink” make random swishes on the purple vellum to tie the yellow and purple together.
Adhere the Vellum over the Detailed Scallops. Be sure it doesn't cover the embossed holes. Use Dimensionals to adhere the “detailed scallops” layer to the card front.
Cut a piece of “Frost Metallic Vellum” 5 3/8” x 3 3/8”. Run through the “Cuttlebug Embossing Plus Brocade Window Folder”.
Run a piece of “Autumn Hay Metallic Vellum” through the “Cuttlebug Embossing Plus Elegant Ellipse Folder”. Center and adhere the “Elegant Ellipse” to the back of the “Brocade Window” using Glue Dots. Center and adhere both pieces to the card front using glue dots on the corners.
Cutting a Spellbinders 7/8” circle out of white cardstock makes the base of the doily flower. Fold in ½, open. Fold in ½ the opposite way, open.
Cut 2 doilies per flower using a “1 ¾” Die-namics Mini Doily Circle”. Sponge the edges in Purple Hydrangea Chalk Ink. Cut the doilies in ½. Fold the ½ in ½ so that the right side is folded in.
Fold the top of the dolly over toward the crease.
Turn over and fold the back of the doily toward the crease. Repeat on the rest of the doily pieces.
Place glue on the center fold line of the doily and glue to one of the folds on the flower base. Be careful not to glue the sides of the doily.
Repeat so you have 4 doily pieces on the base.
Spread the folds of the doily out so your flower is round. The center of the flower is made from the Rose Creations die I added 3 stamen to the center and 4 around the outside petals. Glue the center inside the doily pieces. I made 3 extra centers to add to the card front.
The tag is cut from Spellbinders “Charmed I'm Sure Dies. The rose buds were made using a Marvy 7/8” 6-Petal Flower Punch and Purple Cardstock.
I also used Martha Stewart’s Branch Punch; Marianne Creatables Seed and Head Leaves; Marianne Creatables Anja Leaves 3; Digi Leaves
Christina says ...
A truly remarkable piece of work and the flowers are so pretty.
I am sure that this masterpiece will be treasured by the recipient for a long time and all your hard work will be noted for the beautiful card you have produced.
Click here to read or post comments
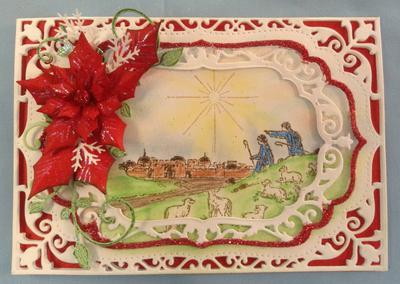
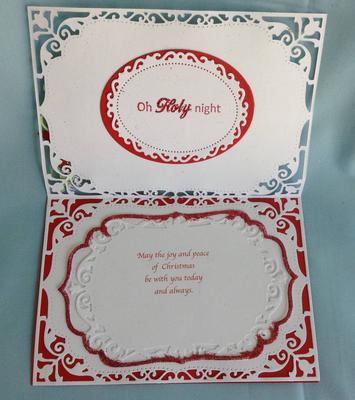
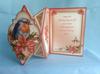
O Holy Night
by Emlie
(California, USA)

|

|
This is my 2013 Christmas card. It is a 5” x 7” hinge card. See Christina's video tutorial.
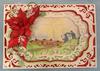
Stamp the “Shepherd Scene”, leaving off the star, in VersaMark and emboss in brown.
Stamp the star in VersaMark and emboss with “Translucent Gold”.
Color the scene using colored chalk and pencils. Cut 5” x 7” Matting Basics B out of Red cardstock. Adhere to the back of the card.
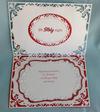
Top of inside of card: Cut Classic Ovals out of Red Card stock. Cut Floral Ovals out of White Card stock Adhere the white to the red.
Stamp greeting in Red Ink. Go over the word “Holly” with a Sakura Pinpoint Roller Quickie Glue Pen, sprinkle with red embossing powder and emboss.
Bottom of inside: Stamp words in red on white cardstock. Cut out using Elegant Labels 4 Adhere to inside of card.
Tape Elegant Labels 4 in place on White cardstock. Then, place Labels 4 in the center and cut.
Glitter the outside edges in Red and adhere using Dimensionals. Repeat for card front.
Adhere the 2nd red frame on card front using Dimensionals. Add Poinsettias, leaves and flourishes as shown.
Christina says ...
Such a pretty card for Christmas and would certainly take pride of place on my mantelshelf.
I love the festive colors you have used and the Poinsettia is perfect.
Merry Christmas to you xx
Click here to read or post comments
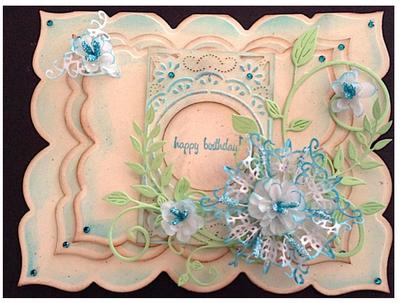
Asters and Baby’s Breath in Turquoise
by Emlie
(California USA)


|


|
See Christina’s video on how to make a Hinge Card. Cut 2 pieces of Pacific Point 5” x 7” Matting Basics B, Die #7.
Layer 1 piece onto card base; save the other for the inside. Emboss and cut 2 Detailed Scallops - Die #3 from White Cardstock.
Go over the scallops with a “Sakura Gelly Roll” Pen. Layer over the Pacific Point Layer. Using Dimensionals.
The angled pieces: Cut 2 - 5” x 7” Matting Basics A - Die #3 from Pacific Point Cardstock. Adhere 1 piece at an angle, using Dimensionals. Save the other for card inside.
Cut 2 - 5” x 7” Matting Basics B, die #2 from DSP. Sponge edges in Pacific Point. Adhere flat, at an angle. Save the other for card inside. Cut 5” x 7” Matting Basics A, Die #2 from White Cardstock.
Emboss with “Cuttlebug Acanthus” Embossing Folder. Using your blending tool, lightly add color to the raised areas (See Christina’s blending tool video). Sponge edges in Pacific Point. Adhere flat, at an angle.
For the feathery flower on bottom right corner Stamp 2 Heartfelt Creations Delicate Asters in Pacific Point using Die #1. Color tips with Blue Pencil. Add a pink stipe along the vein to match the DSP. Color the center yellow. Adhere flower petals together and add a yellow center using Punch Bunch small sun punch.
For the Pacific Point petals, punch 5 leaves using Martha Stewart’s “Rose Leaf (1”)”. Fold in ½.
Start at tip and cut diagonal cuts almost to the fold, about 1/16” apart. Using your White Chalk Marker, draw a thin line along the cuts.
Draw a line along the fold. Fluff the fringe you cut. Place them evenly around the Aster flower, fold side up, and glue in place. Cut 3 Anja Seed and Head Leaves. Glitter the head. Cut off the stems. Glue around the flower. Adhere to card
For the top of the card make 2 Aster flowers. Add 1 Anja Seed and Head Leaves, 2 Aster Leaves. Add a blue dot in the center of the Cheery Lyn Baby’s’ Breath flowers and adhere to card.
For the card inside, adhere the 2nd piece of Pacific Point Cardstock and Detailed Scallops to the card base. Angle the 2nd piece of DSP over the Detailed Scallops. Die cut the Computer generated words using 5” x7” Matting Basics B - Die #3. Sponge the edges. Adhere to card as shown.
Cut Cheery Lyn “Mini Flourishes” from green cardstock. Adhere to the top of the card and add the Aster Flower.
Christina says ...
There is nothing else to say but "WoW" this card is simply gorgeous and I just love those flowers .... beautiful
It is going to make someone very happy when they are lucky enough to get it.
Click here to read or post comments
Easter, 2014
by Emlie
(USA)


I made this Center Step Card for my 7 year old Grandson who loves to paint.
I followed Christina’s great tutorial (https://www.card-making-magic.com/centrestepcard.html) to make the card base.
I added DSP to the outside and a contrast DSP on the steps.
The large bunny is a digi graphic and the smaller bunnies are stickers.
I made the greeting using Office “Word Art” and cut it out using Spellbinders Ribbon Banners Large.
Before removing the words from the die I used my blending tool to add color around the words. Then I adhered them to the card front using Dimensionals.
Christina has a video on how to use a blending tool.
Christina says ...
How cute is that card and I bet your Grandson was delighted with it. I love the bright colors in the card and that clown is adorable.
There are instructions on how to make this ... and other step cards ... in the Video Tutorials in the NavBar to your left and then you will be able to create the card as cute as Emilie
Click here to read or post comments
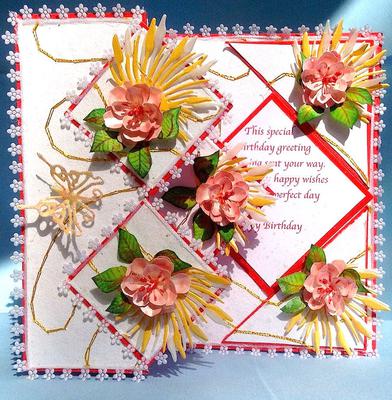
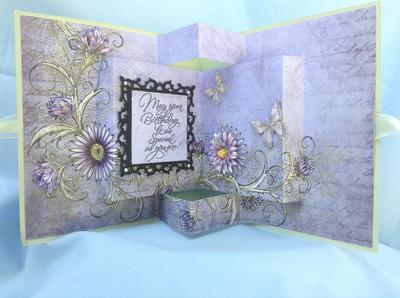
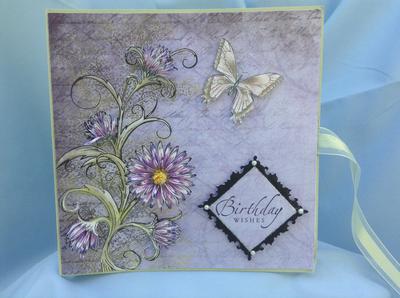
Tri Shutter Card Variation
by Emlie
(USA)


|


|
When I first saw a card made like this I thought it was a tri shutter card. After studying the card I realized it wasn’t a regular Tri Shutter Card, but rather variation of one.
I really liked the variation so I decided I’d try to make one. It was named a “Double Display Card”
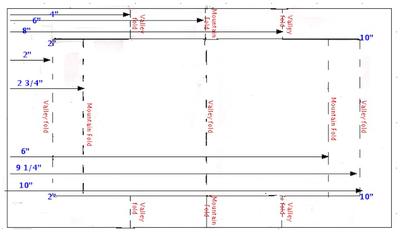
The template for this card can be found at http://www.susanbluerobot.com/2009/11/how-to-make-my-double-display-card.html.
I made 2 copies on legal size printer paper and cut them to 6” x 12”. Save 1 for your template and use the 2nd to make a sample of the card.
As Christina always says: make a sample so you don’t waste good paper in case you have a problem with the card.
A simple way to transfer your template to your good cardstock is to paper clip your Template to the cardstock. Then, lay it on your cutting mat.
Use your piercing tool to poke a hole at each corner and where the lines meet. Save the Template to use again.
Using your ruler and embossing tool, join the marks together. Now, Using your ruler and Exacto knife, cut on the cut lines as shown on your template. Fold your mountain and valley folds as directed. Be sure to make hard creases on the folds.
Using your template, make patterns for decorating your card. When you cut them out cut them a little smaller then the original so you have a border around them. I kept the patterns so I could use them next time.
All of the DSP is from “Heartfelt Creations Delicate Aster Paper Collection”. I used 2 different sheets from the collection so I’d have the contrast.
I cut the front closure using Spellbinders Labels 18 out of cream cardstock. I traced the outside of the die onto Lavender cardstock for the outside edge.
The flowers and Butterfly are from the Delicate Aster Paper Collection; hand cut and adhered to the cardstock. I used a decorated blank verse card from the collection and stamped my verse in Lavender.
Christina says ...
This is such a delicate color for your card and the style is unusual.
Thank you for the detailed instructions on how you made it and also for where others can get the template from.
I hope it is one that some of you will try and of course show us the results of your ideas in the Gallery Pages.
Click here to read or post comments
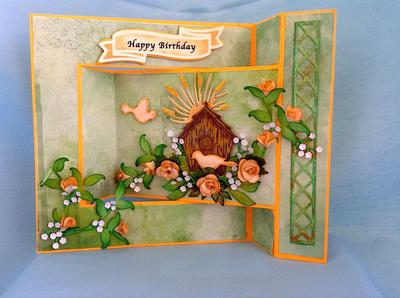
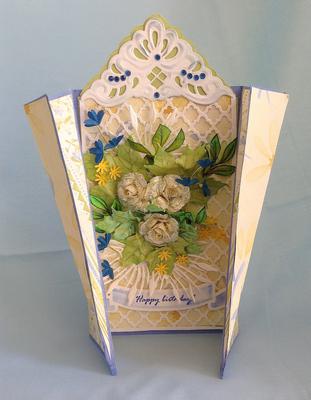
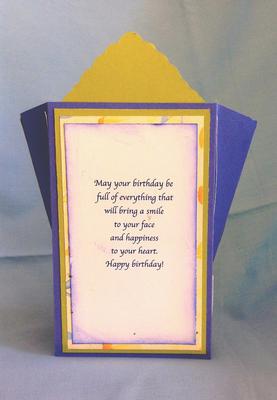
Folded Card
by Emlie
(USA)

|

|
When I saw this folded card I thought it was unique. I had never seen anything like it. So, I decided I had to make it. I followed the template that can be found here:
http://heukske.blogspot.com/2012/10/workshop-vouwkaart.html
As Christina says, “be sure to make a template, first”. Fold the template following the directions given. Cut Apricot cardstock 8 ¼” x 6 ¼”.
A simple way to transfer your template to your good cardstock is to paper clip your template to the cardstock. Then, lay it on your cutting mat. Use your piercing tool to poke a hole at each corner and where the lines meet. Save the Template to use again.
Using your ruler and embossing tool, join the marks together. Now, Using your ruler and Exacto knife, cut on the cut lines as shown on your template. Fold your mountain and valley folds as directed. Be sure to make hard creases on the folds.
I cut green DSP and adhered it to the card front. Die cut the fan shaped leaf from “Autumn Hay Metallic Vellum” using “Marianne Designs “Seed Head Leaves Dies”. Color Seed Heads in Apricot and Glitter with Yellow Stickles.
The birdhouse is cut out of Sand colored cardstock using “Heartfelt Creations Bird Haven PreCut Set”. I colored over the cardstock with Pan Pastels in Yellow, Orange and Green to add some color and give it a weathered look.
Punch 3 leaves using “Martha Stewart Maple Leaf Punch”. Crush them, open them up and add a little color using “Pan Pastels Orange, Yellow and Green”. Add orange around the edges.
Cut and emboss 2 leaf stems from “Foliage Two Dies. Sponge edges in “Green”. Use a colored pencil to add darker green lines to embossed area. Use your “Sakura Jelly Roll Pen” to add a line of glitter to embossed area in the center of the leaf. The roses and buds are punched from Beargrass Metallic Vellum using a 1” Marvy 6-Petal Flower Punch. The edges are brushed in Apricot. I also used some digi leaves under the birdhouse. The Baby’s Breath Die is from Cheery Lynn.
The greeting is cut using Spellbinders “Ribbon Banners”. I used my blending tool to add color around the words. I followed Christina’s directions to get the apricot color behind the tag.
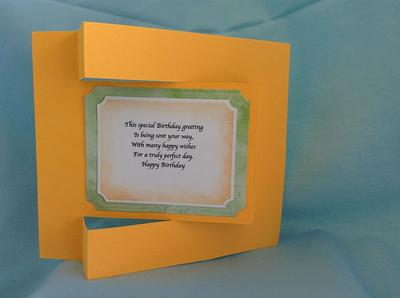
The verse on the back is cut using Spellbinders Grand Large Labels - #1 and Large Labels - #5
Note: If the card doesn't stand when you are finished making it, it’s because you folded it wrong. How do I know this? Because that is what I did! I had to refer to the correctly folded template to see what I did wrong.
Christina says ...
This is a very pretty card and I like the design that has been added to the front.
It is one of hose cards that stand out from the crowd because of the unusual design in it.
You can find a video tutorial for a similar type of fold in the the Tutorials and it is in step by step instructions ... Look for Shutter Card Tutorial
It can be adapted to create a card the smae as Emilies and is sure to get the comments once you have tried it.
Click here to read or post comments
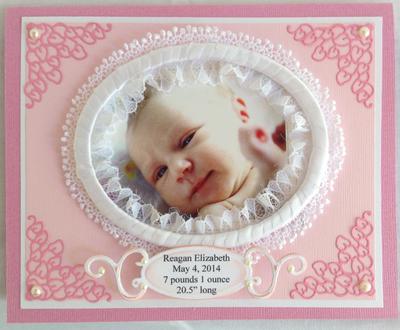
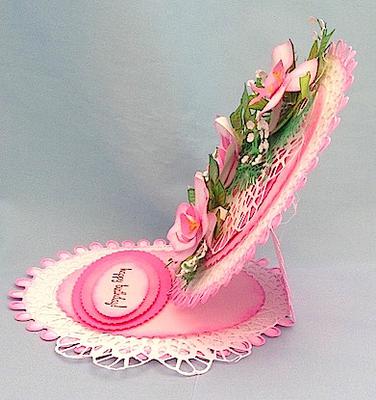
Vintage Baby Card
by Emlie
(USA)

|

|
When I saw this card on cherry Lynn’s blog I liked it. I made several changes to it.
I cut a 12” Sq to 7” x 11 ½”. Scored at 5 ¾” and folded it in half for a 5 ¾” x 7” card. You could also make a Hinge card if you don't have 12”sq. paper.
Cut 2 pieces of White Card stock 5 ¼” x 6 ½” and 2 pieces of Rose Card stock 5” x 6 ¼”. Adhere 1 piece of Rose Card stock to 1 piece of White and adhere to the card front. Repeat with the remaining pieces for the inside of the card.
I didn't have big enough oval dies to cut the baby’s photo out so I had to use my Oval Coluzzle.
Tape Oval Coluzzle onto Light Weight Cardboard and cut out using circle #6 and #7. I used 44” of 3/8” White Satin Ribbon to wrap the frame.
Place a small glue dot on back of frame, adhere ribbon and wind it around the frame. Adhere the end of the ribbon in place with another glue dot on back of frame.
Glue narrow gathered white lace to the inside of the Oval. Let Dry.
Glue a different style lace to the outside edge of the circle. Let Dry. I used an actual baby picture for the center of the frame. Use Oval Coluzzle #7 to cut around the photo and glue the photo to the back of Oval Frame. Let Dry.
Adhere frame to the card using Dimensionals. Place it closer to the top so you have room for the tag.
The words for the tag are computer generated. Cut them out using Spellbinders Fancy Tags and use your blending tool to add color. Adhere to the bottom of the frame using Dimensional stacked 3X.
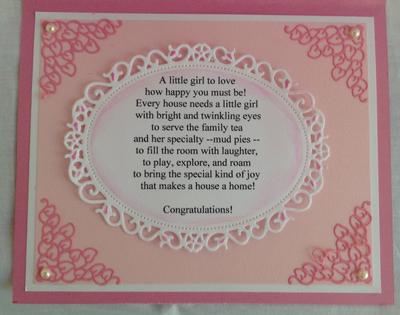
Die cut 8 corner pieces from “Lace Corner Deco E” dies and glue on the 4 corners on card front and inside.
The inside verse is computer generated. Emboss and cut the words out using Spellbinders Floral Ovals. Before removing the words from the die use a blending tool and Pink Ink to add color to the embossed areas. Adhere to card with Dimensionals.
Add pearls to the corner of all lace pieces and smaller pearls to the tag on card front.
Christina says ...
This is such a lovely card and I like how you have wrapped the ribbon around the frame. The delicate shade of pink makes it very feminine.
The lace is a lovely touch too and the bay is simply gorgeous. This has to be a "Keepsake Card"
for the parents to save until she is old enough to look at and appreciate the work that it has taken.
Click here to read or post comments
Fancy Tri Fold Card
by Emlie
(USA)

|

|
I saw several Tri Fold cards designed this way but they didn't have a template.
Christina has a template I altered to make this card https://www.card-making-magic.com/fancytri-foldcard.html. I made the following changes to Christina’s template
Cut cardstock 6” x 8 ¼”. Working on the 8 ¼” side, mark both ends at 1” and 2 ¼”. Make a mark ¼” up from the bottom outside corners. Score straight down at the 2 ¼” mark on both ends. This makes the cards center.
Now, score diagonally from the 2 ¼” mark to the outside corner. Repeat on other side. Score diagonally from the 1” mark to the ¼” mark on the bottom side of the card. Repeat on other side.
Fold straight down along the 2 ¼” mark to form the center of the card. Make a diagonal fold on the 2 ¼” score line to the make a Mountain Fold and on the 1” diagonal line to make a Valley Fold.
Cut 1 piece of Green Card stock 7 3/8” x 3 5/8” for card center. Lay Die #1, from Petra’s Corners, on the top of the cardstock and trace around the outside edge. Cut it out by hand
Make a template to use as a pattern for the DSP. Cut template apart and trim each piece for your DSP.
Trace it onto the back of your paper; turn template over and trace again for the other side. Cut out. Adhere to card front as shown. I used 2 different colors of DSP.
Cut and emboss the Petra’s Corners die out of White Card stock. Before removing from die, use your blending tool to add blue to the embossed areas.
Cut and emboss Spellbinders Lattice Die out of White Card stock. Trim sides to fit inside the DSP in the card center. You want the green edges to show.
Cut 3 strips of white cardstock 1/16” x 6 ¾”. Glue the strips to the long sides of the lattice to cover the cut edge.
Lay the last strip on the bottom edge and cut the corners at an angle. Glue in place. Adhere Petra’s die to the top of the lattice. The lattice should not show through the die cut. Adhere to center of card.
I decorated the card using Roses from Heartfelt Creations Botanical floral PreCut Set Dies #1 and #2 and cut them out using Spellbinders Rose Creations Dies.
Emboss and Cut Marianne Creatables Leaves (Maple Leaves) out of 2 different shades of green. Before removing leaf from die color veins in Blue using your Blending tool.
Wet backs of leaves and scrunch, them up to give them dimension. Brush over leaf lightly with Mango Madness to give it the yellow of the background paper. Sponge edges with Fresh Green.
Make Butterfly flowers using the Punch Bunch Small Cherry Blossom Punch and blue cardstock.
Use white flower wire colored with green ink for the stem. Glue flower to the wire. The tiny daisies are from Fiskers Daisy Border punch.
Stamp greeting in Blue on white cardstock. Using Spellbinder Ribbon Banners cut and emboss the words.
Before removing from the die, use your blending tool and blue ink to add color to the embossed area and around the words.
Adhere to card front using Dimensionals. Add Rhinestones to the top of card as shown.
I placed the verse on the back of the card.
This card will fit into a 5 ¼” x 7 ¼” Clear Box.
Christina says ...
Beautiful card and very detailed instructions... thank you
Click here to read or post comments
Gate Fold Card with Telescoping Balls
by Emlie
(UA)


|

|

|

|
Card Base: Check out Christina’s Gate Fold directions. She has pictures and a video. My directions are a variation of what she has done.
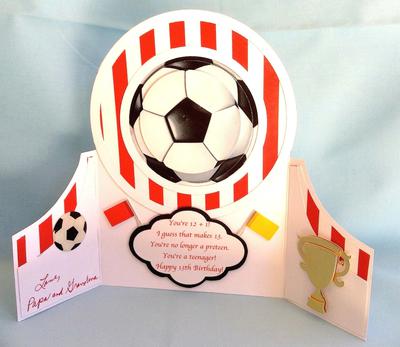
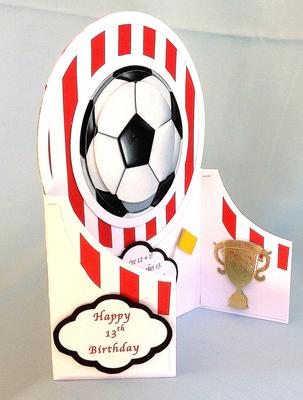
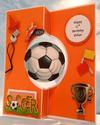
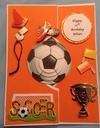
I saw a Gate Fold soccer card on Crafts you Print and decided to make my own version using telescoping balls and Spellbinders Dies.
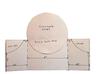
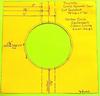
I have included my templates for you to refer to
The first thing I did was to make a template. Cut your Card stock 10” x 3 ¾”. Score each 10” side at 2 ½” and fold. The center will measure 5”. Die cut Grand Circle Die #3.
Close the card and slip Grand Circle Die #3 between the closed gates and adhere in place. Measure ½” along the top edge from the circle out. Measure the side edge up 2 1/8”; repeat on other side.
To Make the side curves, lay the outside edge of Grand Circle Die #2 so it meets the 2 ½” score line and the 2 1/8” mark on the side edge and trace the outside edge of the die and cut out by hand.
Repeat on the other side. Once you have completed the templates the card is very easy to make.
To make the actual card you will cut your cardstock 10” x 7 ¼”. Score as you did on the template. DO NOT FOLD.
Lay template over the card base and trace around the circle and the curved edges. Cut out by hand and fold on the score lines.
Cut Red/White DSP using Grand Circles Die #3 and adhere to circle. Cut a frame using Grand Circles Dies #3 and #2 out of White cardstock and glue around the red and White stripe paper.
To Telescope the soccer balls, Run 3 soccer balls 3 ½” round. Cut 1 out using Classic Circles Small Die #7, 1 out of #6, and 1 out of #5.
Adhere together using Dimensionals. Adhere flat to card base as shown. Cut a frame out of white cardstock using Classic Large Circles Dies #7 and #6. Glue the frame over the largest ball.
For the trim on the side flaps make a template for the DSP, trace it onto the DSP and cut it out. Make a template for the white that goes over the DSP on the flaps.
Adhere the White to the Stripes. Trim as necessary for white to fit. Adhere to the inside and outside panels.
All of the words are computer generated and cut out using Labels 6 Dies #2, #3 and #4. Trace the outside edge of Dies #2, #3 and #4 onto Black Card stock. Cut out by hand.
Adhere the words to the black. Attach to card front using Dimensionals.
Inside verse: Cut out using Dies #4. Trace outside edge of Die #4 onto Black and cut out. Adhere verse to the black. Adhere to card using Dimensionals.
Finish the card by adding Soccer stickers.
Christina says ...
We all find making male cards a challenge but this one fits the bill perfectly for any age group.
And it just goes to show how one simple design can be adapted to suit another with just a little bit of cutting and your imagination.
I am sure that any of the men in your life would love to get a card like this that shows you care by the time and effort you have used to make it
Click here to read or post comments
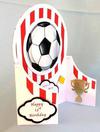
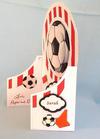
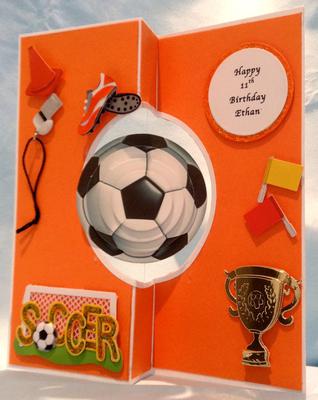
Spinning Soccer Balls
by Emlie
(USA)


|

|

|
I made this for my grandson’s 11th birthday. His soccer team colors are orange, gray and white.
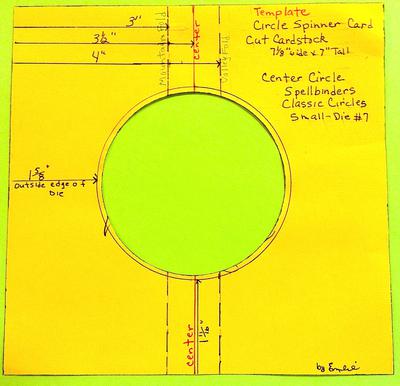
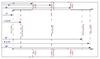
Make Templates before using good paper. I use printer paper to make my templates.
You need to make 2 of these templates: 1 for the card base and 1 to cut apart for the contrast color
Templates: Cut printer paper 7 1/8” wide x 7” Tall. On the 7 1/8” side measure: 3”, 3 ½” and 4”. Score only on the 3” and the 4” marks. DO NOT FOLD.
Draw a light line at the 3 ½” mark. This is the center of the card and where you will adhere the string for the spinning balls.
To cut the center circle place Spellbinders Classic Circles Small – Die #7 on the card so that the die is 1 5/8” from the left edge and 1 11/16” from the bottom edge. Cut out.
The 2nd circle needs to be in the exact same place as on the card base. Lay the 1st template over the 2nd. Lay the Die inside the cut circle and tape in place. Cut. Label the sections on the 2nd Template: Left Top, Right Top, Center Top, and Center Bottom. Cut out along the score lines.
Trace your contrast paper templates onto your contrast paper and cut out by hand. Trim 1/8” off the outside edges of the Left/Right pieces. For the center pieces trim the outside edge 1/8”.
Soccer Balls: Size 4 digi soccer balls 2 5/8” in diameter. Make a 2 5/8” circle for your words.
Cut 1 ball out of each of the Classic Circles Small - Dies #5, #4, #3 an #2. On the circle type the verse and cut out using Die #5. Set aside. Adhere balls together using 1 Dimensional in the center of each ball. Be sure the lines on the balls match up. Do not add the verse to the balls at this time. Set aside.
Assembling the card: Cut your White Cardstock 7 1/8” wide x 7” Tall. Lay the “Card Base Template” over your card base and tape in place through the center circle.
Tape Die #7 in place over the cut out circle and cut. Label the top of the card. Add your score and center lines. Trace your contrast templates onto your contrast paper and cut out by hand. Adhere the left/right sides in place. Don’t worry about the center it will be covered.
Spinner section: Place Red Line tape on the centreline from the edge of the circle to 1/8” from the outside edge of the card. Remove cover.
Cut a piece of thread 10” long (or fishing line). Lay the tread over the tape and along the center line, pulling it tight, leaving about 1” extending beyond the top and bottom of the card. Press thread into the tape.
Add another piece of red line tape over the thread. Remove the cover and loop the end of the string over tape. Press in place next to the original string so it won’t slip out. The loop keeps the thread from slipping out.
Find the center on the back of the verse circle. Adhere a piece of Red Line Tape down the center. Adhere the verse circle to the string and press the string into the tape.
Add another piece of Red Line Tape over the string and press it into the string to secure it. Add 1 more piece of Red Line tape on either side of the center thread.
Adhere the back of the balls to back to the Verse. Line up the edges carefully and center the lines of the ball along the string. Be sure it clears the die cut areas so it will spin.
Add the Center Top/Bottom pieces. Cut a white circle frame using Classic Circles Large Dies #7 & small #6. Adhere around the center circle.
Greeting: Type Happy Birthday using the Apply Chancery Font in a size 12; run on White Cardstock.
Cut out using Classic Circles -Small -#3. Cut/Emboss Classic Circles - Large - #3 out of orange paper; Adhere greeting circle to the Orange circle matching the small circle to the score lines.
Add Orange Stickles along the edge of the orange circle. Adhere to card using Dimensionals.
Finish the card by adding soccer stickers.
Click here to read or post comments
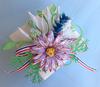
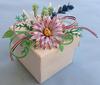
Aster Treat Box
by Emlie
(U.S.A.)


|

|
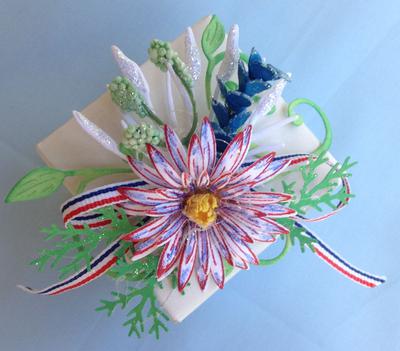
I bought the box and then decorated it for dinner party;
I used Heartfelt Creations Delicate Aster Dies and Delicate Aster PreCut Set. Stamp the Asters using Black ink - stamp 2 - #2 and 1 - #1 on White Cardstock.
I colored them before I cut them out using Pink & Violet Colored Pencils. Color the center using a Yellow Marker. Cut them out using the Delicate Aster Dies.
To form the Asters: Turn the Asters over and lightly mist them so you can shape each petal. Gently pull each petal up towards the center.
Turn the petals over and push down in the center so the petals rise up. Hot glue the petals together, alternating the petals between the rows. Use your two-way glue pen to add some glitter to the flowers.
Flower Center: Punch 2 Punch Bunch small Suns (1/2”). Make a slit between 1 of the petals to the center. Cup the petals using your flower forming toolkit so the tips turn slightly in.
On the 1st sun: Place your tweezers on one side of the slit and roll the petals around to make the cup smaller. Hot glue the open ends together.
On the 2nd sun: Place your tweezers on one side of the slit and roll the petals around to make a cone. Hot glue the open ends together. Hold for a few seconds so they stay tight. Hot glue sun #1 inside of sun #2. Use 2-Way Glue and glitter the center. Hot glue the center of the Aster in place.
Stalk Flower: Using the Punch Bunch ½” Cherry Blossom Punch, punch 6 flowers. Mark the center of the flower and cut off 1 ½ petals. That leaves you with 3 ½ petals.
Mist the 3 ½ petals and, with the half petal on the right side, use your Flower Forming Tools to shape the petal into a cup. Turn the flowers over and press down in the center to cup it again. (Single petal is now on the left side)
Use your tweezers to roll the single petal inside to begin forming the flower. Hold for a few seconds so it holds it shape. Use “Quick Dry Glue” on the inside of the 1st scallop of the double scallops; pull the single scallop over the double scallop and adhere to the 1st scallop.
You should now have 6 scallops. Let Dry thoroughly. Use piercing tool and make a hole in the center. With the piercing tool still in the flower use your tweezers to roll the petals out. Cut 1 ½” piece of floral. Thread flowers on the wire by pushing wire through the center of the flower.
Put a TINY drop of hot glue on the end of the wire and push the flower to the tip of the wire. Use your Tweezers to roll the petals to the outside.
Thread the next flower onto the wire. Hold it in place and add hot glue to the bottom of the flower to adhere them to the wire.
Repeat with the remaining flowers. Be sure to leave a little space between the flowers so you can see the individual flowers.
Cut the “Fan Shaped White Leaf” from Marianne Creatables Seed Heads Dies. Cut the stem off and form the solid part into a cup using your flower toolkit. Add “Stickles Frosted Lace” to the seeds.
The bow was made using 11” of 1/8” Red, White and Blue Ribbon. I added green foam flowers. The flourish is Cherry Lynn’s Mini Fanciful Flourish. The branches are form the Martha Stewart Branch Punch
Christina says ...
Absolutely gorgeous ... but where was my dinner invitation ???
Click here to read or post comments
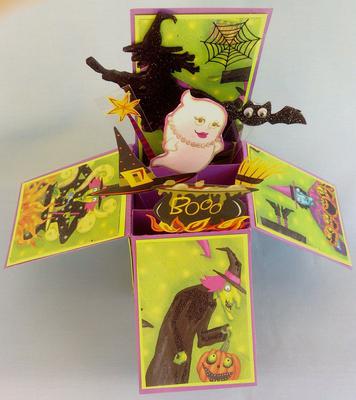
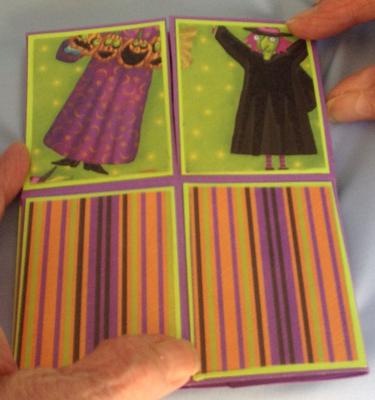
Rubber Band Card in a Box Pop Up
by Emlie
(U.S.A.)

|

|

|

|
I have seen so many “Card in a Box Pop Ups” that I decided to try one myself. Of course I had to make changes to it. I wanted my card to actually “pop up”!
You can make this card any size or shape as long as you follow the basic directions. You can also find videos on You Tube on how to make the base card.
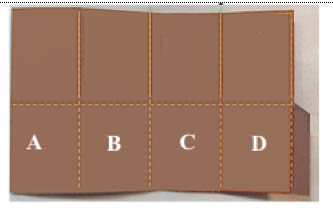
Here is how I made my card: Cut your cardstock 5 ½” x 9”. On the long side, score at 2 1/8", 4 ¼”, 6 3/8”, and 8 ½”. Turn cardstock so the 5 ½” side is along the top of your ScorPal and score at 2 ¾.
Use your scissors to cut the score lines up (see solid orange lines) to the 2 ¾” center score line. On this last piece, at the 8 ½” score line, trim that piece off at an angle at the 2 ¾” score line. That is going to be the flap that closes our box.
This is the web site where I got the Rubber band hooks: http://extremecards.blogspot.com/search/label/rubber band pop up.
The link to the hooks is about ½ way down the page. Follow the directions for making the hooks. I reduced my width of my hooks so the were 1” wide x 4 7/8” long. Set aside to dry before using them.
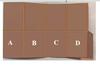
Refer to the hook diagram for placement. Have the closure of the card on the right bottom side.
Turn hook pieces so the hook is facing down. Center the hook piece over the score line between “A” and “B” and adhere to card.
Adhere the other hook the same way, over the score line between “C” and “D”. We will add the rubber band after decorating the card.
Cut 2 pieces of Contrast Cardstock 2” x 5 3/8. Adhere to the front and back on the card center, which is “D” on the diagram.
Cut 9 Pieces of cardstock 2” x 2 5/8”. Lay 3 pieces of cardstock over the top flaps of “A, B, and C”. These flaps will show when the card is open.
Turn card over and cover the rest of the rectangles. This will become the outside of the box. For your greeting, cut 1 piece of white cardstock, 1 ¾” x 5 1/8”.
Add your verse and using your blending tool, add black to the edges. Adhere to the center back of the card. The closure tab is on the bottom left.
To close the box, fold the tab in and put a piece of Red Line Tape on the folded edge of the tab. Place a 2nd piece of Red Line tape at the cut edge.
Remove the tape cover and fold the card at the 4 ¼” score line, lining up your edges and press the edges together to make the box. Fold the 3 side flaps down, but do not fold the center piece.
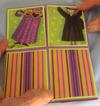
For the inside frames, cut 2 pieces, 1 ¼” W and 3 1/16” L, out of your left over cardstock.
Score the 3 1/16” side at ½”. Flip cardstock horizontally and score the other end at ½”. Fold the edges in.
Put Red Line tape, or glue, on the outside of the ½” score at the fold. Remove tape from 1 side.
The open edge should touch the back of the card and be slightly below the sides; adhere in place on the inside of the box. Repeat for the other shelf with the open edge touching the back of the card and slightly below the sides.
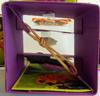
I used stickers and rubber stamps to make the Halloween decorations. You will need to cut 3/8” W x 2” L strips from overhead or window sheets.
Attach a glue dot do to top of strip and adhere to the back of your decoration. Place your decoration on card and trim the strip to fit.
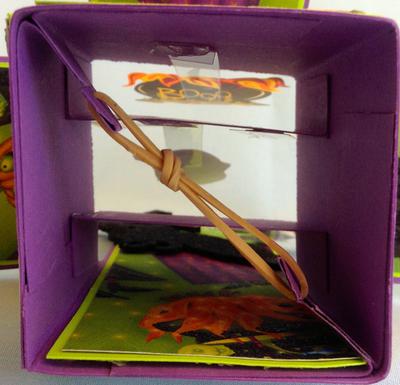
Place a glue dot on the bottom front of the strip and adhere to the back of the shelf. When finished decorating the card, take a rubber band, tie a loose knot in the center and hook the ends into the hooks.
The rubber band should not hang loosely. If it does, get a smaller rubber band or tie another knot in the center of it.
To close the card, push the base to the right and place it in a 4 ¼” x 5 ½” envelope. When the card is removed from the envelope it will automatically pop up and open.
Christina says ...
Who could resist this ingenious little project and thank you for such detailed instructions. I am sure that lots of readers are going to be trying this out for them selves.
It makes a really cute gift and one that is sure to fascinate the children in your family.
Click here to read or post comments
Interlocking Gate Fold
by Emlie
(USA)


|

|

|
This is my version of how to make the Vine:
Die cut 5 buds using “Rose Creations Dies” – Die #2. Form the flowers into buds using your flower Forming Toolkit.
Punch Bunch 5 Small Snowflakes, using the Punch Bunch Small Snowflake, out of green and form it.
Put glue on the base of each bud and adhere to the snowflake. Let dry thoroughly. Use your piercing tool to make a hole in the base of the flower.
Take a thin floral wire and make a hook on the end. Add the flower color to the hook ink. Place the end of the wire through the flower so that is comes out at the base. Don’t pull the wire all of the way through, yet.
Add glue to the flower center and pull the wire through. I cut the wire that is sticking out of the flower so it is about a ½” long. Let dry.
I used 8 digi leaves that I sponged them in yellow and 2 shades of green. Add wire to the back of the leaves.
This makes it easier to form the leaves. Cut 5 ½” of the wire for the vine. Lay your leaves and flowers on your wire to determine where you want to place them.
Dip leaf wire into hot glue and attach the wire to the vine. Dip the Flower wire in hot glue and adhere the wire to the vine.
Wind floral tape around the wire being sure you go around each leaf and flower so they are secured to the vine. Form the vine to fit on your card and hot glue in place.
Since the flowers and leaves are on wires you can easily reposition them the way you want. I added Cherry Lynn Baby’s Breath to the vine.
I made 3 flowers using “Spellbinders Rose Creations Dies”: Cut 2 from die #2 and 1 from die #1 per Flower.
Then sponge the front and back of the tips of the petals with Pink Chalk Ink. Form the flowers by rolling the petals around a round plier and use your Flower Forming Toolkit to cup the center.
Glue the petals together to make a flower. Use “Punch Bunch 1” Big Sky Punch” for the center.
Cover the spikes with Fruit Punch Stickles. Let dry. Lay center on the Flower Forming Mat, Press down in the center to bring the rays up.
Glue to center of flower. Cut 3 stamen, ½” long, glitter the ends. Hot glue the stamen together. Then, hot glue the stamen to the center of the flower.
I used Marianne Creatables Seed and Head Leaves and Decorative Elegance with the 3 full flowers. The tag was punched using the “SU! Word Window Punch”.
Christina says ...
Beautiful card and the vine finishes it off beautifully. It is a card that would be suitable for any occasion and in any color.
Quite a lot of work involved but so well worth the effort.
Click here to read or post comments
Christmas Robin Upright Diamond Fold Card
by Emlie
(USA)


|

|
I fell in love with the card the moment I saw it. This is an easy card to make.
You download all of the digi pieces from http://www.card-making-downloads.com
Print the digi sheets onto white cardstock. There is also a video to help you.
These are the changes I made: I used regular cardstock instead of glossy paper. I thought the card was too hard to fold using 2 pieces of glossy paper glued together. So, I chose Rust colored cardstock for my base.
I took the card base I printed and, using it as a template, transferred all of the score marks onto the Rust colored cardstock and cut it out, scored the fold lines and folded the card.
I cut apart all of the design pieces and trimmed them like they were DSP. I used the designs as layer 2. I didn't want the design to go over the fold lines because they would be very thick and I didn’t like that.
Adhere the design pieces on the card and shown in the directions. I did not add a 2nd layer to the card back.
I added gold glitter around the inside verse section and around the largest telescoping piece. Adhere the rest of the telescoping pieces using Dimensionals and your card is finished.
Christina says ...
A very pretty and unusual card and I like the color scheme you have chosen. You can find a similar type of fold here on CMM and all you need to do is turn it on it's side
You will find a Video Tutorial in the NavBar to your left and the title is Springfold Card Tutorial
Click here to read or post comments
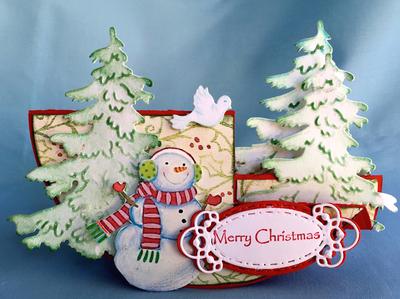
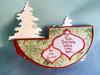
Circle 2 Step Card - Christmas
by Emlie
(USA)


|

|

|
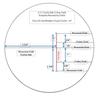
Make a template out of printer paper: Cut a circle using Spellbinders Grand Circles Die - #5. Carefully fold circle in ½ and crease, then open.
Refer to the template I have included for the rest of the measurements. The template is not to size, so you must make your own.
A simple way to transfer your template to your good cardstock is to paper clip your template to the cardstock. Then, lay it on your cutting mat.
Use your piercing tool to poke a hole at each corner and where the lines meet. Save the Template to use again.
Using your ruler and embossing tool, join the marks together. Now, Using your ruler and Exacto knife, cut on the cut line as shown on your template.
Fold your mountain and valley folds as directed. Be sure to make hard creases on the folds.
Cut DSP, sponge edges with “Brilliance Pearlescent Ivy Ink” and adhere to the front, back and steps of the card.
The snowmen were cut from wrapping paper. The trees were cut and embossed using Marianne Creatables Pine Tree die.
I used a blending tool to add the green to the trees. Add glitter to the trees and snowman. Christina has great instructions on how to use a blending tool.
The White Dove is from “Heartfelt Creations Garden Romance Dies”. I added the blue using a colored pencil. Attach the pieces using Dimensionals.
The Tag is from Spellbinders 5” x 7” Detailed Scallops. I followed Christina’s directions on how to add the red background to the back of the tag.
For the verse on the card back I cut & embossed Heirloom Ornaments Dies #2 & #3. Sponge the edges in red and adhered them to the card back. This card will fit in a 5 x 7” envelope.
Christina says ...
Such a pretty card that would look wonderful anywhere it was placed and thank you Emilie for such detailed instructions.
I am sure that other visitors to the website will be really with the cards that they make and I hope that they will add them here in the Gallery too.
Click here to read or post comments
Flip Floral Card
by Emlie
(USA)

The first card I made like this was for a man’s birthday.
I purchased a template before I realized that I could have used Christina’s Flip Card Tutorial: https://www.card-making-magic.com/flipcard.html or watched her video https://www.youtube.com/watch?v=hVUz5b9FPv8&feature=em-subs_digest-vrecs, and just added a step to the centerfold.
The triangle and Diamond shapes are cut using Spellbinders Classic Square Dies. The DSP is from my stash. I added a floral lace border to the edges of the card.
The green leaves are digi. I ran of a sheet of them, cut them out and colored them. I keep them on hand for when I need something different.
The gold and white fan shapes are from Marianne Creatables Seed and Head Leaves. I cut them out of Beargrass Metallic Vellum and glued the gold on top of the white, staggering the petals.
The Flowers are cut from Beargrass Metallic Vellum using Spellbinders Rose Creations Dies. Cut 1 of #1 and 2 of #2 for each flower.
Cut Stamen from Cheery Lynn “Build a Flower out of “Rose Metallic Vellum”. Sponge petals using “VersaMagic “Red Magic” Chalk Ink.
The original template for this card was from Craftsuprint.
Christina says ...
Such a pretty card and the flowers really do stand out as a statement piece.
This is definitely a girly card and I am sure that whoever receives it will be delighted with it.
I really like the little floral edging you have added as this just adds the finishing touches
Click here to read or post comments
Aster Pop Up Book Card
by Emlie
(USA)

|

|

|
The finished card measures 6” Square. The card base is a light green cardstock cut to 6” x 12”. Score at 6” and fold.
Cut 2 - 10” pieces of ribbon and attach to the inside of the card to tie it shut. All of the DSP is from Heartfelt Creations “Delicate Aster Collection”.
Cut DSP 5 7/8” Sq. and adhere to card front. Using Black Cardstock cut/emboss the Fleur De Lis Squares-2nd from center.
Stamp your greeting in Black on DSP and cut it to fit in the center of the Fleur De Lis Square. Adhere the words to the frame. Add small pearls as shown. Adhere to card using Dimensionals.
Before attempting this card on good paper make a sample on scrap paper. I have included a template, but you can see the original diagram on how to cut & score the inside of the card at http://frommycraftroom.blogspot.ca/2013/01/pop-up-book-card-tutorial-6-x-6-card.html
I changed the sizes to suit me and will be referring to my measurements in my directions.
For the inside of card refer to the Score line Temp.
The Aster flowers and buds were made using the Heartfelt Creations “Delicate Aster Pre Cut and Dies #3 & #4”. Stamp 2 of #3 and 1 of #4 on white cardstock in black ink.
Color the petals in Pink & Violet Colored Pencils; color the centres in Yellow and cut out. Use your flower forming tool kit and mat to form the flowers.
Working on the back of the flowers, pull the petals toward the center. Turn oven and push down in the center to bring the petals up. Hot glue the petals together, alternating the petals. Use your 2-way glue pen to add glitter to the petals.
Flower Centres: Cut 2 yellow Punch Bunch Small Suns. Make a slit between 1 of the petals to the center. Cup the petals.
On 1 of the suns, use your tweezers to roll the petals into a smaller cup and hot glue together. On the other sun, roll into a cone shape and hot glut together. Hot glue the cone shape to the inside of the other sun. Glitter. Hot glue cone shape to the center of the other sun.
Flower Buds: Stamp/cut and color 2-#3 Asters. Working on the back of the petals, use your flower forming tool kit and mat to cup the flowers.
Hot glue them together, alternating the petals. Now, cup them by holding the tips together for a few seconds so they hold their shape. Glitter. Hot glue flowers and buds to the card.
Add inside verse. Cut Butterflies from DSP and adhere to card using Dimensionals.
Click here to read or post comments
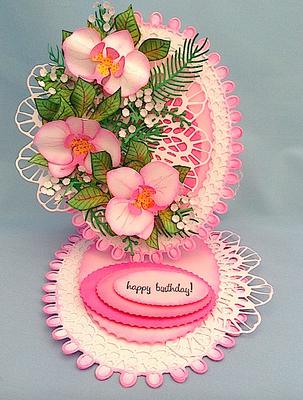
Oval Easel Card With Orchids
by Emlie
(U.S.A.)


|

|


|
I saw a card using the Lacy Ovals on Anita Kejriwal’s blog and decided that they would be the perfect choice for my new Spellbinders Orchid dies.
Make 3 orchids.
I cut the “Angel wings and Lace Oval (Cheery Lynn DL 136AB) out of white cardstock.
For the card base, cut your 8 ½” x 11” cardstock to 4 ¼” x 5 ½”. Make 2 marks 2 1/8” from the left side.
This line is where you put the straight edge of the Angel Wing. Draw a light line to connect the marks.
Lay the Angel Wing so that the straight edge of the die is along the centerline. Tape in place and cut.
Turn die over and place it on the right side of the line, tape in place and cut out. You need 2 of these. Sponge the edges, front and back, in pink.
For the card base take a 4 ¼” x 11 piece of cardstock; fold it in ½ so you have a 5 ½” x 4 ¼” piece.
Make 2 marks 2 1/8” from the left side, and draw a light line to connect them.
Place the top of the die just above the top of the fold (see Christina’s hinge card for how to do this), with the straight edge along the pencil line.
Tape in place and cut out. Turn Die over to the right side and repeat, being sure to match up the edges of the die before cutting out.
You now have a card base with a hinge. Sponge the edges, front and back, in pink. Fold the top oval in ½.
Cut out 2 of the lacy ovals and sponge the edges pink. Cut 2 of the (Cheery Lynn Italian Flourish Doily DL 103), and cut 1of the doilies in half.
Using (Cheery Lyn Inverted Scallop Ovals XM-9) Cut out 2 of #6, 1 of #4 and 1 of #1 out of light pink; cut 2 of #3 in dark pink; and 1 of #2 in a dark shade of pink. Sponge the edges.
Assembling the card: Open the top of the card base and fold it in ½. Add Red Line Tape below the fold.
Line up the scalloped edges on your Angel Wing with the scalloped edges on the card base, remove the tape and press the angel wing in place.
Adhere 1 of the Lacy Ovals over the card base. Add ½ of the doily to the right side; cover it with the Inverted Oval #6.
Layer 3 Ovals together using Dimensionals and adhere to inside of card as shown.
On the card front glue the Lacy Oval in place. Use Dimensionals to add the inverted Oval #6. Adhere 1 of the dark ovals to the front and glue the doily over it. Add your Orchids.
Christina says ...
Such a pretty card and thank you for the detailed instructions. I am sure that many readers will be trying this out for themselves and making cards to be proud of
Click here to read or post comments
Corner Die and Spellbinders Labels 23
by Emlie
(U.S.A.)


|


|
I cut 7 corners from White Cardstock using the Cheery Lyn Lace Corner Die.
Score down the center to make it easier to fold. Sponge all of the edges in turquoise. Fold in ½ on the score line.
Color will be on the inside. Fold the outside edges toward the outside.
Punch a ½” circle and sponge in turquoise and place a dot in the center.
Using hot glue, only on tip of the folded petals, glue on opposite sides of the center dot.
Now, center 2 petals on each side of the first 2 petals. Save the extra petals for the top left corner.
You can find a tutorial for this much of the flower at Cheery Lynn Designs.
The following are the changes I made to the flower: I added 9 stamens to the flower. Roll the stamens in the Tsukineko Essentials Glue Pad and dipped them in Turquoise Glitter. Let dry.
Make the center flower out of “Frost Metallic Vellum” using Rose Creations Dies #1 & #2; cut 2 petals of each size for each the flower.
Use the Flower Forming Toolkit to form the flowers, then, roll each petal around a round nose plier.
Hot glue 2 of each size petal to form the flower. Slip 3 stamens in the center hole of the flower and hot glue in place. Sponge flower edges with Turquoise.
Hot glue the flower to the center of the Lace. Hot glue the 6 remaining stamen under the center flower between the lace petals. Repeat the center flower 3 times. Set aside.
For the card base score an 8 ½” x 11” Naturals Ivory Cardstock at 5 ½”. Lay Grand Labels 23 Die #4 so the top edge of the die is outside of the fold so the card stays together when you cut it.
Before removing from the die add the turquoise using a blending tool. Cut Grand Labels 23 Dies # 1 & #2. Before removing from the die add the turquoise using a blending tool. Use a blending tool to add ChocChip to the edges of all the pieces.
Use the Cuttlebug Chic Circle Embossing Plus Folder for the center. Use your blending tool to add color to the raised embossed areas.
I also used a colored pencil to make the turquoise darker. Die cut 1 each from Cheery Lyn Fanciful Flourish-Large & Mini and Cheery Lyn Olive Branches from Apple Crush Cardstock.
Add the extra Lace corner to the upper left corner of the card. Add 1 flower center to it.
Add the last 2 flowers to the floral spray. Add Blue jewels as shown.
Christina says ...
Another beautiful card from Emlie and with the detailed instructions you all appreciate.
The card is lovely and would be suitable for any occasion. But you may need to search for the Labels 23 die as it has now been retired by Spellbinders
Click here to read or post comments
Rectangle Card in a Box
by Emlie
(U.S.A.)
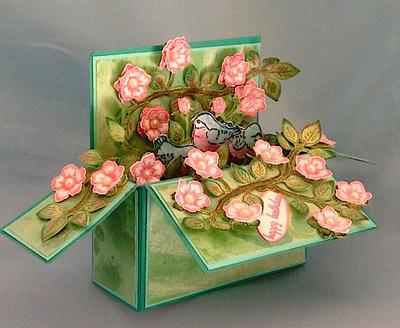

Christina has just made a beautiful card in a box. I wanted a larger box so I changed the sizing of my box to fit on a 4 ½” x 12” piece of cardstock.
Follow Christina’s directions how to assemble the box.
First, make a template using the following measurements: Starting on the 12 “ side, make a mark at: 1 5/8”, 5 5/8”, 7 ¼”, 11 ¼”, 12”. On the short side make a mark at 2 3/8”.
When the template is complete paper clip it to your cardstock, place it on your scoreboard and score on all of the lines.
I left the center back standing up rather than folding it back. Cut on all of the lines above the centerline and fold both small flaps and the front flap.
Leave the back standing up. Add Contrast paper and DSP to the base of the box. Cut 2 strips for the shelves ¾” x 5”, score ends at ½” and fold the tabs forward.
Stamp the birds on white cardstock using black, and stamp the flowers in pink. The branches were stamped in black and sponged in 2 shades of green before some adding for accent color to match the flowers.
The leaves were also sponged in 2 shades of green and I added a little pink accent to them to tie them in with the flower.
The birds were colored using blue and pink chalk. I used my flower forming toolkit to shape the birds and flowers and them layered them on the branch using Dimensionals. I added pearls to the center of the flowers.
Adhere the shelf strips on one side of the box ONLY, and leave the other end loose. I adhered the front shelf about ¼” lower than the back shelf.
Form the box by adhering the tab edge to the inside of the opposite end to form a box. Now attach the loose ends of the shelves to the other side of the box. Tape box shut and then adhere the shelves to the to opposite edge of the box.
Add the branches, birds and flowers to the shelves and the flaps using Hot Glue. I have my verse on the back of the center panel.
Christina says ...
These box cards are so pretty and very easy to make. The tutorial for the one I did can be found in Tuesday Tutorials on my blog at Flowers, Ribbons and Pearls.
But you can change yours ... as Emlie has done to be any size that you need. Try it for yourself you will not be diappointed
Click here to read or post comments


Recent Articles
-
Memory Book
Oct 15, 22 09:17 AM
 Make a memory book, fun to make and even lovelier to give.
 -
Die cut letters.
Jul 19, 21 10:12 AM
 Add that personal touch with die cut letters, add names or sentiment as you please.
 -
Diaper Fold Card.
Jul 19, 21 09:34 AM
Create this fun Diaper Fold Card...and no need for a pin!
Search
