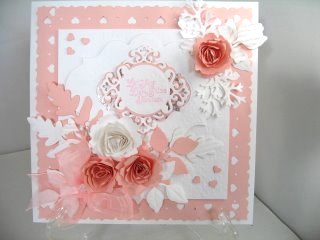
Create Big Cards with Spellbinders
Be up to the minute with the latest trend and create Big Cards with Spellbinders, cards that will make your designs stand out from the crowd
Although this video is using the Spellbinders that have been featured throughout the series you will still be able to create this project from the written instructions here for Big Cards.
You can use any brand of dies that you have and in those written instructions there isn't a Spellbinder in sight.
But if you have Started Your Spellbinder Collection then this will show you how to use them again for a more detailed finish to these larger cards.
The other videos in the series will also show you different designs that you can make all using the same set of dies.
More from Your Spellbinders
Flip Card with Spellbinders
Aperture Card with Spellbinders
Spellbinder Special Card
Felt Flowers with Spellbinders
Gatefold card with Spellbinders
Alternative Spellbinders
Nestabling and Spellbinders

You don't even need to buy the larger cards to get started as this video will show you how to get the look from all the A4 card that you may have in your "Stash".
I have even covered how to make the back of the card just as attractive as the front ... so that from whatever angle your design is viewed the recipient will not be disappointed.
If you have watched the other videos in this series then you should be feeling pretty confident by now, in how to get the most from the Spellbinders.
Adapt some of these ideas to any dies in your own collection for a really special look
I know that you will love every card you make and will be so proud to show them off to family and friends.
And don't forget to show them to us all as well as we would love you to add your cards to the Gallery.
You can add four photos at any one time . it could be four different cards or the same cards from four different angels, the choice is yours, but it is very easy to do.
Just have the nerve to get started and then you will really enjoy your cardmaking creating Big Cards with Spellbinders.
And to store the Spellbinders when you have finished creating just add them to some magnetic sheeting that you have cut to size and stapled inside the original package.
That way you will always know where they are and if one is missing then instantly you can search for it.
It is so easy to leave the smaller ones attached to your card, if you use the low tack tape ... and this will make you check properly.
Return from Big Cards with Spellbinders to Homepage


Recent Articles
-
Memory Book
Oct 15, 22 09:17 AM
 Make a memory book, fun to make and even lovelier to give.
 -
Die cut letters.
Jul 19, 21 10:12 AM
 Add that personal touch with die cut letters, add names or sentiment as you please.
 -
Diaper Fold Card.
Jul 19, 21 09:34 AM
Create this fun Diaper Fold Card...and no need for a pin!
Search
