Rubber Stamps
I love Rubber Stamps and the effects they can make to enhance your cards.
From creating a background or making the main focal point to your designs the results need to be good each and every time.
There is a vast choice in stamps so choose carefully and make sure it is one you will use over and over again.
They come in all different images and can be used in a variety of ways, to enhance your projects quite easily, and effectively.
Try to buy a good quality stamp, and one that you know you will be able to use time and time again, on lots of different projects.
If cared for properly they can last you a lifetime and over the years you will build up a sizeable collection
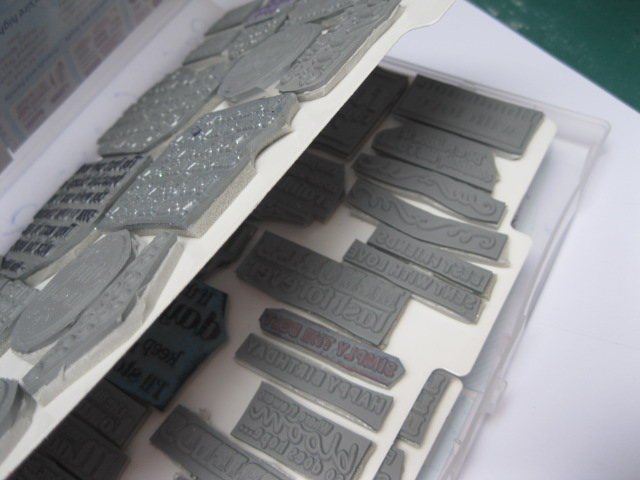
Rubber Stamps can be mounted or unmounted.
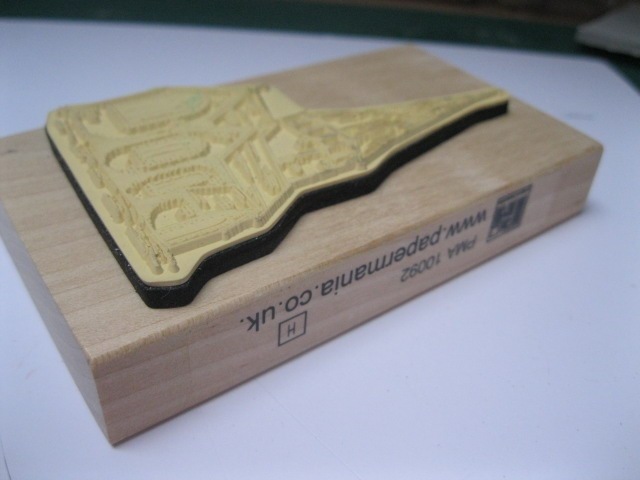
Mounted stamps ...
are glued to a wooden block, with a foam cushion in between.
They are more expensive than the unmounted ones, and the image is usually on the top of the block as an index and to make sure that you stamp it the right way round.
They need to be cared for carefully. Never put them in water as this will rot the wood. The glue will come apart and the stamp itself will fall off the block.
Don't use an oil based solvent to clean them as this will perish the rubber. Use a specialist cleaning agent to give long life to your stamps, before you store them away.
But for quickness, if you are just changing colours, then a quick wipe over the stamp with a baby wipe will remove the ink.
Then when you have finished the project, clean them properly, with the specialist cleaning fluid.
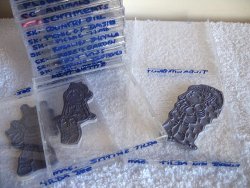
Unmounted stamps ...
are either made from clear silicone, acrylic or polymer, or the same kind of rubber as the mounted ones, just minus the wooden block.
Both these types of stamps can be stuck onto an acrylic block with a glue stick, spray on glue or by mounting onto a ready sticky stamping cushion.
The acrylic blocks are see through, and this helps you to position the image where you want it, with more accuracy.
This sort of stamp, and the blocks can be easily washed in warm soapy water, and they are a lot cheaper than the mounted ones.
 |
 |
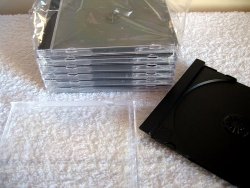
This is an excellent way to store your unmounted rubber stamps.
Take a clear CD case and remove the inner part that holds the CD in place.
You may need to push out the little lip to accommodate larger stamps, but most will fit as they are.
Use a permanent marker pen to write on the case what the stamp is, and store them all on a shelf or in your cupboard.
There you have a perfect storage system and all can be seen whenever you open the cupboard door.
 |
 |
I like to add foam mount to the back of my stamps and I store them flat. I also like to keep them together in the sets they were bought in and then I always know which stamp is which.
I can also add the stamp packaging to my storage folder and that will index all the sets for me.
There is a video that will help you when the time comes to
Mount Your Stamps
and it will show you the best way to do that.
Always apply your rubber stamps on a flat solid surface.
Your table top may look flat but any bumps or ridges in it will spoil the effect. Try a couple of sheets of old newspaper under the card you are stamping on to. I prefer to stand up.
Stamp onto small pieces of card and mount the finished image on to the main card.
That way if you make a mistake you have only lost a small piece rather than the whole card. Especially if it is a special cardstock.
Tap the ink pad onto the stamp, and make sure it is well covered. Any dry areas will not print out, and so spoil your image.
When applying the image use firm even pressure. Don't allow the stamp to move or rock as this will blur the image.
Clean the rubber stamp before changing colour to prevent contaminating the ink pad. An oil free baby wipe will work between colours.
The Video "Tips for Perfect Stamping" will give you more advice especially if you are new to this technique
Spotlight Stamping
Masking techniques
Choosing Inks
Colouring in
Chalks
Copic Marker Pens
Enlarging stamped images
Paper Piecing
Techniques
Card-making equipment.
Cardmaking Ideas
Easy Projects
More Projects
Kinetic Cards
Papercrafts
Return from Rubber Stamps to Homepage


Recent Articles
-
Memory Book
Oct 15, 22 09:17 AM
 Make a memory book, fun to make and even lovelier to give.
 -
Die cut letters.
Jul 19, 21 10:12 AM
 Add that personal touch with die cut letters, add names or sentiment as you please.
 -
Diaper Fold Card.
Jul 19, 21 09:34 AM
Create this fun Diaper Fold Card...and no need for a pin!
Search
