This Pocket Card is a useful addition ...
...To your Cardmaking Skills.
Easy to do this Pocket Card is handy for lots of occasions
For other ideas with this style of card take a look at Folded Cards
Or if you prefer to watch then you will find a short video here to explain all your choices when you make this card. Crossover Card Tutorial
This handy little pocket card can be used for male or female, and can cover a lot of different occasions.
It is very easy to make and you will need
three pieces of cardstock in the same colour.
Step 1
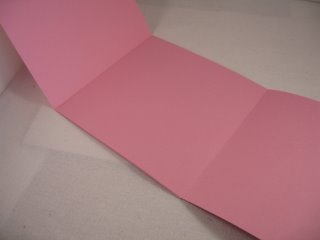
I have trimmed two pieces of the card to measure approximately 15 x 29.5cms. (6 x 11.75") and then folded it in half.
This makes roughly a 15cms (6") square card. You will need two of them the same size.
Step 2
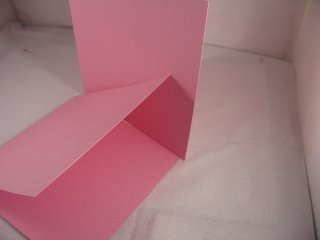
Lay them flat on your worktop and have one of the flaps opening to the right and the other to the left.
Lay the two backs of the cards together, and with a strong glue stick one to the other.
Step 3
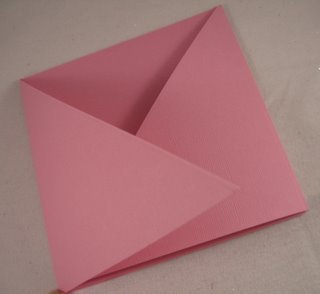
Trim each of the side panels as shown in the photo.
From the top inner edges to the bottom outer edge, and then crease the folds with your bone folder.
It should look like this when you have done so.
Step 4
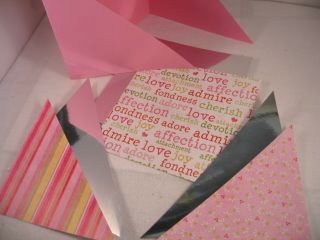
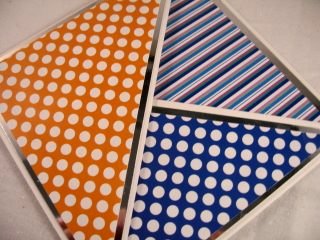
Now for the back of the card, and each of the triangular panels you will need to make smaller panels to fit.
I have used Mirror card, and then three smaller, different patterned papers on top of that.
Step 5
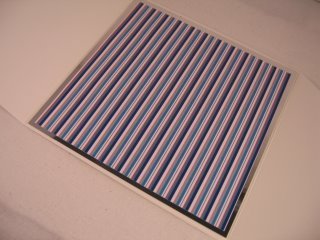
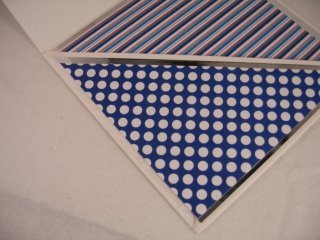
Mat and Layer all the papers together and fix the back panels in place first.
(The stripy paper is on top of the mirror card.)
Step 6
The next step is to fold the two sides inwards, one at a time, and fix in place with double sided tape on the bottom edge only.
It doesn't matter which side you fold in first, but fold the second flap in and stick along the bottom edge also.
This creates the pocket of your card.
Step 7
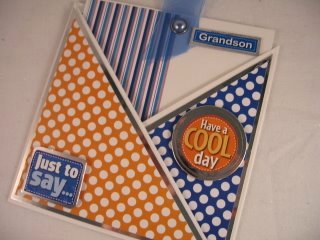
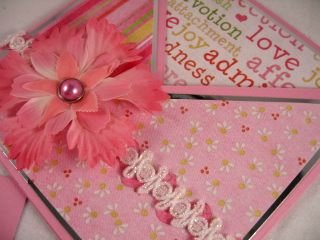
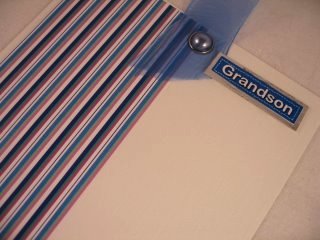
Decorate the pocket however you wish to suit the recipient.
These two are made in different colourways to suit male or female.
Now lets make the inner part of the card.
Step 8
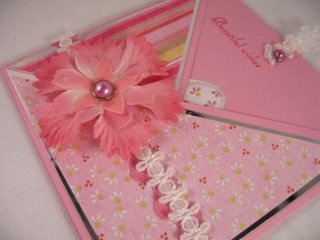
With another piece of card to match your project cut a panel that is a 14cms (5.5") square.
Make sure it slides in to the pocket and trim it accordingly till it does.
I have added some ribbon with a brad, to the top of the panel so that the recipient can pull the slider out.
On this panel add your message and any sentiment that you want but keep them flat to the card or it won't fit into the pocket.
And there you have a very pretty Pocket Card for any occasion...and the message can be a secret if you want...
Return from Pocket Card to Homepage
Search


Recent Articles
-
Memory Book
Oct 15, 22 09:17 AM
 Make a memory book, fun to make and even lovelier to give.
 -
Die cut letters.
Jul 19, 21 10:12 AM
 Add that personal touch with die cut letters, add names or sentiment as you please.
 -
Diaper Fold Card.
Jul 19, 21 09:34 AM
Create this fun Diaper Fold Card...and no need for a pin!
Search