Create this Stepper Card Easily ...
and not a ruler in sight
Do you like the look of a Stepper card, but can't be bothered with the measuring? Well try this one instead.

On this website you will find the detailed instructions to create all the styles of these Cards.
Side Step Card and the double version, are there for you as well as the Centre Step Card
But if getting out the ruler and pencil is not your thing, then this one will appeal to you even more.

Or if you prefer to learn visually then Click here. for the video version of the instructions for this Card.
Step 1
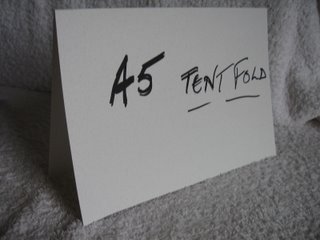
You will need an A4 card, some pretty paper, a topper of your choice, a sentiment and anyembellishments that you have in your stash.
So to start!... fold your A4 in half and keep the spine at the top. (Tent Fold)
Step 2
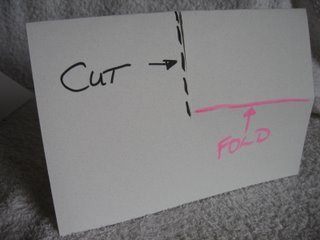
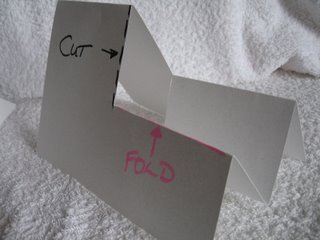
Then depending on the size of your topper, cut in to the center but leave enough room to fit your topper and any layers that you add.
Only cut half way down the card,(the dotted line)
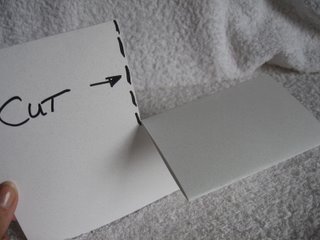
Keeping the card closed you will fold it to the back, and crease it sharply...
Step 3
...and then fold it the other way and crease it this way too.
Step 4
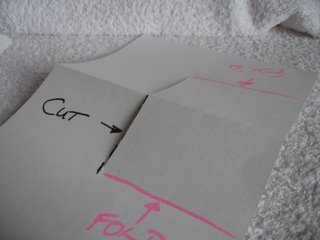
Now open the card out and this is what you should have.
You will need to push the center fold in to the cards center (Valley fold) and crease the other two up (Mountain fold)
Step 5
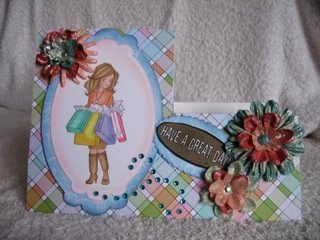
The end result is this shape.
It can be used either way round and dressed as you wish, for any occasion
I have used Punched flowers, Gemstones, and some lovely Decorative Pins on some of the cards, and Brads, Buttons and Glitters on others.
But what ever you decide to add to your creations have fun.
Return from Stepper Card to Homepage


Recent Articles
-
Memory Book
Oct 15, 22 09:17 AM
 Make a memory book, fun to make and even lovelier to give.
 -
Die cut letters.
Jul 19, 21 10:12 AM
 Add that personal touch with die cut letters, add names or sentiment as you please.
 -
Diaper Fold Card.
Jul 19, 21 09:34 AM
Create this fun Diaper Fold Card...and no need for a pin!
Search
