Make your own Blending Tool....
...and Save
Money
Save yourself a fortune and make your own Blending tool.
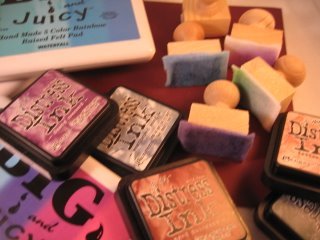
Do you like to use inks on your creations, maybe to make your own background papers or just to add a vintage look to the edges
And do you find that the blending tools available in the shops are rather expensive especially when you would like several of them?
I use lots of different types of ink in many, many colours and so I like to have the equipment ready to hand for when I change the colours.
And, maybe like you, I can't afford to go out and buy them at the prices in the shops.
So here's what I did.....
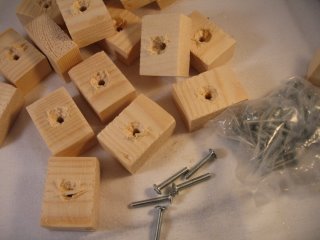
I bought a long length of wood form the DIY shop, that was
4.5cms wide by 2cms
deep. (1 3/4" x 3/4")
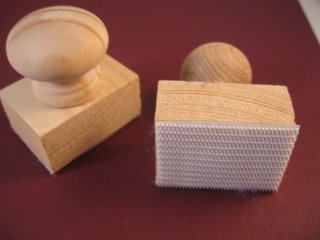
I had the length of wood cut into small pieces, to make blocks that are 3cms wide (1 1/2") and had the top of each one drilled with a counter sunk hole.
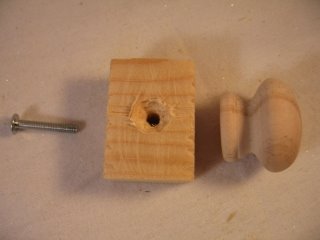
I bought a pack of wooden cupboard door knobs and some screws.
Make sure the screws fit through the wood into the knobs, and assemble them
together....
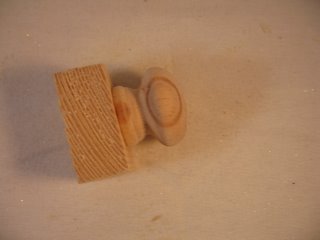
...and this is what you get.
A nice neat and easy to hold tool for all your needs...
but it's
not quite finished yet....
For the next step you will need some strong stick on Hook and Loop tape, (Velcro) and a sheet of white felt.
You can buy the foam blending pads if you want to use water based inks.

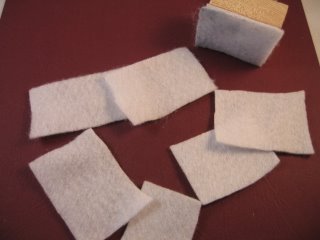
Cut the velcro to fit the bottom of the block and leave it to set really hard overnight.
Make sure you buy the part of the Hook part of the Velcro that the felt or foam pads will stick to.
Cut the white felt into pieces that will fit the bottom of the block, and
these will now attach to the velcro for you to use.
Or if you have the foam pads then these will just press into place.
The foam pads are better for blending Distress Inks and the felt is ideal if you like to use Alcohol Inks.
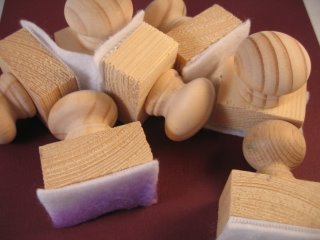
And there you have a whole lot of your very own blending tools for a fraction of the cost of shop bought ones.
(Any that you don't use for the Inks can be used to glue any small sentiment stamps on to and then they will always be on hand too.)
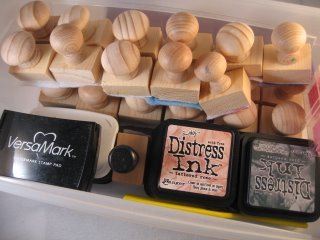
Store them together with your inkpads.
With a marker pen write, on the handle of each block, the colour of the ink you have used it for.
And save it just for that particular ink.
Now your colours will never get mixed.
When the felt pad gets worn out you can simply replace it with another one and you're good to go again.
The foam pads you will be able to wash out if they need it.
And you can also use them to glue a small sentiment stamps to.
Then write the name of it on the handle and then you can see immediately what it says.
And if you are not sure how to use Blender correctly then please take a look at the short video
How to use a Blending Tool
Equipment
Choosing
Inks
Distressing
Inks
Easy
Projects
More
Projects
Kinetic
Cards
Ideas
Occasions
Novelty
Cards
Papercrafts
Useful
Resources
View all Pages and
Topics
Return from Blending Tool to
Homepage


Recent Articles
-
Memory Book
Oct 15, 22 09:17 AM
 Make a memory book, fun to make and even lovelier to give.
 -
Die cut letters.
Jul 19, 21 10:12 AM
 Add that personal touch with die cut letters, add names or sentiment as you please.
 -
Diaper Fold Card.
Jul 19, 21 09:34 AM
Create this fun Diaper Fold Card...and no need for a pin!
Search
