The Fabulous Quad Easel Card
Designed to get noticed...the Quad Easel Card certainly fits the bill
Easel Cards are so much in trend at present and they will give you a real stunner of a card.
This is the Quad Easel and, step by step, I will show you how to create this lovely card for your self.
If you prefer to learn by watching how the card is made then here is where you will also find the Video Tutorial
Try all the variations as your confidence grows.
They are not difficult to create and you will find the full instructions for all the styles here on the website.
The Twisted Easel which will show you how to add a twist to the single variety.
So lets get busy making the pictured card.
I have used an A4 card 21 x 29.5cms (8 1/4 x 11 3/4 inches) approximately
When you feel more adventurous move on to the Double Easel and the Double Twisted.
Then when you are happy with them progress to the Triple Easel and the Triple Twisted variety.
Some of them are also available in video in Cardmaking Tutorials
I have included both Metric and (Imperial) measurements, but please only follow one set or the other ... do not mix the two
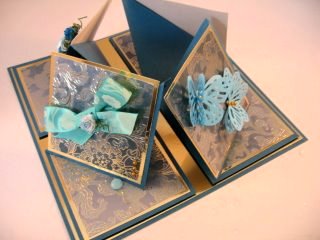
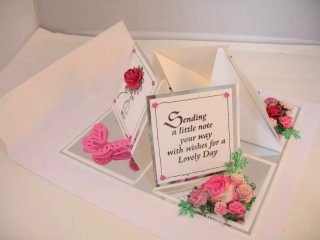
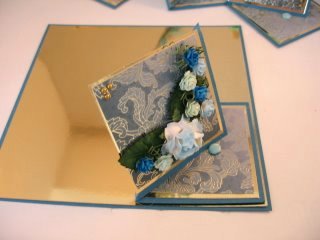
I have made my Quad Easel Card so that each panel faces outwards.
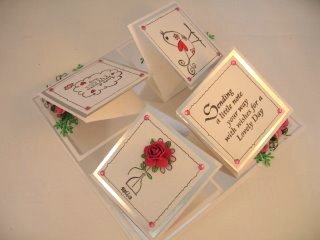
(The blue card is made to centimetres and the pink one is in inches.)
But once you know the principal behind each style you will be confident enough to adapt it to suit your self
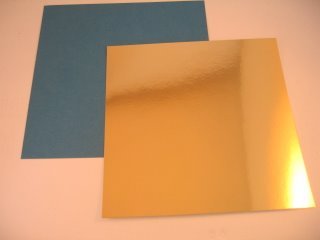
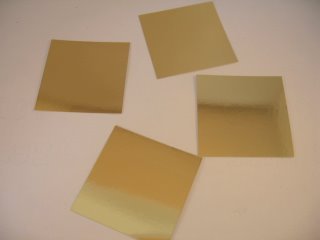
I have cut a base card into an 18cms (7ins) square, and the gold mirror is card 17.5cms (6 1/2ins)square.
Mat and layer the two together
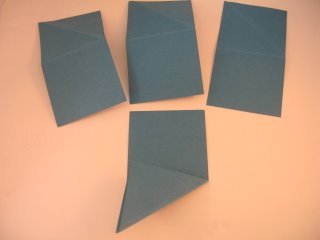
Cut four pieces of card 8 x 15.5 cms (3 x 6 ins) for the easels.
Crease and fold each one in half and then take the outer corner and fold it down to the left.
Make sure all the folds go in the same direction
Cut the gold card 7 cms (2 3/4 ins)...
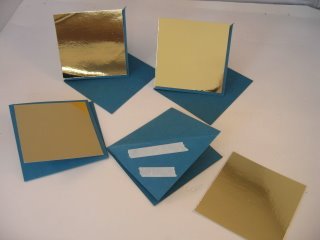
... and adhere them to the lower corners of each easel
Now although the picture shows double sided tape it is. in my opinion, a far better option to use a wet glue for a stronger bond
You can add more layers if you wish.
I have added one more that is slightly smaller again and layered all onto the easels.
If you want to add layers to the bottom of the easel then you will need to cut more squares as before, and layer them up
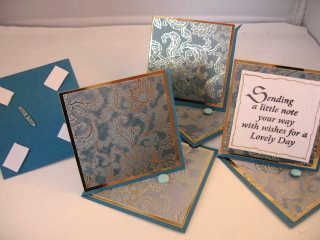
I find it easier to decorate each of the easels before I add them to the base card.
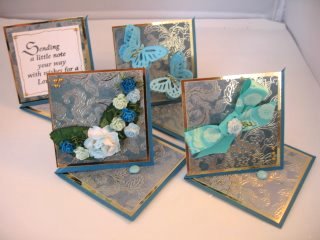
I have punched a hole through all the layers and added Brads as stops to keep them open
On the bottom of each easel I have added foam pads to raise them up from the base, and then carefully pressed each one into place on the outer edge.
All are facing out so that the recipient can see each panel as the card is rotated
Making your Quad Easel Card to these measurements enables you to fit it into a standard 20cms (7 1/2ins)square envelope once it is folded flat.
But because of the flowers on mine I have made a box
The little verse added to both of these cards is from Clarity Stamp
Easy Projects
Kinetic Cards
Novelty Cards
Papercrafts
Cardmaking Tutorials
Useful Resources
View all Pages and Topics
Return from Quad Easel Card to Homepage


Recent Articles
-
Memory Book
Oct 15, 22 09:17 AM
 Make a memory book, fun to make and even lovelier to give.
 -
Die cut letters.
Jul 19, 21 10:12 AM
 Add that personal touch with die cut letters, add names or sentiment as you please.
 -
Diaper Fold Card.
Jul 19, 21 09:34 AM
Create this fun Diaper Fold Card...and no need for a pin!
Search
