Decorating Hatpins Tutorial ...
...for beautiful effects.
The Decorating Hatpins Tutorial will show you how to get this customised look for yourself. It is one of the cheapest and prettiest ways to make your cards special.
The subject of this low cost item was discussed in Decorative Pins, and there we covered some of the simplest ideas.
But as you get better, and enjoy adding these embellishments to your own designs then
I thought that you may enjoy a tutorial that would show you the easiest way to create some some stunning results for your self
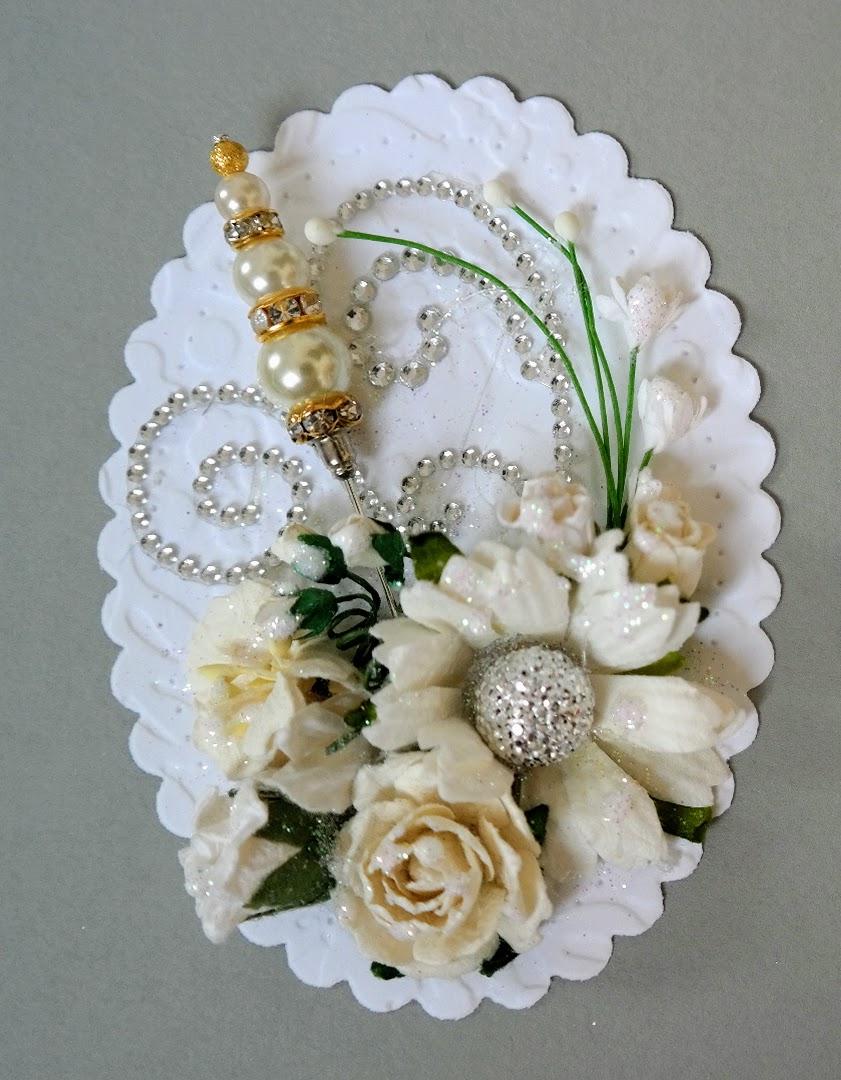
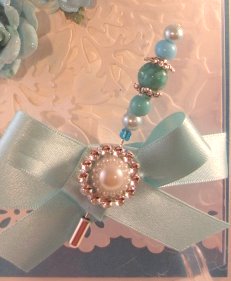
Add the finished pin to a beautiful floral display that you have glued to a shaped topper. Just tuck it in and then it can be taken out again.
This is now ready to add to any project and looks lovely with the flowers sparkled as well.
But be sure to tell your recipient that the hatpin can be removed from the card if they so wish.
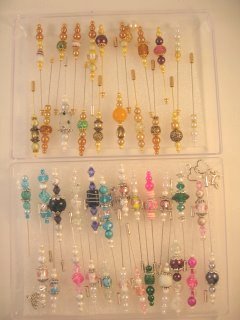
These are just a few of the ones I have made over the last few days and once you start making them it becomes addictive as they are such a pleasure to do.
And of course all your creativity comes to the surface and you will surprise your self at the ones you come up with.
Let the Decorating Hatpins Tutorial show you how.
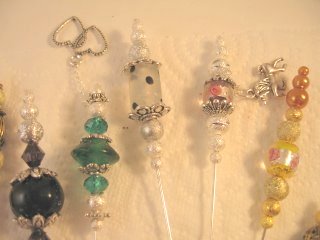
The first thing you are going to need are the Hatpins themselves.
They come in many different sizes and some will already have beads attached, as you will see in the video.
But I like to buy mine plain in gold and silver and assemble them my self.
I like to experiment with different designs and I get my pins ... complete with end protectors from Amazon
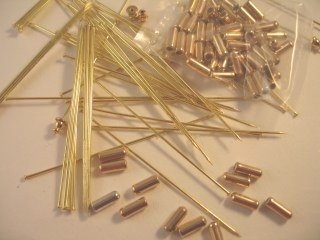
There you will find a good assortment of sizes and styles in pins for all your needs, as well as beads in glass, fimo, metal and lampwork to make the most adorable pins for your cards.
You will need Beads too and they are not expensive to buy and you will get quite a lot for your money. Buy them in different sizes and colours, as well as finishes.
The collection I have are pearls and glass beads as well as some gold and silver spacer beads.
And the bit that covers the bead is the bead cap and they can just add the finishing touch.
And you could always dismantle any old necklaces that you own that you no longer wear. Or have a search around the Thrift shops or car boot sales
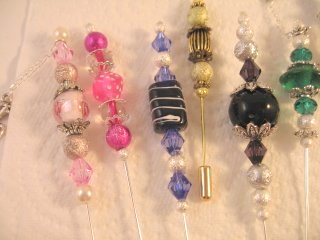
Experiment with colours and styles as I have done in this Decorating Hatpins Tutorial.
And if you do a dry run with the beads first then nothing is lost if you don't like the arrangement.
Just undo it and start again until you are happy and then....and only then glue them in place.
You will find many sizes in the hatpins but the one that is my preference is the 3".
This will give you a lovely pin that won't overpower the card as the effect you want is classy.
The pin I added to the card in the video was too large and so I changed it for this one that gives a more elegant look to my finished design.
I was very pleased with the result and I am sure that you will be too, with the ones you create for yourself.
I hope you enjoy the Decorating Hatpins Tutorial and will add some of your finished cards to the Gallery Page.
Try to include a close up of the pin in one of the photos that you add.
Return from Decorating Hatpins to Homepage


Recent Articles
-
Memory Book
Oct 15, 22 09:17 AM
 Make a memory book, fun to make and even lovelier to give.
 -
Die cut letters.
Jul 19, 21 10:12 AM
 Add that personal touch with die cut letters, add names or sentiment as you please.
 -
Diaper Fold Card.
Jul 19, 21 09:34 AM
Create this fun Diaper Fold Card...and no need for a pin!
Search
