Springfold cards...
...for something a little different.
Springfold cards look intricate but once you have the hang of it they are quite easy to do.
Search

You can buy templates that can help with the process or use a scoreboard if you have one.
But here is the method to use to produce this unusual shaped card for yourself quite easily.
You will also find a short video Tutorial to show you how to make the card here
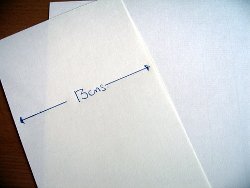
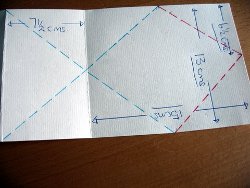
Start with an A4 piece of card and measure in from the long edge 13cms. Trim off the excess but don't throw it away, save it for another project. You now have a piece of card that is 13cms x 30cms.(approx)
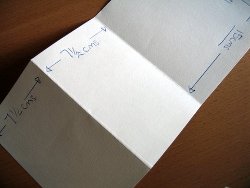
From the bottom edge measure up 7.5cms and score and fold. Then from that fold measure again another 7.5cms and fold the opposite way.
So now you have a piece of card 13cms x 30cms with two marks on it at 7.5 and 15cms.
Yes? Yes!
Fold the bottom 7.5cms up, but don't do any sticking yet. We need to get all the folding done first.
Then fold the next section from the bottom the opposite way. You now have a card with a bend in it, and the top 15cms is still flat.
Still with me? Oh good!
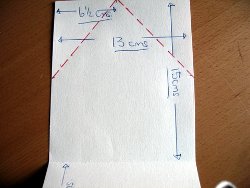
Now in the top part of the card we need to find the halfway marks along the edges, and mark lightly with a pencil.
From the top centre mark to the side centre marks score ready to fold. Following the red dotted line in the picture.
Then from the centre side marks score all the way down to the fold 7.5cms up from the bottom of the card. Following the blue dotted line.
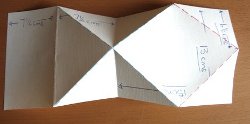
Make a sharp crease down all these guidlines with a bone folder or the back of a spoon.
Now you can see how the card will fall into place as you push the folds.
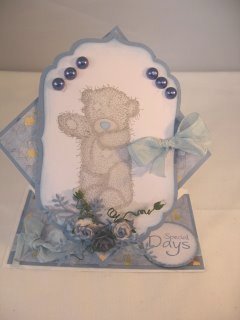
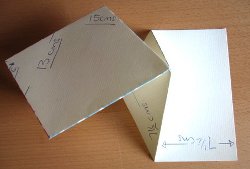
The card is ready to decorate any way you want to. Fold and glue down the top flaps to the diamond shape.
Decorate the bottom panel before you glue it into place. Then once this is glued down the card will stand up in the diamond shape.
Here are some more springfold cards.
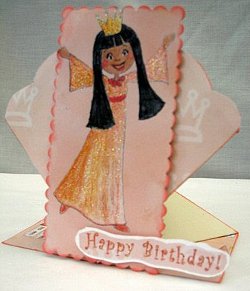
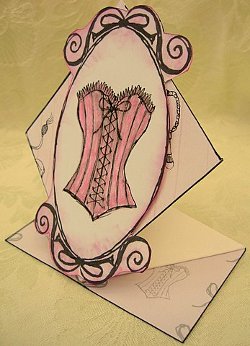
Any little girl would be pleased to get this card...
....and any big girl would love this.
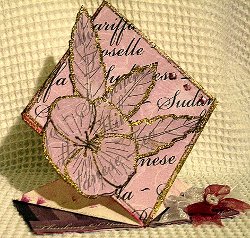
Or how about some flowers for your mum. Awwwww!
Gosh I'm tired after all that measuring and picture taking....I need to go have a cuppa now.
Magic!
Return from Springfold cards to Homepage


Recent Articles
-
Memory Book
Oct 15, 22 09:17 AM
 Make a memory book, fun to make and even lovelier to give.
 -
Die cut letters.
Jul 19, 21 10:12 AM
 Add that personal touch with die cut letters, add names or sentiment as you please.
 -
Diaper Fold Card.
Jul 19, 21 09:34 AM
Create this fun Diaper Fold Card...and no need for a pin!
Search