Paper Pleating ...
an unusual effect to your designs.
Paper pleating although not a difficult effect to achieve...it is
fiddly!
Most women at some time have pressed the pleats into a skirt, and this is the same principle ...just on a smaller scale.
It isn't difficult to do and if you want a random effect to your pleats then go ahead and fold the paper back and forth at the size you want the pleats to be.
But if you want a more uniform look for the card then the paper will need to be measured, and the spacing determines the size of the pleat.
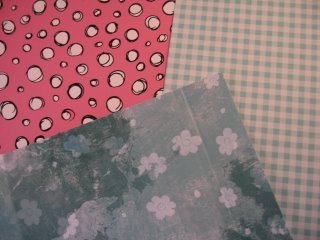
Choose the pattern that you wish to use but keep to paper as card is harder to fold.
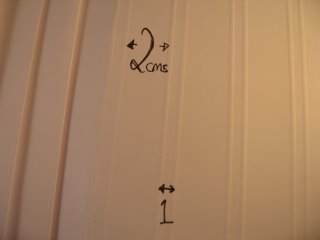
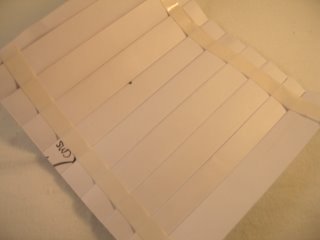
I have used a Scoring Board to measure my paper at alternate 2cms and 1cms spaces.
This will give a nice deep pleat which is a very attractive finish.
If you don't have one then you can score the lines with something as simple as an empty, used up ball point pen.
Just don't score the lines too deeply or you will tear the paper.
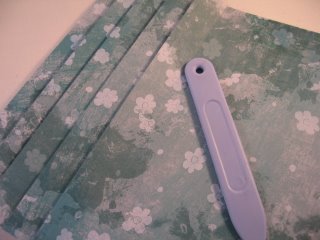
Using a bone folder I have folded the paper backwards and forwards and creased each time to give the paper a really sharp fold.
As you can see from the photo all the pleats are evenly spaced
Flip the paper over and add double sided tape to the back. This will hold the
pleats in place and allow you to adhere it to your card.
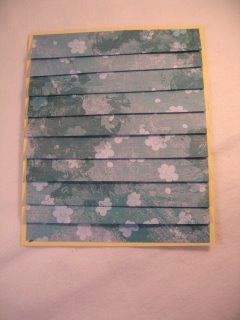
I decide to Mat and
Layer my pleats onto some pale yellow card, and then I added this to a white
base card leaving a small border all round.
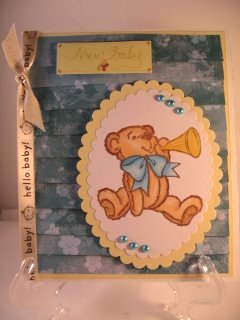
I stamped out one of my favourite images and coloured it to match my scheme.
With the addition of some "Hello Baby" ribbon and a sentiment the card is
ready to send to someone as a welcome for their New Baby.
Spellbinders where
used to create the scalloped mat and then flat backed pearls complete the
look.
Make use of anything that you have in your "stash".
I
hope you enjoy this technique and will add it to your cards.
And why not try the
Return from Paper Pleating to Homepage
Search


Recent Articles
-
Memory Book
Oct 15, 22 09:17 AM
 Make a memory book, fun to make and even lovelier to give.
 -
Die cut letters.
Jul 19, 21 10:12 AM
 Add that personal touch with die cut letters, add names or sentiment as you please.
 -
Diaper Fold Card.
Jul 19, 21 09:34 AM
Create this fun Diaper Fold Card...and no need for a pin!
Search