Paper Folded Butterfly ...
Easy to create with just a few folds.
Try this Paper Folded Butterfly to adorn your cards.
Search

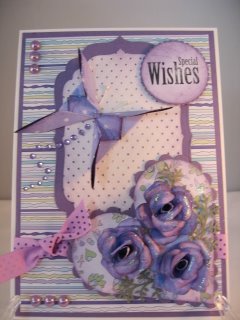
This lovely card is one you will be proud to give and it is another one that can be used for any occasion.
Make it in beautiful pastel colours and add it to your designs along with the Paper Roses
If you are a person that likes to watch then this where you will find the Video Instructions
Step 1
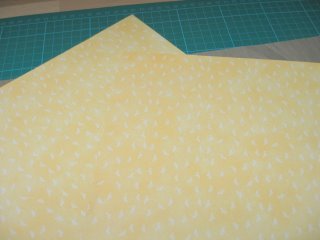
You will need two matching pieces of paper for this and because the projects is small try to keep your pattern small too otherwise it will be lost on the folds.
Place your chosen paper face down and make the first fold from corner to corner.
Crease the paper and then open it out.
Crease again in the opposite direction, again from corner to corner.
You will get a really sharp crease by using a Bone folder.
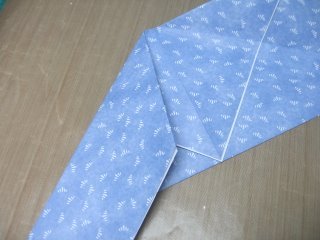
Step 2
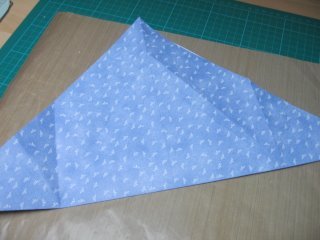
Take the point and crease it to the fold in the paper.
You can see that some of the white to the paper is showing so if you ink the edges before you fold then they won't show on the finished butterfly.
Step 3
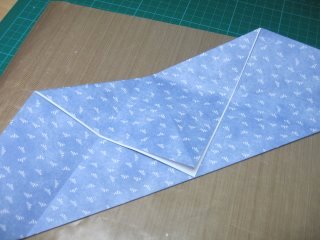
To fold the wings I keep my finger in the centre, as this is the bit that will form the body.
Take the part of the wing that is opposite the point and fold it down towards the point....
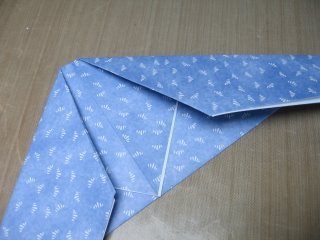
...and do the same for the other side.
The photo shows you how it should look when you have done this.
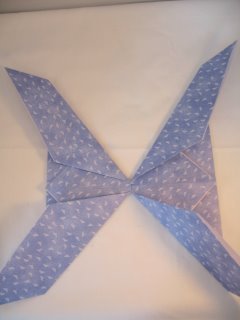
This is the first part of the wings and now you need to do exactly the same with the other matching piece of paper.
Try to keep your wings the same so that when they are side by side they don't look odd.
The two wings will now be ready for you to attach them to the front of your card.
You can add some of the little stamens for the antenna or a small piece of wire that you can bend into shape.
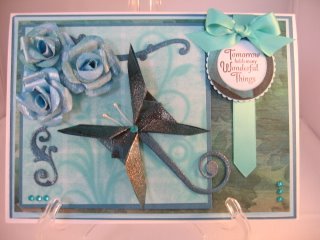
On this card I die cut a flourish and removed the end part.
I added my stamens to this for the antenna but it changed the look to more of a dragon fly.
But I still like the look and I hope you will enjoy making this Paper Folded Butterfly.
Return from Paper Folded Butterfly to Homepage
Search


Recent Articles
-
Memory Book
Oct 15, 22 09:17 AM
 Make a memory book, fun to make and even lovelier to give.
 -
Die cut letters.
Jul 19, 21 10:12 AM
 Add that personal touch with die cut letters, add names or sentiment as you please.
 -
Diaper Fold Card.
Jul 19, 21 09:34 AM
Create this fun Diaper Fold Card...and no need for a pin!
Search