Adding Skeleton Leaves ...
To make a unique background.
Adding Skeleton Leaves can help you to create a unique background for all your cards.
Sometimes when we are card making we can't find the right kind of backing paper for our design.
But if you have some skeleton leaves in your stash then you can make your own.

This versatile embellishment can be used in several ways but here is one that is unique and produces a really gossamer effect from just one leaf.
So this is how to make the backing paper for your card.
When you have finished adding skeleton leaves don't throw them away .....just make another card, and add some of the very beautiful
You will need a large inkpad (I have used the Big and Juicy) and a brayer.
Have some scrap copier paper on hand and of course your skeleton leaf.
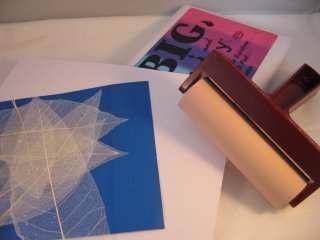

Step 1
Lay the leaf flat onto the inkpad and cover it with a piece of scrap copier paper.
Then roll the brayer over the paper to coat the leaf with the ink.
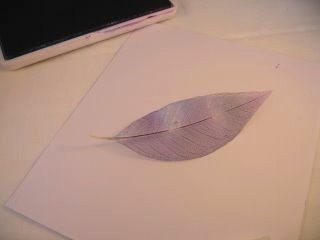
Step 2
Once the leaf is full of ink remove the copier paper.
Lay the leaf flat onto the paper you are using to make the backing.
(Have another sheet of copier paper underneath to keep your work surface clean.)
Cover it with a clean piece of copier paper and roll the brayer firmly over the leaf.
This will leave an impression of the leaf on the paper.
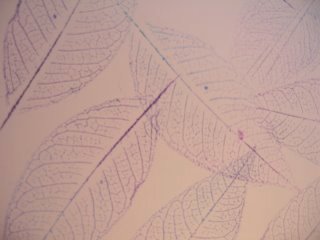
Step 3
Repeat the process, adding skeleton leaves as you wish.
Turn the leaf around on the paper till you get the effect that you want and allow some of them to overhang.
Then trim the paper to the size and ink the edges with the same inkpad.
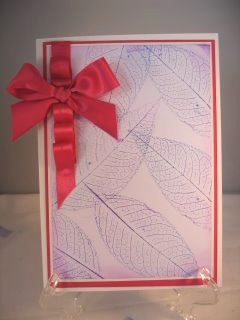
Step 4
Mat and layer your backing paper onto a co-ordinating card.
Add some ribbon if you like and any topper that you wish to use.

Dress the card up with the stuff in your stash. This image is from a CD by Debbie Moore Designs
Add your sentiment and send it with love.
It can be used for lots of different occasions.
This lovely basque is a "Freebie" from Paper Printables and you will find a lot of other free stuff for you to use on the website.
OooooH! I love a freebie.
I hope you enjoy adding this look to your projects, and of course using them in other ways too.
The ribbon on the lilac card is fabric and is made using the instructions for the Ribbons and Buckles Tutorial

Return from Adding Skeleton Leaves to Homepage


Recent Articles
-
Memory Book
Oct 15, 22 09:17 AM
 Make a memory book, fun to make and even lovelier to give.
 -
Die cut letters.
Jul 19, 21 10:12 AM
 Add that personal touch with die cut letters, add names or sentiment as you please.
 -
Diaper Fold Card.
Jul 19, 21 09:34 AM
Create this fun Diaper Fold Card...and no need for a pin!
Pretty Embellishments
PopShops™ affiliate storesSearch
