Screenfold Card...
dress it up, dress it down
...either way it looks good.
There are lots of ways to make this screenfold card, here is one to get you started.
Search

This lovely card can be made on lots of different themes.
Keep it pink and girly, dress it with flowers, and gemstones too.
Add letters to the panels to spell out a short name, or keep the colors muted for the male members of your family.
Place an Art Deco Lady on each of the panels and add the glitter and glitz to each one.
So how do we make it?
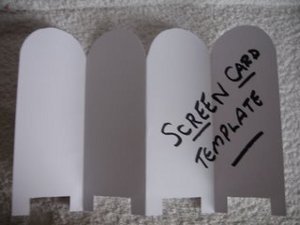
Follow the steps..and as always make a template first to get the hang of it, and to avoid spoiling your good card.
Keep the template safe and use it over and over again. With a different theme each time.
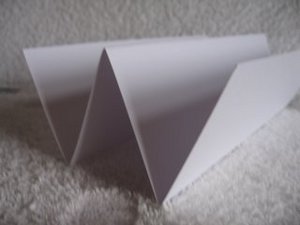
Step 1
Fold an A4 card in half and then fold each half back on itself again.
We will then have a "W" shaped card.
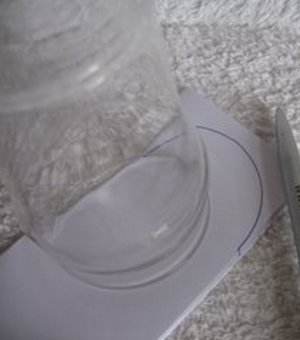
Step 2
Keep the card folded together and use an ordinary glass to shape the top of the card.
Draw around the glass with a marker.
Cut around the shape.
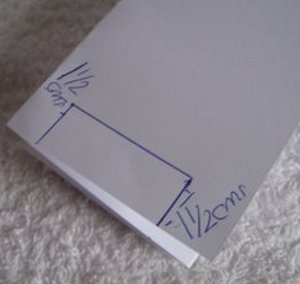
Step 3
At the bottom of the folded card measure in and up by 1.5cms on each side and join the dots.
This is another area we are going to remove too.
Step 4
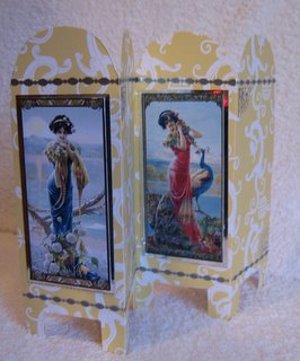
Once these two areas have been removed this is what the card will look like, and it will stand freely.
You can dress the back and front of this card.
I have made mine on an Oriental theme and decorated the front with Dragon paper and Japanese ladies.
Let your imagination roam when you play with this fold, it can be as interesting as you want to make it.
Return from Screenfold Card to Homepage


Recent Articles
-
Memory Book
Oct 15, 22 09:17 AM
 Make a memory book, fun to make and even lovelier to give.
 -
Die cut letters.
Jul 19, 21 10:12 AM
 Add that personal touch with die cut letters, add names or sentiment as you please.
 -
Diaper Fold Card.
Jul 19, 21 09:34 AM
Create this fun Diaper Fold Card...and no need for a pin!
Search