Patchwork Cards...
...To use up your favourite scraps
Patchwork cards are an easy way to use up all your favourite pieces of paper....the ones you can't bear to throw away!!
They can be brightly coloured by using up any of your mis-matched papers, or subtly elegant with those that blend.
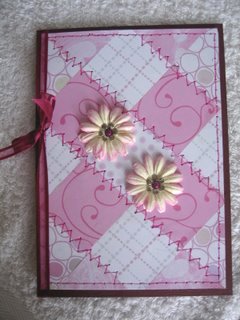
The joins can be covered with paper ribbons, real ribbons or some glitter
Or get out the sewing machine and add some real stitching around the joins and if you can't be bothered then try your hand at Faux Stitching using some of your colored pens
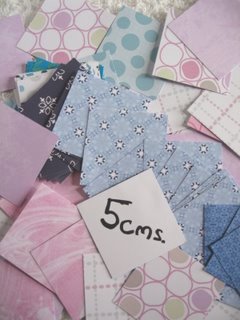
Cut some pretty papers into equal sized squares for your Patchwork Cards.
I have made mine 5 cms.
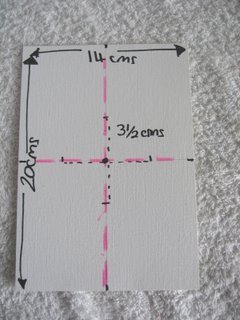
I used some scrap card, 14 x 20 cms, as my base, to build the squares on to.
Make a small mark in the centre of each side, and join them up.
Where the lines cross is the centre of the card. Make a dot.
(This just ensures that your squares will be evenly spaced and not look crooked on your card.)
From that centre dot measure out 3.5 cms along each line and make a small mark.
This is the distance across your 5 cms square from each point, and helps you to position the square correctly.

I prefer to place all my pieces in a dry run before I glue them into place, until I get a pattern that I like.
Place you first square in the centre of the card...
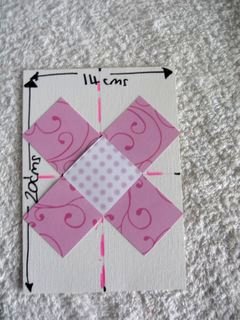
...and build up each part as you go.
I know they are squares but these are called rounds....just to confuse you!!
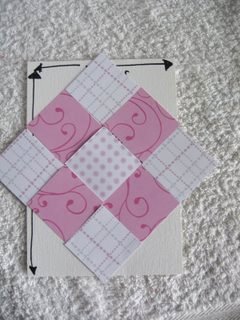
Don't worry about the papers overhanging the base card, they will all be trimmed soon.

Continue until the base is covered and when you are happy with the pattern you have then you can glue them into place.
Using a wet glue will give you time to move them around if they aren't quite correct.
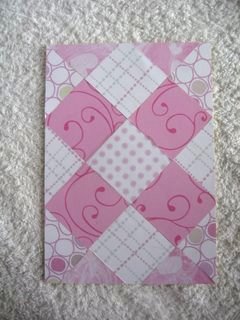
When the glue is dry then you can trim all the excess edges off.
If you do this trimming from the back of the card it will give you a much neater finish.
You can trim the panel smaller if you wish, or indeed make it smaller at the start, but the method is still the same, just alter your measuring accordingly
Add this trimmed panel to the front of your cardstock.
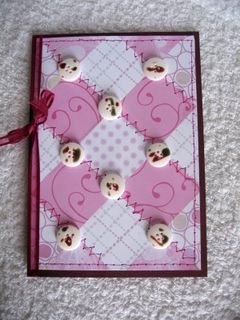
The card can now be dressed with ribbons, buttons, as in the first picture or flowers like this one
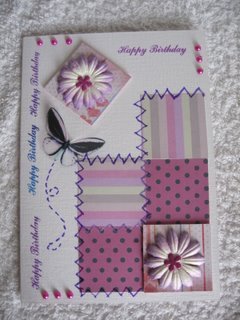
And to ring the changes to your Patchwork Cards add the squares straight or at an angle.
The one in the lower right corner has been raised with foam pads, and the flowers added top and bottom.
The butterfly is a Peel off layered onto Acetate and the trails and stitching added with Sakura Pens.
And if you fancy having a go at a real patchwork quilt then take a look at Quilting Tidbits
There you will find many hints and tips to help you get perfect results
Papercrafts
Easy Cardmaking Projects
More Projects
Useful Resources
View all Pages and Topics
Return from Patchwork Cards to Homepage


Recent Articles
-
Memory Book
Oct 15, 22 09:17 AM
 Make a memory book, fun to make and even lovelier to give.
 -
Die cut letters.
Jul 19, 21 10:12 AM
 Add that personal touch with die cut letters, add names or sentiment as you please.
 -
Diaper Fold Card.
Jul 19, 21 09:34 AM
Create this fun Diaper Fold Card...and no need for a pin!
Search
