Applying Chalks ...
for subtle definition
Chalks are a lovely easy medium to work with ...ideal for beginners
They are usually found in palette form, and will probably have some sort of an applicator with them
The effect you get depends on how you apply them
There are a number of ways, and there is no need to go to great expense, as you probably have most of these around the house
Cotton wool balls will give a soft effect, and cotton buds are useful for blending and smaller details. Or buy the packs of cotton wool and tear off the amount you need
Scroll down for some more ideas on this easy to use medium

You can buy small sponge daubers, which fit on the end of your finger, and these can also be used for applying inks.
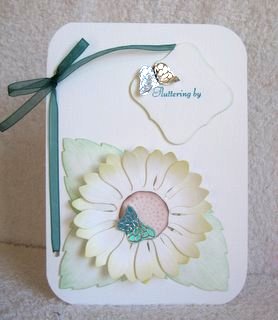
Here I have just used an inexpensive bath sponge, and lightly added the accents I wanted to the sunflower and leaves.
This will cost you pennies and not
£££'S.
Cut the sponge into smaller pieces, and you will produce a stronger colour by going over the area again.
It will cover the larger areas quicker too.
A pack of sponge eye shadow applicators, from the supermarket is another way to use this medium and make-up sponges.
Just don't try putting your make up on with them afterwards!!
There is a video that will show you one way to use these to
Create A Chalk Background
Another way is one you may not have considered before and that is to paint with them with a brush ....no not the emulsion type!... just a small one, with a little water, or a water brush.
Dampen the colour you want to use with a small amount of water and apply to your image
I keep to the edges to start and then blend in towards the centre as I go along.
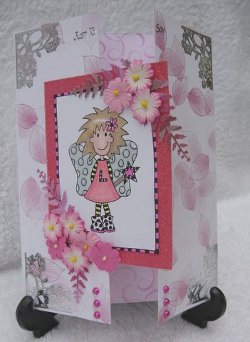
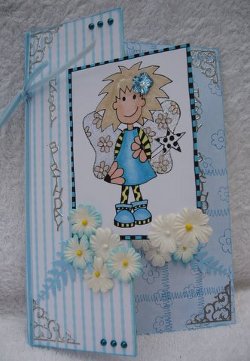
This image is a download called "Funky Fairy" and she looks very pretty on the front of this card
It is a very verstile medium and well worth giving it a try.
Once you have completed your colouring in, give it a quick spray with some cheap hairspray, this will seal it and stop it from dusting off.
The pink fairy has "Glossy Accent" wings. This is a medium that looks wet and shiny when dry.
The blue fairy has Glitter on hers. This is a very fine sparkly glitter from Glitter Magic and I use it on many things! It's brilliant stuff.
Magic!
P.S. It's no use pinching your kids chalks either ... I've tried that too ... they don't work!!
Return from Chalks to Homepage


Recent Articles
-
Memory Book
Oct 15, 22 09:17 AM
 Make a memory book, fun to make and even lovelier to give.
 -
Die cut letters.
Jul 19, 21 10:12 AM
 Add that personal touch with die cut letters, add names or sentiment as you please.
 -
Diaper Fold Card.
Jul 19, 21 09:34 AM
Create this fun Diaper Fold Card...and no need for a pin!
Search
