Bespoke envelopes
... to fit any shaped cards
Make your own Bespoke envelopes when nothing else will fit the project you wan to complete
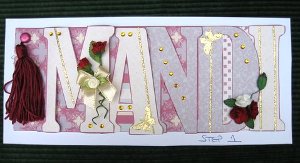
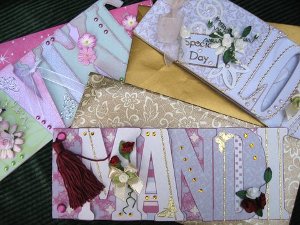
Word books are a fabulous addition to your repertoire but I am often asked how to make envelopes to fit the extra length of these creations.
Shop bought ones can be expensive, so here is a guide on how to make bespoke envelopes to fit any size, or shape, of card you want to make.
You can use any paper that you have to hand, wrapping paper, wallpaper, scrapbook papers or some thin card if you need to add protection.
Just make sure that the paper you choose is large enough to accommodate your card.
Practise on scrap paper first, save your good stuff until you feel confident.
All my wordbooks are created from the CD's from Funky Hand
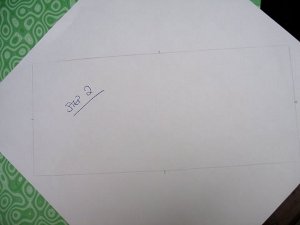
Step 1
Place your finished wordbook, or card, flat on a piece of scrap paper and draw around it, leaving about 1cm around each edge.
This will give you the room you need to get the card in and out of the envelope.
Cut out this square/oblong shape.
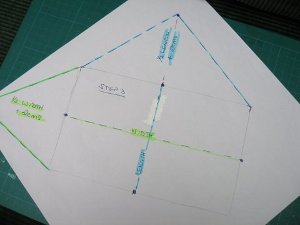
Step 2
This now becomes your template for the envelope.
Place it diagonally, onto the wrong side of your chosen piece of paper, and lightly draw around it.
Measure the width and height of the square or oblong, and mark centre point on all four sides.
Step 3
Whatever the width of your template is ... measure half and add 2cms, and from this centre mark measure out and make another mark.
(e.g. If your width is 10cms, half it, 5cms+2cms=7cms)
Join this centre mark to the two nearest corners, so that you now have a triangle.
Do the same for whatever the length is and you will end up with triangles on each side. (The blue and green lines are shown to help you
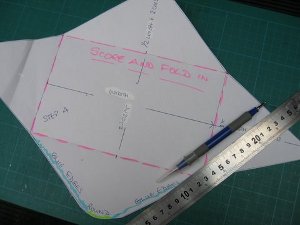
Step 4
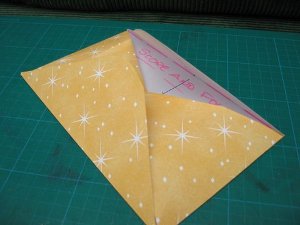
Once you have these lines joined, cut around the triangles to give you the shape in the picture, and score and fold along the inner marks. (The pink lines)
Round off the corners at the top and bottom of your envelope, and add the glue to the outer edges of the bottom flap. (Shown in blue)
Don't take your glue completley to the edge though as you will glue the flap shut.....not good!!
Step 5
Fold in the two outside flaps.
Fold up the bottom flap, and press down to secure the glue.
I find it better to use a wet glue for a secure join.
Double sided tape dries out, and the last thing you want is for your envelope to come undone in the post.
Step 6
So now you should have a perfectly sized envelope to match whatever sized card you have made.
Step 7
Using this method will also produce bespoke envelopes for whatever the shape of your card too.
Just remember to always start with a piece of paper large enough for the card.
And the basic template needs to be square or oblong.
Hope you enjoy this tutorial ... Have fun!
Return from Bespoke Envelopes to Homepage


Recent Articles
-
Memory Book
Oct 15, 22 09:17 AM
 Make a memory book, fun to make and even lovelier to give.
 -
Die cut letters.
Jul 19, 21 10:12 AM
 Add that personal touch with die cut letters, add names or sentiment as you please.
 -
Diaper Fold Card.
Jul 19, 21 09:34 AM
Create this fun Diaper Fold Card...and no need for a pin!
Search
