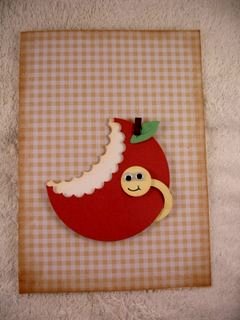
A Juicy Apple Card...
...Good Enough to Eat
This Apple Card is a fun idea for your children to make that they would enjoy giving to their teacher at the end of the school term..
This card would be a lovely way for the kids to say "Thank You" to a favourite teacher, at the end of term.
It is not difficult to make and only needs some punched or die cut circles, so why not let them have a go at making their own.
There are lots of other ideas in the Novelty Card section, which are also easy for children to do.
Step 1
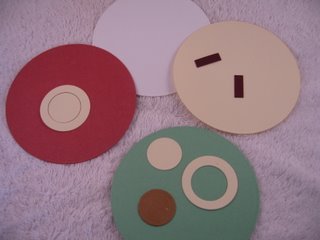
For this project you will need some colored card, depending on what color you like your apples...
I have also cut some white and cream card for the core part of the apple.
Cut two small pieces of brown card to represent the stalk.
Cut a circle of cream card and then punch out the center, but keep both parts, as this will be your worm.
The smaller brown circle is for the leaf, if you don't have a punch in that shape.
Step 2
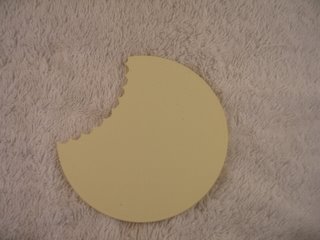
The white or cream card is going to form the inner core of your apple.
In this you will need to draw some bite marks and cut them out with your craft knife or scissors.
Step 3
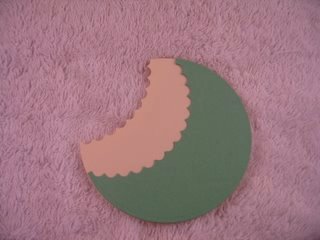
The coloured circle will also need the bite marks.
This needs to be a bigger bite than the other, so that the core will show through.
Step 4
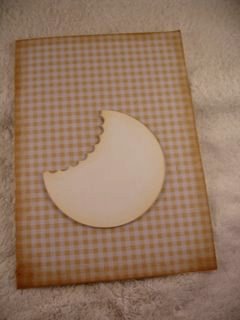
So to assemble the Apple Card....add your backing paper to the base and ink the edges with your Blending Tool.
Ink the edges of all the parts to the apple too, and with foam pads position the core where you want it to be.
Step 5
Place the coloured part of the apple on top of the core.
I raised mine up from the base with 1mm foam pads.
The leaf shape, or the half circle of brown card, is added to the top and the stalk is placed alongside it.
In the outer part of the cream ring make a small slit and slip it behind your apple. This is the worms neck.
Add the inner part to the neck and this is the worms head.
I drew in a smiley mouth with black pen and added some Googly Eyes.

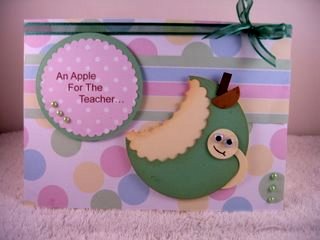
Whatever your favourite apple is, this fun Apple Card is sure to make some one smile when they receive it.
And I am sure the children will have as much fun making it too.
Return from Apple Card o Homepage


Recent Articles
-
Memory Book
Oct 15, 22 09:17 AM
 Make a memory book, fun to make and even lovelier to give.
 -
Die cut letters.
Jul 19, 21 10:12 AM
 Add that personal touch with die cut letters, add names or sentiment as you please.
 -
Diaper Fold Card.
Jul 19, 21 09:34 AM
Create this fun Diaper Fold Card...and no need for a pin!
Pretty Embellishments
PopShops™ affiliate storesSearch
