Try Paper Weaving...
...and never waste your scraps again.
Got the last remains of your favourite scraps? Well try Paper Weaving to use them up, and feel really pleased with yourself in the process.
Search

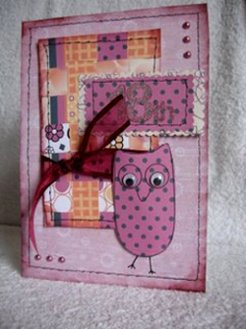
This pretty card has a paper weaved panel attached to the front, and all the colors blend for a rather good effect.
The strips used to make the panel are, roughly, 2 x 18cms and I have used 9 of them to make it up.
(You can alter yours to suit the card you are making, but the method is the same)
It is an excellent way of using up all those scraps that are just too pretty to throw away...and yet not enough of it to make a card.
Step 1
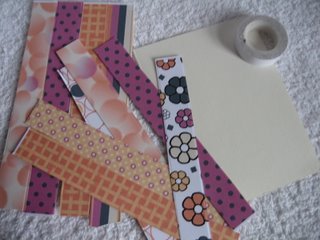
You will need some patterned papers, and some scrap card to attach the strips to, and some double sided tape.
Cut your strips all the same width and length, and play around to see which way you would like to add them to the scrap of card.
Step 2
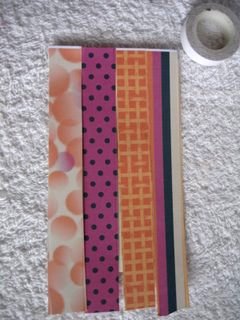
Attach some double sided tape to the scrap of card, and along the top lay your strips of paper, vertically.
(I have used four strips along the top of mine)
Step 3
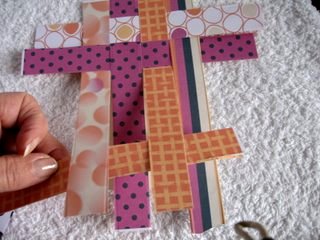
Through these vertical strips we are going to weave the horizontal ones.
The first one will go under the first vertical strip and then over the second one. Then slide it up to the top.
Keep going under/over to the end.
Now with the second horizontal strip we will weave opposite to what we have just done.
So if you weaved under/over/under/over...then the next strip will be over/under/over/under...still with me? Oh! Good...
(The picture shows what yours should look like)
Hopefully!

Step 4
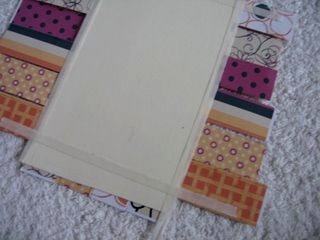
Flip the panel over when you have weaved all the strips together, and with some double sided tape secure all the ends.
Allow the tape to overlap the scrap card a little and then trim the edges neatly. (As in the photo)
(My finished panel is approximately 9 x 14cms, and fits onto an A5 card)
I have added Faux Stitching around the edges of the base backing paper and the panels.
Flat backed pearls add a little bling, and I love googly eyes at the moment for a fun element to the card.
A little bit of ribbon and there you go, a lovely card to send for any occasion.
Magic!
Return from Paper Weaving to Homepage
Search


Recent Articles
-
Memory Book
Oct 15, 22 09:17 AM
 Make a memory book, fun to make and even lovelier to give.
 -
Die cut letters.
Jul 19, 21 10:12 AM
 Add that personal touch with die cut letters, add names or sentiment as you please.
 -
Diaper Fold Card.
Jul 19, 21 09:34 AM
Create this fun Diaper Fold Card...and no need for a pin!
Search