Adding a Cloud Effect
A simple and easy to create Cloud Effect that you can add as the backdrop to any of your stamped characters or images.
Adding a cloud effect background to your cards is a lovely technique that is very easy to do that can make your characters stand out from the page.
It makes your image appear to be outdoors and can work in lots of different ways.
Here's what you need to do to get the look for yourself ...
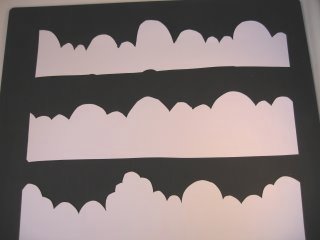
On a piece of cheap copier paper draw out some shapes.
Use the top area of the paper and the bottom part will protect your card as you work.
Your shapes don't have to be anything fancy just some random circles and ovals across the paper that have a look of clouds.
Make them different sizes ... mix small shapes with large ones and then carefully cut around the outline ..
... and this is what you will have.
This is the template that you will use to create the clouds on your paper so keep it safe as it can be used over and over again.
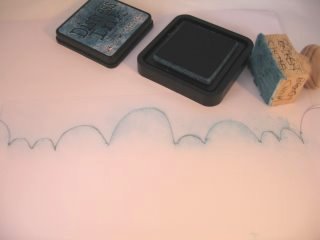
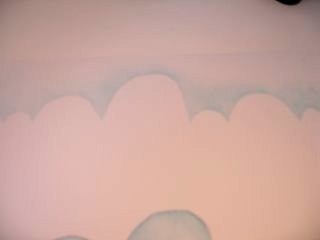
Lay the template onto your chosen paper and carefully ink over the edges.
I have used distressing inks as they blend beautifully on the paper.
You can use sponges, Cut'n Dry, or why not make some of your own blending tools to get a smooth look to your clouds
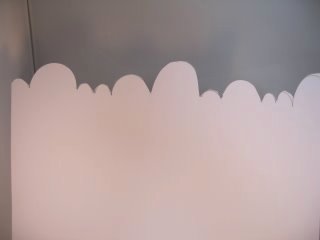
This is what you will have when you move the template.
Once you have done this layer move the template down and ink the next layer on to your paper and rest your hand on the bottom half of the copier paper to prevent smudging
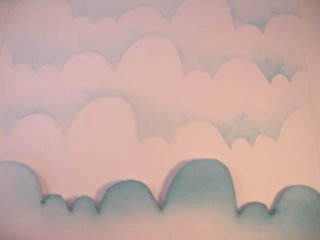
Move the template along your card so that you are using another area...
or simply flip it over and use it the other way for another variation in the clouds.
Mixing the large and small shapes randomly on your background gives a more natural look
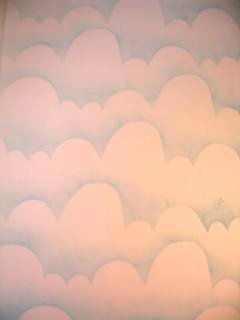
Continue this process down the paper until you have a whole host of clouds.
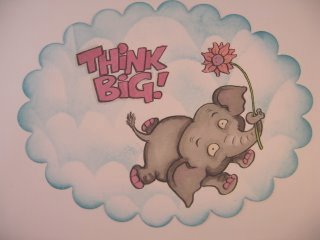
Images can now be decoupaged onto this sheet if you wish.
If you are adding the clouds and you want them to appear behind your character then it is a good idea to stamp the character first, create a mask, and then add in the cloud effect
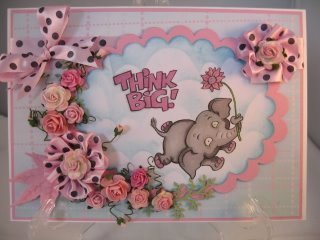
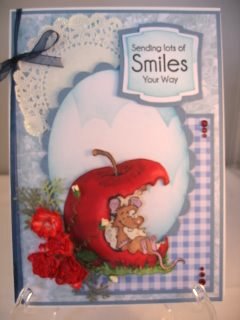
You can then either add this effective topper to the card...
... or this card has the image decoupaged over the top of them.
This mouse is sitting under a summer sky eating his apple.
But whichever way you choose to use them it makes a really neat background for some of your cards.
Return from Cloud Effect to Homepage


Recent Articles
-
Memory Book
Oct 15, 22 09:17 AM
 Make a memory book, fun to make and even lovelier to give.
 -
Die cut letters.
Jul 19, 21 10:12 AM
 Add that personal touch with die cut letters, add names or sentiment as you please.
 -
Diaper Fold Card.
Jul 19, 21 09:34 AM
Create this fun Diaper Fold Card...and no need for a pin!
Pretty Embellishments
PopShops™ affiliate storesSearch
