Masking Techniques ...
For added interest
Masking Techniques are easy to do and this tutorial will show you how to marry two stamps together for a whole new look.
There may be character and background stamps in your collection that would go together beautifully, but you don't know where to start.
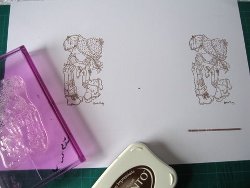
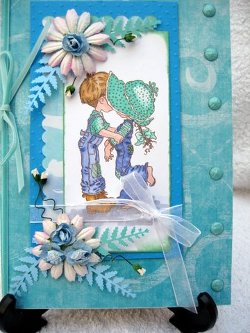
I chose the Sarah Kay stamp "First Kiss" to make my card.
This is a lovely stamp by itself but I wanted something different for a change.
When you have chosen your character you will need to stamp the image twice on good quality paper.
Because I intend to colour my image in with Copics I used a Momento Dye ink in Rich cocoa.
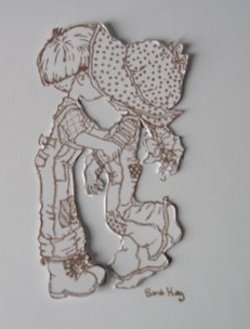
The next step is to cut one of the images to make the mask.
Cut it out carefully and make sure to remove any area that is between the figures that would be in the background.

Lay the mask over the other stamped image. It needs to be kept in place while you stamp the next image.
Either use a post it note to make your mask or spray a little amount of re-positionable glue on the back.
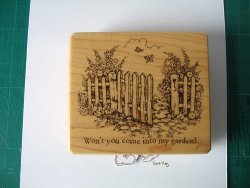
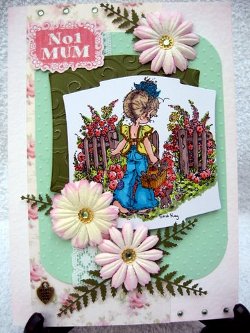
For my background I have a lovely garden scene.
Ink up the second stamp ... and keeping the mask firmly in place stamp over the first image.
Don't rock the stamp or you will spoil the new image.
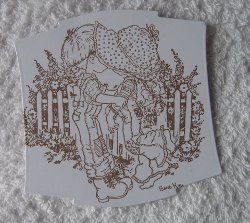
When the stamp and the mask are carefully removed the pair are now in a garden stealing that first kiss.
Colour in the new scene with whatever is your prefered medium.
Here is the finished card in a vibrant yellow, and of course the flowers I love to use.

The image looks just as good without the background, but it's good to ring the changes.
And the same background stamp is used with another stamp from the Sarah Kay collection.
I'm sure you will want to try out this lovely technique to increase the images you can produce.
Try on scrap paper first before you let yourself loose on your best paper. And when you have gained your confidence then go for the real thing.
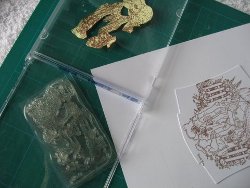
And when you have finished store the stamp and the mask carefully in you CD storage box for the next time you want to masking techniques.
Magic!
Return from Masking Techniques to Homepage
Search


Recent Articles
-
Memory Book
Oct 15, 22 09:17 AM
 Make a memory book, fun to make and even lovelier to give.
 -
Die cut letters.
Jul 19, 21 10:12 AM
 Add that personal touch with die cut letters, add names or sentiment as you please.
 -
Diaper Fold Card.
Jul 19, 21 09:34 AM
Create this fun Diaper Fold Card...and no need for a pin!
Search