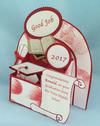
Minecraft’s Pop Up Creeper Card
by Emlie
(USA)


|


|
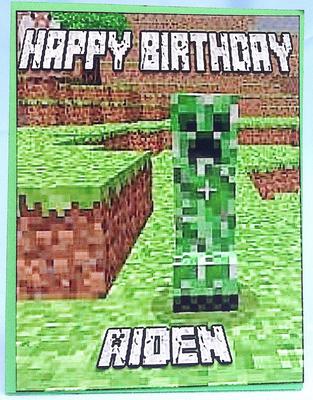
I have seen several of these “Pop Up Creeper Cards” on the Internet but no one gave any directions on how to make it. Since my grandson’s birthday was coming up I decided to make my own. I have included a template for my card. Feel free to use it.
Print the template on an 8 ½ ” x 5 1/2” piece of printer paper. Paper clip the template to your green cardstock. Lay it on your Score Board and score on the Blue lines. Do Not remove the template yet.
Lay the entire paper clipped piece on your cutting mat. Using your Exacto Knife cut on the red lines. Remove template from the Cardstock and carefully fold your mountain and valley folds as shown on Template.
DSP – One side of the card appears to be larger than the other. So, Do Not flip the pattern over or it won’t fit the card.
Using your Exacto Knife cut out ONLY the creeper section your template. Lay the template over your card base and trim as needed.
Paper Clip this template to your DSP. Trace the cut out creeper onto your DSP. Fold the DSP in ½ and cut apart on the fold.
Carefully lay the DSP over the card base, around the creeper. Check to be sure all edges fit. Tape the Right side in place. When that is done, tape the left side in place.
Adding a face to the Creeper: Punch 16 Black Squares using your 1/4” square punch. Adhere squares to creeper as shown. Go over the squares with “Black Stickles Glitter Glue” to give the black squares a shine. Let dry before proceeding. Then Stamp the “Smiles and Laughter” verse, from Hero Arts, in Black Ink.
Card Front - The “Happy Birthday” and “Aiden” are from Textcraft. This is free service that writes your words in Minecraft Script.
I sized the picture on the card front to 5 3/8” x 4 1/8”. Before printing the picture I added the Happy Birthday and the Name that I downloaded from “textcraft”.
Print the picture on glossy Photo Paper and adhere to card front.
Click here to read or post comments
Template for Minecraft’s Pop Up Creeper Card
by Emlie
(USA)

I had a request for the template for making the Minecraft’s Pop Up Creeper Card I posted here: https://www.card-making-magic.com/minecrafts-pop-up-creeper-card.html
I originally saved the template as a pdf file but needed to change it into a jpg or png file to post.
I finally figured out how to do that. For those of you who are interested in changing pdf to a jpg this is how I did it on a “Mac Computer”
To change a PDF to a JPG so you can post it online
Open PDF
File - Export – select JPEG
This gives you your template.
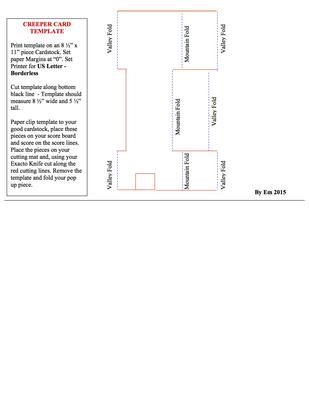
Now for the template – Before you print the template onto good cardstock print it on an 8 ½” x 11” piece of printer paper.
Set your margins at “0”; when you print the template, set the Printer to - US Letter – Borderless.
Cut template along bottom black line - it should measure 8 ½” wide and 5 ½” tall.
Place paper on your Score Board and score on the score lines.
Place your paper on your cutting board and using your Exacto knife cut on the cutting lines. One side of the paper will look larger than the other side. That's how it should look. Fold to make the pop out.
Now, run the template on another piece of printer paper and cut along the black line like you did in your sample.
Cut your good cardstock to measure 8 ½” wide and 5 ½”. Paper clip template to your good cardstock, place these pieces on your Score Board and score on the score lines.
Place the whole piece on your cutting mat and using your Exacto Knife, cut along the red cutting lines. Remove the template and fold your pop up piece.
See my “Minecraft’s Pop Up Creeper Card” for directions on how to finish the card.
Christina says ...
Emlie has very kindly sent in the instructions to make her Pop Up Creeper card and I hope you will show us your creations when you have made them.
Many thanks to Emlie for taking the time to send them in
Click here to read or post comments
Nativity Card In a Rectangle Box
by Emlie
(U.S.A.)


|


|


|


|
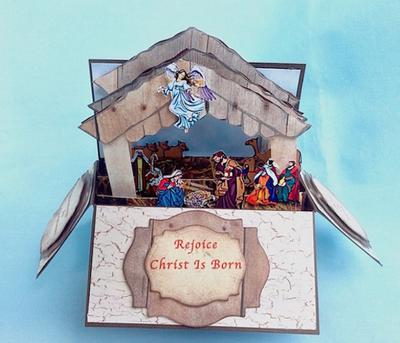
I found many different ideas for cards in a box on the Internet. The idea I liked best was from Craftsuprint titled “Away on the Manger”. It was a mini version.
I wanted to use real figures and have the card big enough so that people could actually see it.
I decided to use my own card in a box template that I posted here https://www.card-making-magic.com/rectangle-card-in-a-box.html so the finished size would be 4 ½” x 4”.
I have included a template you can printout to size for the card base. I have included the directions on how to print the template on the template itself.
I ran 2 copies of the template, cutting one apart so I could use it for the DSP. Cut 1/8” off 2 of the sides on each DSP template piece.
Then, you can trace these on the DSP and cut them out. Cut a 12” sq. of Dk. Brown cardstock 4 ½” x 12”. Paper clip the template to your Brown cardstock. Score on all of the lines.
Remove Template and cut on the cut lines, only. Cut off the marked area on the right side. Fold on all fold lines.
The cut pieces fold to the back. The pieces for the stable and figures can be found here. These are free as long as you cite to the web site:
Nativity Graphics: nativity scene clipart ##C92CAE;
Camels: http://kidspedia.hdwallpaperhdpictures.in/nativity-scene-clipart-2240/8669/
Angel: http://www.angel-fine-art.com/Free-Angel-Clipart.html
The DSP I used was Straw, Crackle and Clouds. I used sliver spritz on the clouds before I adhered it to the card.
Run the figures on Glossy Photo Paper, following the directions printed on the template.
Run the template with the “stable pieces” at 100% on white printer paper: U.S. Letter; Orientation: Landscape.
Then, cut off the 3 individual roof pieces, run them on Wood Grain DSP and cut out. Run the remaining 3 “Stable pieces on dark brown cardstock and cut out.
Cut wood grain DSP that measures 3/8” wide x 2” long and tape in place on the stable poles. Use Dimensionals to adhere the roof pieces to the stable roof.
For the shelf part cut “Straw DSP” 3 7/8” x 1” and tape in place over the shelf. This DSP does not cover the folded tab.
The figures are adhered to the shelves using Dimensionals. Cut off the tabs, only on the back stable piece.
Adhere the cows to the left side so they are partially above the shelf.
Lay the 2nd stable piece over the back piece, DO NOT CUT OFF THE TABS; Using Dimensionals, adhere the Shepherds and Camels in to the shelf so that the cows show.
Lay the 3rd stable piece, DO NOT CUT OFF THE TABS; over the other 2 shelves and use Dimensionals to adhere the Wisemen and Mary, Joseph and the baby in place.
All of the figures should be seen. Use Red Line Tape to tape the box shut by adhering the tab to the opposite end.
Starting with the back stable piece, Use Dimensionals to adhere it to the sky piece being sure the top edge of the shelf is even with the side of the box.
Put Red Line Tape on the folded ends of the remaining 2 shelves and adhere in place.
The words on the flaps were computer generated and cut out using Spellbinders: S4-310 Labels 18, Die #2 and #3.
I die cut the words on the side flaps using Die #2, then traced the outside edge of the die on word grain paper and cut it out.
For the front flap I cut the words out using Die #2 and used Die #3 to cut the wood grain paper.
I sponged the edges of both pieces in Brown and adhered them together using Dimensionals, then adhered them to the flaps using Dimensionals.
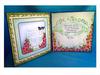
I adhered the verse on the card back
Christina says ...
WOW !!!!
Click here to read or post comments
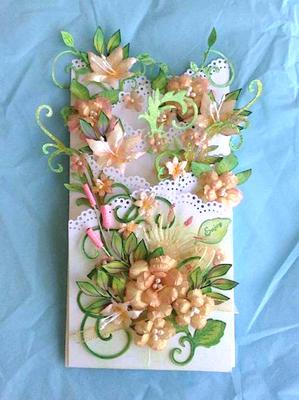
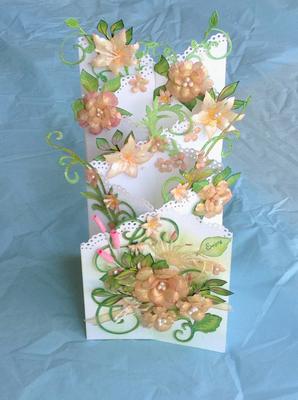
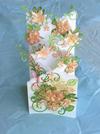
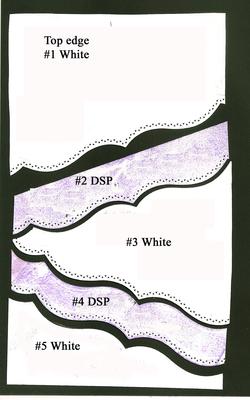
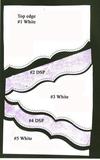
Double Cascade Card
by Emlie
(U.S.A.)


|

|
I followed Christina’s video to make the card base.
It looks difficult but Christina makes it easy
I punched the slanted edges with the Martha Stewart Doily Lace Border Punch and Lace Corner Punch.
Then I folded the card as directed on the template and slid the 2 sections together.
https://www.card-making-magic.com/doublezigzagcard.html
Some of my dies may no longer be available, so use whatever you have to decorate your card.
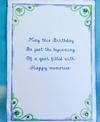
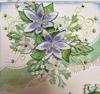
I decorated my card by stamping “Heartfelt Creations Malabar Lilies in Pixie Pink onto Wheat Vellum and Die cut 6-8 #1; 1-2 #2; 3-4 #3. Save the extras for another card. Form the lilies and add pearls for the center.
The Posy Patch flowers were stamped in Pixie Pink and cut out using the matching dies: 12-20 #1; 6-8 #2; 5-6 #3; 1 #4. Form the Posy Patch flowers and assemble in groups of 2 and 3 petals.
I also used Spellbinders Shapeabilities Floral Flourishes S4-327; Foliage Dies S4-328; Floral Flourishes S4-327; Cherry Lyn Mini Fanciful Flourishes and digi leaves. Add glitter as desired.
This card folds flat for mailing. I put into a clear plastic box before placing it into a legal sized padded envelope to mail.
Click here to read or post comments
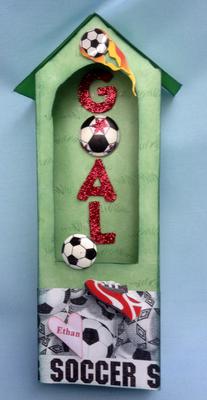
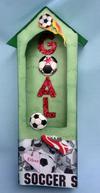
Soccer Luminaire
by Emlie
(U.S.A.)


|

|
I wanted to make something different for my grandchildren for Valentines Day this year.
I saw some cute luminaires on Card Making Downloads, but none of them had a soccer theme.
I lucked out because when I was looking through the luminaries I found a free one and I downloaded it.
I didn't care what it looked like I just wanted the pattern. (The link below is where you can find luminaires; however, the one I used is no longer free)
http://www.card-making-downloads.com/index.php?main_page=index&cPath=1378
I printed the luminaire onto printer paper and used that as a template.
TIP: A simple way to transfer your template to your good cardstock is to secure your template to your cardstock using Washi Tape.
Trace around the template, then, lay the 2 pieces on your scoreboard and score all of the score lines.
Remove and save the Template to use again. When you remove the Washi Tape it comes off clean.
It doesn’t leave any trace of tape on your project and it can be used more than 1 time.
I traced the template for the card front and back onto green cardstock, scored it, cut it out and folded it to shape.
Then I taped the template to my DSP and repeated the process. Cut the DSP apart and trim as needed to fit the card base.
The Soccer ball section, on the bottom of the Luminaire, was cut from a second piece of DSP
Sponge all of the edges using green ink before adhering to the bottom of the box. I used a third piece of DSP to get the soccer words
The “GAL” words were cut using my Cricuit Machine. I used a soccer ball for the “O” in the word goal. The rest of the balls are stickers attached to the card using Dimensionals.
The small on the front is punched using an “EK Success Heart Die”.
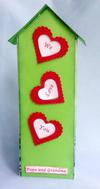
Assemble the box so that the back flaps are on the outside of the card back.
The “We Love You” words on the card back are computer generated and punched out using Martha Stewart’s “1” Heart Punch”. Set aside.
To make the Red Heart Frames: Place the Martha Stewart 1” Heart die all the way into the red cardstock with 1 edge at the edge of the paper (or the previous cut).
Take Spellbinders Classic Scalloped Heart die #2 and lay it over the cut out piece on the paper. Tape die in place using Washi Tape and cut out.
Arrange the words on the card back and tape in place. Use Dimensionals (cut thin) on the heart frames.
Lay frame over the hearts and adjust the words the way you want them. Adhere words in place; then, center the heart frames over each of the heart words.
Turn on your Tea Light and set the luminaire over it. It makes a great night light and the kids love it.
Click here to read or post comments
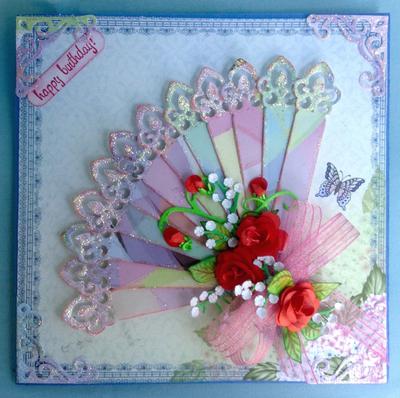
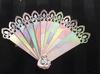
Card with Fan
by Emlie
(U.S.A.)


|

|

|
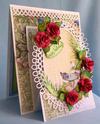
I really liked Christina’s fan card and decided that I had to make one.
For the card base cut a piece of blue cardstock 6”x 12”, score at 6” and fold it in half for a 6” square card.
Cut 3 - 6” squares from the Heartfelt Creations “Birds and Blooms” Paper Collection. Use 1 sq. for the card front and the other 2 for the inside.
Trim each square so they are just a tiny bit smaller than the card base and adhere to the card.
Cut/Emboss white cardstock for the inside verse using “Marianne Creatables Petra’s Heart die”.
Before removing the die, sponge embossed areas using Green ink. Add Dimensionals and set aside until you finish the card front.
Using the tag die from Spellbinders Valiant Honor Die cut it 12 times out of white cardstock and 12 times out of DSP.
NOTE: If you use heavy DSP you don't need to cut the tags out of white cardstock Spray each of the white tags with “Krylon Permanent Spray Adhesive”.
Carefully, line up the top edges of the DSP to the top of the white tags and press in place. Repeat on the other tags. Let dry.
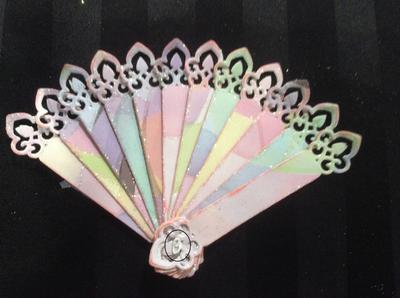
Sponge edges with Pink chalk ink. Use a “Quickie Glue Pen” to go over the long edges of the fan pieces and then dip them into white glitter. Join the tags to make the fan shape.
On the bottom filigree you will see a tiny diamond shape. I took a thin piece of white floral wire and threaded it through the diamond shaped hole on all 12 tags.
Then, I twisted the ends and flattened them against the filigree edge so the tags wouldn't come apart. See the picture with the circle on the bottom filigree.
Take pieces of removable tape and place them on the back of the fan. Spread fan pieces out the way you want them to look and adhere them to the tape so they stay in place. Turn fan over and use Diamond Stickles on the top Filigrees. Let dry thoroughly.
The 4 corner dies are from Cuttlebug Vintage Dies #37-1201, cut out of the same DSP as the fan.
NOTE: In order to cut the Cuttlebug dies with foam on the die with your Grand Calibur; you will need the Raspberry Plate “D” and the Cutting Plate “C”.
If using thin DSP cut 2 at once; If using thick paper cut 1 at a time.
Use Diamond Stickles on the 4 corner dies. Let dry and glue in place. I put some glue on a piece of paper and used a toothpick to place dots of glue on the corner pieces. Let dry thoroughly.
The 3 small roses and rose buds were made using the Marvy 1”- 6-Petal Flower Punch; Remove the tape from the back of the fan.
Adhere fan to card using Dimensionals stacked 2 high. Adhere bow to bottom of fan.
Arrange Roses and leaves around center of the bow. Cut 1 Cheery Lyn Add a Flourish B456 in green. Add 3 rose buds to it. Add Baby’s Breath around roses.
Happy Birthday is stamped and cut out using SU! Word Window Punch
You will find Christinas card posted here http://flowersribbonsandpearls.blogspot.com/2014/04/valiant-honor.html,
Click here to read or post comments
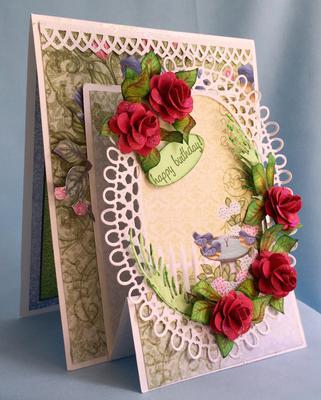
Up Right “Z” Fold Card
by Emlie
(U.S.A,)


|

|

|
The first time I saw a card made like this I thought it was a card that they added a step to.
After looking for other ideas for the card I found it was actually called an Up Right “Z” Fold Card.
I made my card base by cutting White Card stock 12” x 5” and scored it at 6” so I had a 6” x 5” card.
All of the DSP is from “Heartfelt Creations “Birds and Blooms Collection”. Cut 2 pieces of DSP 4 ¾” wide and 5 ¾ long. Adhere 1 piece to the card front and 1 to the inside.
Using Martha Stewart Arch Lattice Punch, punch a top border, glitter and adhere to top edge of card front.
To make the front “Z”, cut white cardstock 7 7/8” x 3 ½”; Score at 4 7/8” and 6 3/8”. Cut the DSP 3 ¼” wide x 4 5/8” tall and adhere in place at the top of the “Z” Fold.
Cut 2 pieces of DSP 3 ¼” Wide x 1 3/8” Tall and adhere in place on the bottom folds. With the “Z” section folded, lay the bottom of the folded “Z” section to the card at the bottom of the card base.
Cut a piece of DSP 4” tall x 3 5/8” wide from Heartfelt Creations “Birds and Blooms Collection. Overlay this piece with the “angel wing” from Cheery Lynn DL 136AB Doily.
I added a little white glitter to the edge of the Doily. Adhere the bottom of the doily over the front step as shown.
I made 5 mini roses using Marvy 1”- 6-Petal Punch. The leaves are from: Marianne Creatables LR0192-Seed and Head Leaves; and digi leaves.
I sponged the leaves in shades of green and added the red color to the veins. The Happy Birthday is stamped on light green cardstock using Dark Green Ink.
I cut out the oval shape using Cheery Lynn Little Stackers Oval – XM-7and adhered to the card font using Dimensionals.
I cut some rose buds and leaves out of the DSP and adhered to the right and left side of the card.
When you stand the card up, be sure “Z” fold is straight up as shown or the card won’t stand.
Christina says ...
What a really lovely card and as always detailed instructions from Emlie on how to make this for your self.
I am sure we would all like to thank you for sharing this card idea and will be trying it out too.
Click here to read or post comments
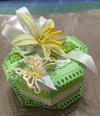
Treat Box with a Lily Corsage
by Emlie
(U.S.A.)


|


|

|
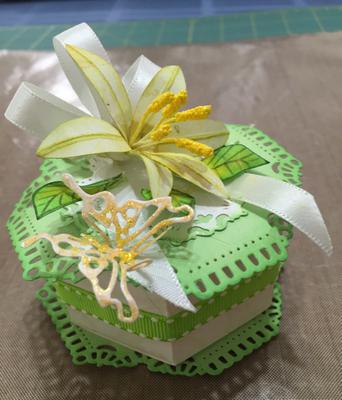
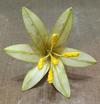
The Lily flower petals are made with just 1 Small Oval Punch. Cut a 1” wide strip of white paper, fold in ½ so it is ½” wide.
I marked my punch with a pencil so that all of the petals would be the same size.
Put the folded edge into the oval punch so that the top and bottom edges of the fold are at your marks. Punch 6 petals.
Sponge the crease of the petals in light green ink. Add a little yellow ink to the bottom of the petals so the center will be yellow around the stamen.
I rolled the ends of my stamen in yellow ink.
I made my flower into a corsage by gluing a 3” wire to the ends of the stamen sticking out of the back of the flower.
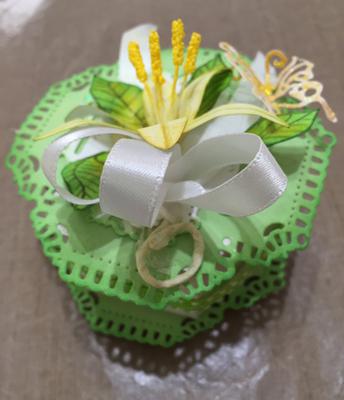
I wrapped white floral tape around the wire, twisted the end and hot glued the entire piece to the top of the box. Add a 3 petal ribbon and you have a small corsage.
The hexagon box is from Dollar Tree. I added the green top and bottom using Spellbinders Decorative Labels 27 die #3 and layered it with white cut from Labels 27 die #2.
I sponged the edges of the white with green. Adhere the green to the top and bottom of the box. Layer the white piece on the top.
The leaves are Digi. I cut the leaves from green paper, added a green colored pencil vein down the center of the leaves, and then sponged the edges with a darker green to make them stand out.
The butterfly is from Cheery Lynn Mini Exotic Butterflies, cut out of white and glittered using “Stickles Yellow Glitter Glue”. Shape butterfly and adhere to box.
Christina says ...
A very pretty box that would be suitable for many occasions
Click here to read or post comments
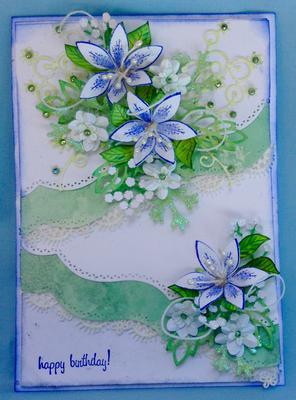
A2 Curved Borders One Cut Diagonally with Lilies
by Emlie
(U.S.A.)


|

|

|

|
I got the idea for this hinge card from one I saw on Pinterest. When I went to the web site the only directions were to cut the dies on a slant. So, I decided to try making the card myself.
Make a hinge card using Spellbinders Matting Basics A, Die #7.
I have included a set of templates, using the “A2 Curved Borders One” dies that I made for the diagonal cut overlays.
Cut the templates out by hand. Then, lay template #1, #3 & #5 on a piece of white cardstock.
Select the curved cutting edge of your choice and lay it at the curved edge of your template, tape the die in place and remove your template before die cutting your cardstock.
Using your DSP templates #2 & #5 repeat the process on DSP. Add lace to the top of the scalloped edges on pieces #3 and #5.
Cut another piece of white cardstock using Matting Basics B – Die #7 (4 5/8” x 6 5/8”)
Starting at the bottom edge lay your curved pieces on the white cardstock so that the DSP pieces overlap the white pieces to cover up where the lace is glued.
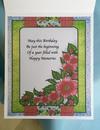
When everything is the way you want it stamp “Happy Birthday” on the bottom layer.
Use Dimensionals and adhesive to adhere the layers to the card. When finished, use Dimensionals to adhere this layer to the card front.
You can make the lily by using any leaf die.
The small white flowers are made using Martha Stewart’s Hydrangea 3 in 1 punch. I used 2 of each size petal for each flower.
Fold the petals in half to make a crease. Then I sponge the crease and flower edges in green. Add a small jewel in the center of each.
Use 2 “Memory Box Snowflake Corner Dies” under the flowers on the top of the card. I lightly sponged the edges in green and added a tiny green jewel in the center of each snowflake.
The leaves are from Marianne Creatables Anja Leaves 2, Spellbinders Foliage die and digi leaves. The Baby’s Breath is from Cheery Lynn.
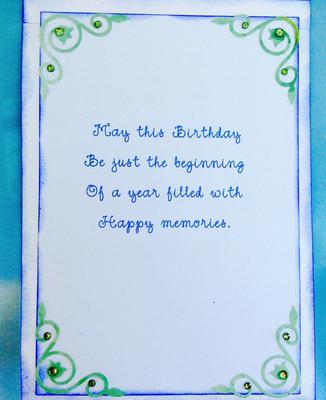
For the card inside: Cut white cardstock using Spellbinders 5” x 7” Matting Basics B Die #7 (4 5/8” x 6 5/8”).
Add your verse. Sponge edges of verse and card inside. For the corners I used Cuttlebug Vintage Floral Dies cut from the same DSP as on card front. I added the same green jewels as on the card front.
Click here to read or post comments
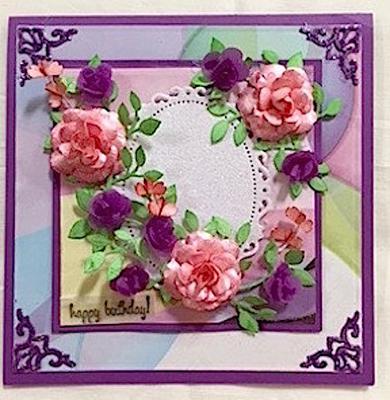
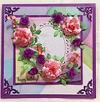
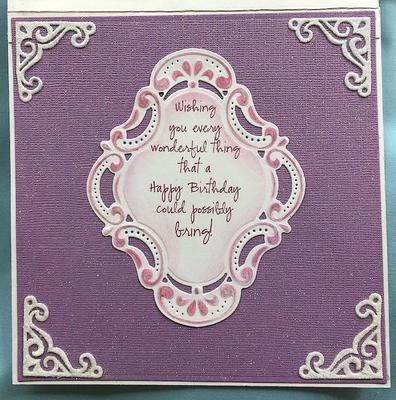
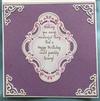
Roses and Butterfly Flowers
by Emlie
(U.S.A.)

|


|
I used Spellbinders 6” x 6” Matting Basics A & B to make my square hinge card and all of the layers.
The Large roses are from Spellbinders Rose Creations dies.
The small roses are made using the Marvy, 1” 6-Petal flower.
Butterfly flowers are made using the “Punch Bunch Cheery Blossom Small (½”).
Nestabilities Floral Ovals were cut out of white glittered paper for the front and inside ovals.
I used Spellbinders Sprigs for the leaves on the card front.
Happy Birthday was stamped in black on vellum and adhered to the front using red line tape.
The corners were cut from Spellbinders Marvelous Sq. and glittered in purple.
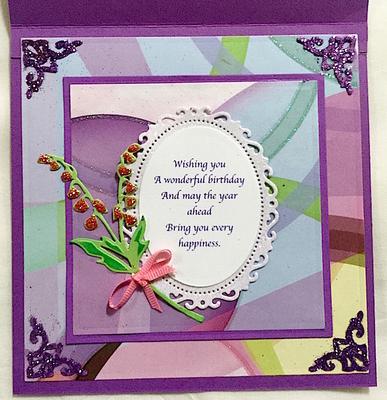
The inside verse was cut out using Spellbinders Small Classic Ovals Die #4 and glued to the inside of the glittered oval.
I die cut the Blue Bell Stem using Spellbinders Die D-Lites Blue Bells and Lily of the Valley Die.
Before removing the die I used a Stenciling Brush to add green to the flower stem.
I learned this technique from Christina, but I couldn’t find the link to her tutorial. Sorry about that.
After removing the die I used Stickles to add dimension and color to the Blue Bells.
I added a ribbon to the stem and glued the Blue Bells to the card.
Christina says
Another beautiful card from Emlie with all the instructions needed for you to make it for yourself.
Click here to read or post comments
Center Step Card Using Petra’s Ornaments Die
by Emlie
(USA)


|

|
I decided to make a Center Step Card using Petra’s Ornaments Dies. The card base is cut from a 5 1/2" x 11" piece of cardstock. The sides are 1” wide and the center is 3 ½” wide. After cutting the base I made templates for the DSP.
To decorate the card I used Petra’s Ornaments LR0279 - Cut Die #3 & 2 together. Remove Die #2 and use for another project.
Before removing Die #3 - Use a Stencil brush and “Versa Magic ‘Aloe Vera’ Green Ink to add color to the raised edges and around the center edges of Die #3. Remove die.
Go over raised areas edges using “Stickles Eucalyptus glitter glue” and let dry. I cleaned the ink off my die and mat using a Baby Wipe
The roses were formed using Spellbinders “Rose Creation Dies” and “Mountain Rose Metallic Paper”. Edges were sponged in VersaMagic Pink Carnation Chalk Ink.
The mini Roses were made using Fiskers 5/8” Heart Punch - Punch 2 - 5/8” Hearts out of purple Metallic Vellum and sponge edges in VersaMagic Pink Carnation Chalk Ink to form the bud.
See tutorial here: http://cardsandschoolprojects.blogspot.com/2011/04/heart-punch-flower-tutorial_15.html
After making the mini bud, die cut 1 Spellbinders Rose Creation die #2. Form the petal as you would for any rose.
Then glue the mini bud to the center. This is a cute little rose that you can tuck into any flower arrangement.
Add lace on the bottom edge of card. Cut side leaves are from Cheery Lyn D136AB Japanese Garden with Angel Wings.
Glitter and adhere to the sides of the card. Attach pearls to the side leaves and color them in purple Felt Pen.
Use Dimensionals to adhere Petra’s Ornament Die #4 on center of card. Add leaves, Roses and Baby’s Breath.
Stamp “Happy Birthday” in Cottage Ivy Ink and punch out using a word window punch.
Sponge edges in Aloe Vera Ink. Add “Stickles Eucalyptus glitter glue” to the edge. Adhere to card using Dimensionals.
Card inside: Words are computer generated, run on white cardstock and cut out using Petra’s Ornaments LR0279 Die #3.
Sponge edges and glitter as you did on card front. Adhere to inside of card using Dimensionals.
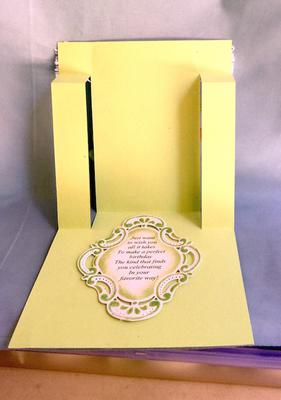
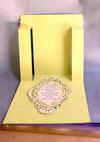
Fold Back Pop Up Card with Roses
by Emlie
(U.S.A.)

Fold Back Pop Up Card Open


|

|
This is the second time I’ve used this template to make a card. See my post at https://www.card-making-magic.com/beauties-from-emilie.html#submission_30713018 for my original post and directions.
This time I used Roses and Marianne Creatables Seed and Head Leaves. The leaves are digi and colored in shades of green, yellow and pink. I added Stickles Fruit Punch to the tips of the seed heads and center of the butterfly.
I adhere the leaves, flowers and butterfly in place using hot glue. I added dewdrops using Stickles Fruit Punch to the roses.
I used spellbinders squares and turned them sideways for the triangle shapes. The words are computer generated, run on DSP and cut out using Spellbinders square dies.
This card will fit into a 6” square or a 5” x 7” clear box for mailing.
Click here to read or post comments
Halloween Card 2016
by Emlie
(U.S.A.)

Halloween Front


|


|
When I saw this card on another website I knew my grandchildren would love it.
I didn’t have all of the dies that Anita used, so I improvised. After cutting the hinge card base I used Spellbinders Grand Circles LF-114 Die #3 to round the tops and Classic Circles Large S4-114 - #2 for moon).
I ran the top gray piece through SU! “Spider Web” Embossing Folder by Sizzix. I had the Cheery Lynn’s Dies for the “Spooky Tree B191 and the “Home Sweet Home B595”. For the windows on the house I punched 7 - ½” white circles and 1 - ¼” circle. Cut 1 white rectangle 1” x 1¾” for the front door windows.
Turn house so the front is facing down and adhere the circles and rectangle in place so the windows are white. Add Dimensionals to the back of the house. The “BOO” and the bat are stickers.
Card inside: I used the Die cut the spider web (Delicate Web – Memory Box #98706) and sprayed it with Krylon Spray Adhesive before sprinkling it with white glitter.
After it dried I sprayed the back with Krylon Spray Adhesive and adhered it to the card. The “Happy Halloween Stamp” is from SU!
Click here to read or post comments
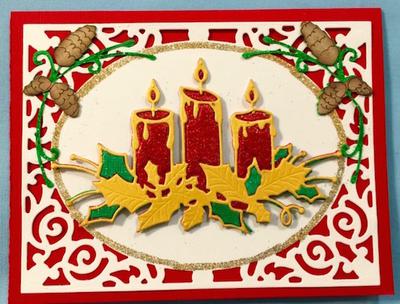
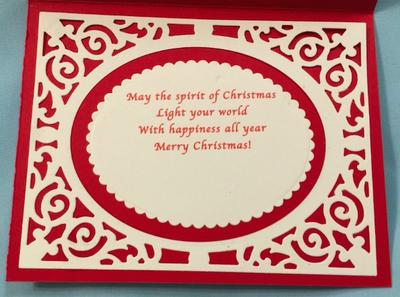
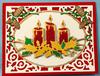
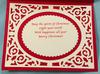
Glowing Candles Christmas Card
by Emlie
(U.S.A.)

|

|
I used red cardstock for the card base, which measures 4 ¼” x 5 ½”. The white overlay is Spellbinders A2 Filigree Delight S5-177.
The candles are made using Red Glittered Cardstock, Green and Gold cardstock. I was having a lot of trouble keeping the red candle together after it was cut out. This is the base candle and the other candles are all taped to it.
I found this wonderful tip for keeping the red pieces together ... use 2 pieces of Packing tape on the back of the red paper before cutting it. It worked like a charm!
I cut the candle cardstock 4 ½” x 2 ¾”. After cutting the green candles I removed the green leaves that show on the front of the red.
Glue the green candles to the back of the red. Glue the red leaves to the front of the red candles as shown.
The gold layer is the top layer. I cut it out using Gold Shiny paper. Remove all of the leaves and adhere it to the front of the card covering the edges of the candles and leaves.
The pine cone spray was cut using “Circuit’s “Joys of the Season. After cutting, turn 1 set of pine cones over so you will have the same stem on the top.
Use Sakura Silver jellyroll pen to mark the individual cones on the pine cone. Using Dark Brown, fine point felt pen to draw the individual cones above the silver pine-cones. Use Sponge Dauber to sponge the edges. I added green glitter to the stem. Adhere to corners of card.
Card inside uses the same Filigree die as on the card front. I cut the center of the filigree out using Cheery Lynn “Oval Little Stackers XM-7 #1 and Scalloped Stackers XM-8 #2”.
Click here to read or post comments
Petra’s Ornaments with Gardenia Roses
by Emlie
(U.S.A.)

|

|
I made a 6” square hinge card. See Christina’s hinge card tutorial here: https://www.youtube.com/watch?v=HIntxNU5dTQ.
I cut 2 pieces of white cardstock to for the card base using the largest square from Spellbinders Matting Basics A (S6-02) for the base.
Cut 2 pieces from Glittered Lavender Cardstock using one size smaller. Adhere 1 of the Lavender pieces on the card front and 1 on the inside.
I used Petra’s Ornaments LR0279, LR0281 and LR0280 for the card front. I embossed and cut the dies out of white paper.
Before removing the die use a stencilling brush and lavender ink to add color to the embossed areas. Use a glitter pen to go over the lavender to give it some sparkle. Adhere the pieces on the card front using Dimensionals.
The Gardenia Roses and Buds are made using the Cheery Lynn Gardenia Strips Large B339. I used 3 Roses and 3 Buds. I cut the roses out of White cardstock and sponged the edges in chalk ink.
I used digi leaves that I ran on light green cardstock. I sponged them 2 shades of green ink. I added some purple to the veins to tie the leaves in with the flowers.
The 3 Mini Daisy Flower Bouquets were made using my Cricuit machine and the “George and the Basic Shapes” cartridge. There were cut at size 1. I cut 3 – 1” pieces of wire for each bouquet. Hot glue flowers to the wire. Arrange 3 flowers per bouquet. Wrap stems with floral tape and glue in place.
Add the Butterfly is from Cheery Lynn Exotic Butterflies DFL112. I sponged a little purple on the edges and glittered the butterfly in white glitter.
The Happy Birthday was stamped on white cardstock then freehand cut the banner.
Christina says ...
The flowers are so pretty on this card in a lovely shade of pink. It goes really well with the Lavender.
Click here to read or post comments
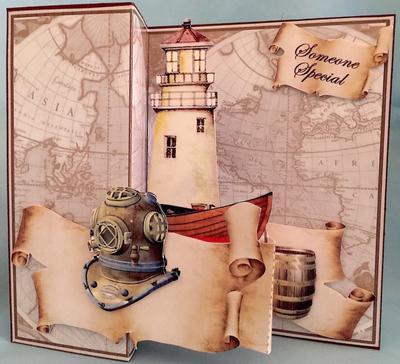
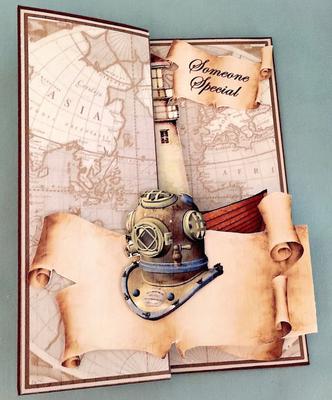
Double Z-fold card: At Sea
by Emlie
(U.S.A.)


|

|
After I purchased the kit to make this card from http://www.craftsuprint.com/card-making/mini-kits/mini-kits-men/z-fold-pop-up-at-sea.cfm. I found several great sites with tutorials on how to make this card.
I liked this site the best http://stampinwithsandi.com/stampin-up-video-star-of-light-double-z-card/. Sandi had both written directions and a video, which made it made it so much easier to assemble the card.
I cut my card base to fit in an A7 envelope: 5 ¼” x 7 ¼”
Click here to read or post comments
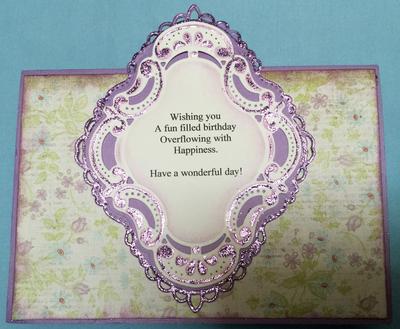
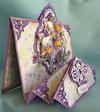
Diamond Fold Card Variation
by Emlie
(U.S.A.)


|

|
When I first saw this card it reminded me of the “Springy Card” I had made before. They posted a picture of the template, so it made it easy to change my Springy Card template to this variation.
My card base is cut from Lavender Cardstock and measures 8 ½” x 11”. I decorated my card using Petra’s Ornaments LR0279 Dies #3 and #4 for the center.
I used Spellbinders Marvelous Squares S4-383 die #3 on all of the corners and glittered them in Lavender.
For the front of the first fold I used Petra’s Ornaments again, and cut out Die #2 in Lavender and Die #1 in White. I added Lavender glitter to both pieces.
The flowers are from Heartfelt Creations Delicate Asters PreCut Set HCPC 3494 Die #4.
The flower centers are made using the Punch Bunch small Sun Die 1/2”. I accented the corners and the center medallion in Lavender glitter.
I repeated the card center on the back. The words are computer generated.
Click here to read or post comments
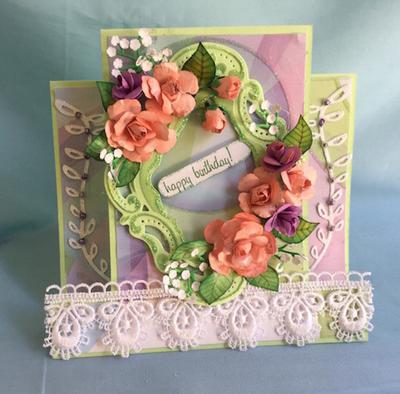
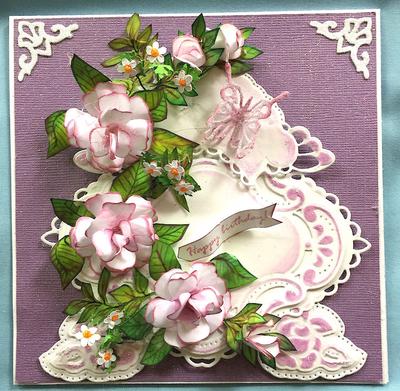
Twisted Easel Card
by Emlie
(U.S.A.)

|

|
I’ve seen several Twisted Easel card but they didn’t look easy to make. When I found Christina’s Tutorial at https://www.card-making-magic.com/twistedeaselcard.html I decided to try and make one. Christina’s directions were so easy to follow.
I used cardstock from Heartfelt Creations “Birds and Blooms Collection” and left overs from my stash.
The flowers are from a stem of silk flowers that I took apart, sponges with pink ink and hot glued in place over the small flowers in the picture.
Thanks to Christina’s tutorial, this card was easy to make and so much fun. I plan on making several more.
Click here to read or post comments
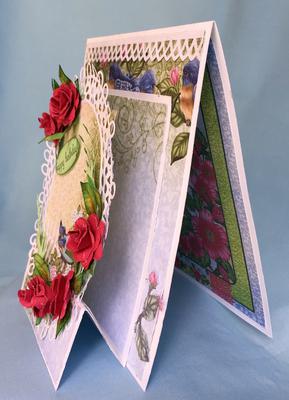
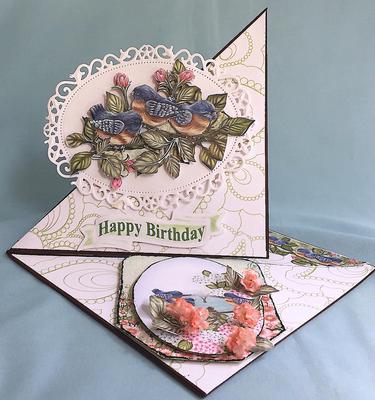
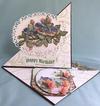
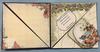
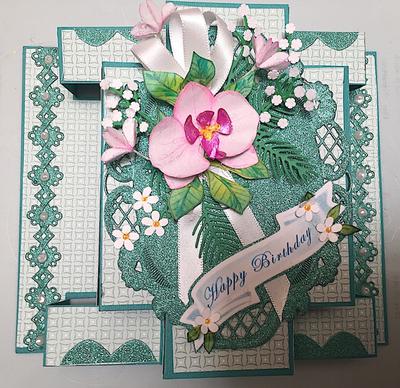
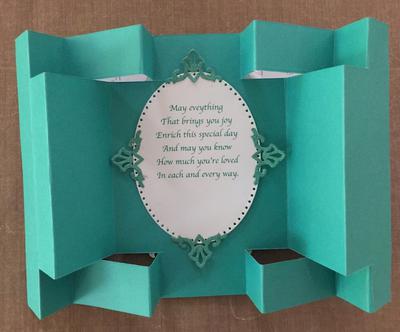
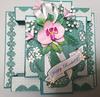
Reverse Double Display Card with Orchid
by Emlie
(U.S.A.)

|

|

|
It looks like a double display card but then it isn’t. I call this a reverse double display because if you turn your double display card template over, it looks like this card.
To make a template for his card, take your “Double Display Card Template” and change all of your “Mountain Folds” to “Valley Folds” and change all of your “Valley Folds” to “Mountain Folds.
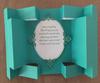
Transfer your template to a 6” x 12” piece of glittered green cardstock; transfer your score lines to your cardstock; fold to shape your card.
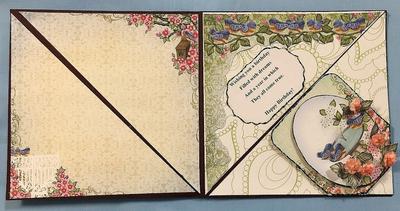
To decorate my card I made templates out of white cardstock for my DSP. The templates are about ¼” smaller than the card. This gives me a 1/8” border around the pieces. Then, I traced them onto my DSP, cut them out and adhered them to my card base.
The glittered lace trim is cut using “Nellie Snellen’s Interlaced Border Die” Flower EC-DIE-ILD002. Cut 4 pieces. Intertwine 2 sets and glue on the back to hold in place. Glue in place on as shown on card.
Glue a pearl in the center of each flower. Cut the border in 2 pieces, interlace and glue together. Cut 2 sections off and adhere to sides of card. Glue a pearl in the center as shown. Use the leftover pieces to trim the top and bottom edges.
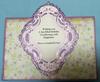
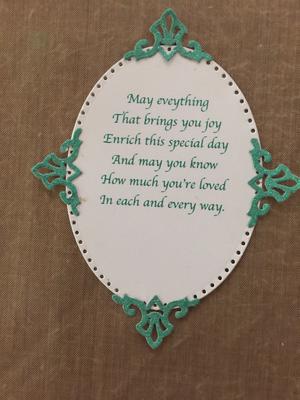
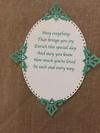
On the back of the card I added my verse. I cut it out using Marianne Creatables Anja’s Small Oval #LR0376. I trimmed the edges using green glittered cardstock and Spellbinders Marvelous Squares #S4-383 Die #3. Glue the 4 pieces around the oval and glue to center back of card.
For the card front I cut Marianne Creatables Anja’s Small Ovals #4 out of the glittered cardstock. I followed Christina’s tutorial on how to make floral corsage to make my Orchid Corsage.
I used Spellbinders Orchid Die #S2-162; Cheery Lynn Baby’s Breath Flower Kit #B364; Small Daisies, Digi Leaves and Butterfly Filler Flowers.
Christina says ...
Very pretty and you get twice as much usage from your template
Click here to read or post comments
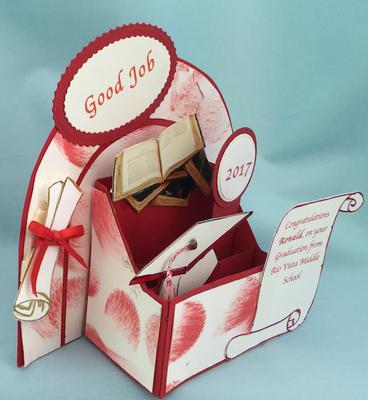
3-D Graduation Box
by Emlie
(U.S.A.)


|


|

|
My grandson is graduating from Middle School and I needed a card for him.
I purchased the “3D Graduation Box kit”
It only came in pink. I needed it to be red and white for the school colors.
In order to change the box’s color, I ran all of the templates on white printer paper, cut them out and traced them on Red and White cardstock. Score the pieces as shown on the template.
After cutting out each piece I folded them on the score lines before going to the next piece. I added a middle shelf for the graduation year.
The arches are cut out of white cardstock. I used VersaMagic Chalk Ink in Red to add the red splotches on the white cardstock. I went over the edges of the book and the diploma using a Sakura Gold Glitter Pen.
I added a red ribbon to the diploma using a mini glue dot. Adhere to card using Dimensionals.
Cut the graduation hat out of white cardstock. Use a red sharpie pen to go over the red areas on the hat.
Tassel: Use the “Graduation Cap” stamp from Northwood Stamps. Stamp just the tassel in red. Cut out and trim edges as needed. Adhere to top of hat and cover it with a red jewel. Set aside to dry.
All of my words are computer generated. I wrote the year in red and ran it off on white. I used Spellbinders Classic Circles Small S4-116 to cut out words and Spellbinders Large S4-117 out of red for the backing. Adhere overlays in place using red line tape.
I added my own graduation words the scroll.
Refer to the tutorial that comes with the download for complete instructions on making your card.
Click here to read or post comments
Fold Back Pop Up Floral Card with Floral Sprays
by Emlie
(U.S.A.)


This is a variation of the card I posted here a while ago. I purchased a template for this card, but you can use Christina’s Fold Back Card instead of purchasing the template. It can be decorated in so many different ways.
Today, I decided to make some rose sprays to go on my card. I used Cheery Lynn Fanciful Flourish #B291 for the base of my spray. The roses are made using Cheery Lynn Gardenia Rose Dies, Small and large, and the DIY Rose Tutorial
Leaves are from Cheery Lynn Flourish Leaf strip B178 and digi leaves.
Words are computer generated. Cut them out using Spellbinders Classic Squares Small S4-128 –- Die #6. I trimmed the edge off the words and adhered them to a rectangle cut form the same cardstock as the card base.
Click here to read or post comments


Recent Articles
-
Memory Book
Oct 15, 22 09:17 AM
 Make a memory book, fun to make and even lovelier to give.
 -
Die cut letters.
Jul 19, 21 10:12 AM
 Add that personal touch with die cut letters, add names or sentiment as you please.
 -
Diaper Fold Card.
Jul 19, 21 09:34 AM
Create this fun Diaper Fold Card...and no need for a pin!
Search
