Vintage Cards...
...Aged to Perfection.
Vintage cards don't have to be old...they just have to look it!
Aged cards are expensive to buy, but there is nothing like producing your own.
The idea is to make your card look as old as you can.
If you look at some old cards they are faded and curled. The edges are scruffy and they obviously look worn out and old.
The papers and flowers have faded in the light, so I wanted to reproduce the same look on the card.
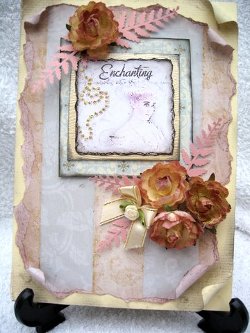
For this card I looked for papers that were faded to get that authentic charm.
The ones I used are "Nostalgia Warm" from Papermania and there are 40 sheets in the pack.
So lots of cards to be made.
The edges of the base card are sanded to age them and then chalked over in brown.
Keep your old emery boards, they do the job brilliantly!
I tore the paper and then chalked it to make it look dirty and worn.
Once it was stuck to the card I curled the edges around a barbeque skewer stick.
(Apply your Chalk with a cotton wool ball, or a make-up sponge...but obviously you can't use it for make-up again if you do.)
(When tearing paper, remember with the right side up if you tear it towards you the edges will be rough, tear it away and they will be smoother).
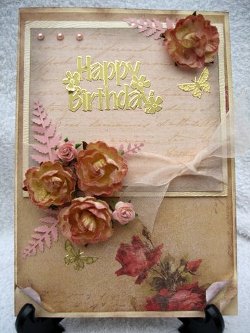
The flowers are the same on both of these vintage cards. They had been in my stash for ages and they really looked the part...tatty!
I roughed them up with my fingers and sprayed them with some antique gold glitter.
The fern leaves are from a punch and they are all attached with silicone glue.
The sentiment is a peel off and the ribbon is organza again from my stash.
But once the card is finished, I'm sure you would agree it looks good, and I would be pleased to send it to someone with my love.
Magic!
Look at the card-making ideas page for more inspiration.
Return from Vintage cards to Homepage
Search


Recent Articles
-
Memory Book
Oct 15, 22 09:17 AM
 Make a memory book, fun to make and even lovelier to give.
 -
Die cut letters.
Jul 19, 21 10:12 AM
 Add that personal touch with die cut letters, add names or sentiment as you please.
 -
Diaper Fold Card.
Jul 19, 21 09:34 AM
Create this fun Diaper Fold Card...and no need for a pin!
Search