Tab Cards... a novel way...
...to fasten your cards.
Try this novel way to fasten your cards and make Tab Cards for a different look.
Trying to make cards look a little different, to stand out from the crowd, is what most card makers try to do, whether they are for sale or just to give them to friends and family.
We all want to get that Wow factor, and this is a really neat way to fasten them.
It is very easy to do.
Just follow the steps and see what you can do.
Before you use your good stuff, I always recommend that you make the card first using a cheap piece of card.
On this you can make all you marks and measurements bold, and then keep it for future reference for the next time you want to make the card.
When you feel confident then go to town with your good cardstock.
If you prefer to learn by watching then here is the Video Tutorial

Step 1
Take an A4 card and fold it in half.
Trim off a strip from the right hand front and keep it to one side.
This is the piece that will make the tab that holds the card closed.
Step 2
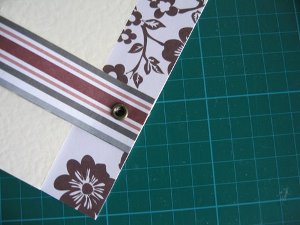
Open the card out and with a pencil measure up from the bottom of the card. Make small dots at 5cms and 8cms.
Then from the outside edge make dots at 6cms and 8cms.
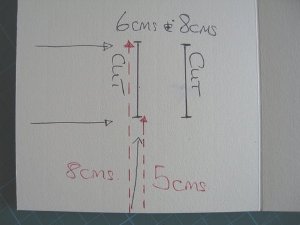
Lightly draw a line to join these marks vertically, and this is where you will make your cut.
The cut lines are shown as solid lines on the photo.
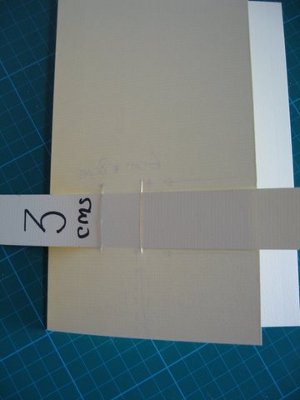
Step 3
Before you go any further make sure that the strip that you cut off the front of the card goes through the slot.
Make any adjustments that you need to here.
It needs to be able to slide into the opening easily.
Don't attach it just yet.
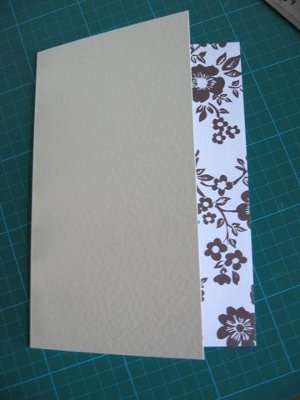
Step 4
On the inside of the card attach your chosen paper to the back.
The edge of this will show at the side where the strip was cut of.
You can add paper to the cut off strip if you wish or punch it into a shape.
I have used a die cutter to get the shape I want to my Tab Card.
Step 5
We can now attach the strip to the right hand side of the card, on to the back panel.
I used an eyelet but you could use a brad if you don't have eyelets.
Glueing it may not be strong enough to hold the tab in place as the card is opened.
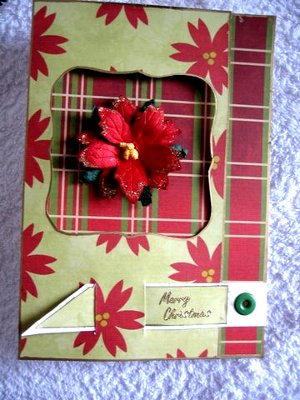
Step 6
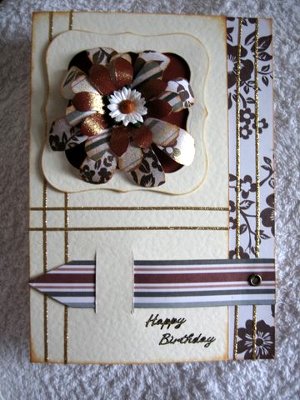
I stayed with darker colours for this one and the flower is handmade.
I used a spray to add some sparkle to the petals, and added some fine line peeloffs.
The sentiment is also a peel off and the daisy was an odd one I found in my stash.
(The "Stash" that grows continually!)
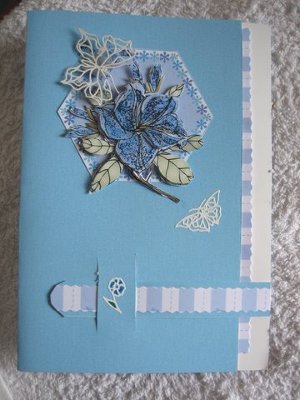
These tab cards can be for any occasion you like, and the colours can suit your recipient.
All you need is your imagination to produce some thing really different, that is sure to delight the person who receives your creation.
Magic!
Return from Tab Cards to Homepage
Search


Recent Articles
-
Memory Book
Oct 15, 22 09:17 AM
 Make a memory book, fun to make and even lovelier to give.
 -
Die cut letters.
Jul 19, 21 10:12 AM
 Add that personal touch with die cut letters, add names or sentiment as you please.
 -
Diaper Fold Card.
Jul 19, 21 09:34 AM
Create this fun Diaper Fold Card...and no need for a pin!
Search