Shrink Plastic...
...for miniature effects to your cards.
Shrink Plastic is an unusual product that can create miniature embellishments to your cards.
Search

This is really good product to use on your cards but not one I would advise you to use with children, as the plastic needs to be heated and it gets very hot.
Step 1
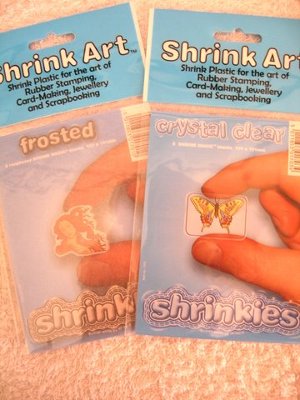
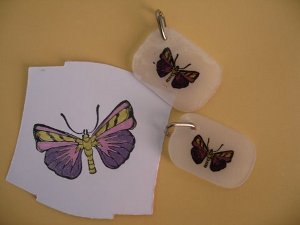
Choose the one that you wish to use. It comes in many colours and sizes.
The ones I have are in small packets of about 6 sheets and I have used the crystal clear and the frosted.
Each one gives a different effect.
Step 2
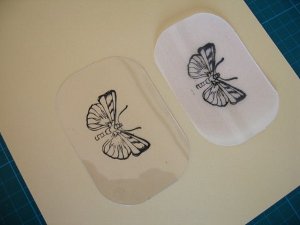
I have stamped the same image onto both to show you the difference.
If you are using the frosted plastic then stamp the image on the rough side.
I have used a black StazOn ink pad as it dries very quickly, and won't rub off.
Step 3
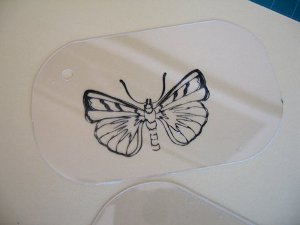
If you want to hang your tile then punch a hole where you want to thread it before you start to shrink it.
I also rounded the corners with a punch too.
Step 4
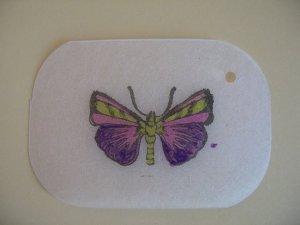
This is also the stage to colour your image if you want to, and again if you are using the frosted type then colour in on the rough side.
I used Sakura pens and as you start to shrink you will see that the colour intensifies.
Step 5
With your heat tool start to make the plastic shrink. It will twist and curl in all directions ....but don't panic!
It's supposed to do this as it shrinks down. (This process can also be done in a regular oven)

Before it cools flatten it with something solid.
But be very careful as the plastic is hot.
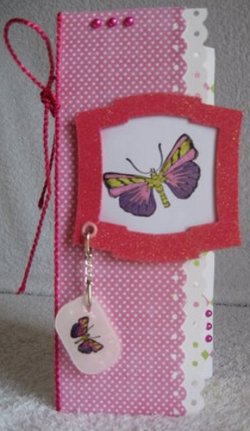
And once it is cooled then add the ring to attach it to your card. This is another style of charm.
There is absolutely nothing fancy about these rings they are quite simply rings that you would use to attach your bath plug to the chain. (And they will cost you pence and not ££££'s)
Step 6
I have stamped the butterfly image onto regular card and coloured it in with the same pens and colours as before.
The shape has been die cut out ready to add to the card.
And here is the finished card, with a detachable shrink plastic butterfly, that can be used as a key ring when the occasion is passed.
The recipient gets two for the price of one.... a card and a small gift too.
Don't forget to add your name to this one... "Handmade by....your name"
Magic!
Return from Shrink Plastic to Homepage
Search


Recent Articles
-
Memory Book
Oct 15, 22 09:17 AM
 Make a memory book, fun to make and even lovelier to give.
 -
Die cut letters.
Jul 19, 21 10:12 AM
 Add that personal touch with die cut letters, add names or sentiment as you please.
 -
Diaper Fold Card.
Jul 19, 21 09:34 AM
Create this fun Diaper Fold Card...and no need for a pin!
Search