Easy to make Shaker cards...
... just follow the steps.
Are you ready to try something a little more adventurous?
Then try making shaker cards, another kinetic card with movement to it.
Just follow the steps and see what you can do.

This is where you will find the Video Instructions
Step 1
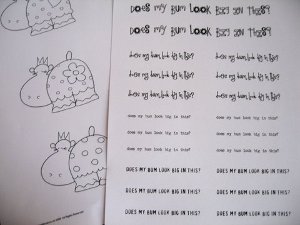
Choose the papers that you want to make your card with, and the image that you need for your focal point.
Mine is a digital download from Pink Petticoat and the Hippo is fab!
I used the largest one, and the sentiment is from the kit too.
Step 2
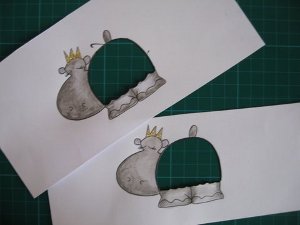
Colour it in using your favourite medium and remove the centre part that is to be the shaker.
Leave enough of the outer card for you to finish the edges off as you wish.
Step 3
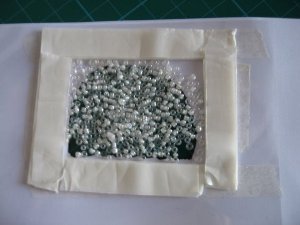
Once you have done this, turn the image over and on the wrong side place double sided tape along all the edges around the cut out part.
Then stick a piece of acetate to cover the opening and press it down.

Step 4
The next part is to stick foam tape pad around the edges of the opening, on top of the acetate.
Make sure there are no gaps as you don't want the beads to fall out.
Pour in the beads, confetti, metallic shapes or glitter and press them flat.

Make sure the pretty side of the paper is visible through the acetate, and that there are no gaps for the beads to fall out of. and don't overfill or it won't shake

The finished card can be for any occasion and of course the flower is made by me.
Take a look at
Handmade paper flowers
and always have the flowers you want to match your projects.
What could be more magical?

Return from Shaker cards to Homepage


Recent Articles
-
Memory Book
Oct 15, 22 09:17 AM
 Make a memory book, fun to make and even lovelier to give.
 -
Die cut letters.
Jul 19, 21 10:12 AM
 Add that personal touch with die cut letters, add names or sentiment as you please.
 -
Diaper Fold Card.
Jul 19, 21 09:34 AM
Create this fun Diaper Fold Card...and no need for a pin!
Search
