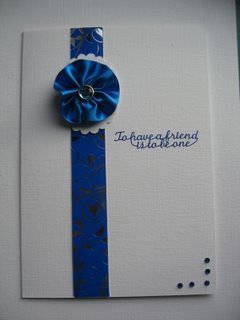
Make this pretty Ribbon Flower...
...and attach it to your creations!
How about a topper with a difference? Try this Ribbon Flower...just for a change!
We have tried making other types of flowers ...
Crochet Flowers,
Paper Flowers,
Retro Punched Flowers,
and we have even got some
Acetate Flowers
so how about having a go at some flowers made using up bits of ribbon in your stash.

These are very easy to make and can be added to all your projects to suit the color scheme or the occasion that you are using them for
I love adding flowers to my cards, for me it adds the finishing touch, and what woman doesn't like to get flowers?
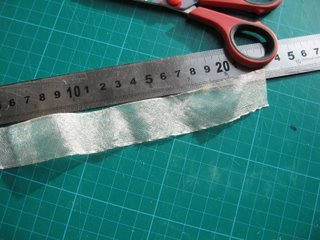
Step 1
You will need a piece of ribbon about 20cms long, but it doesn't matter if it is longer
Use silk, taffeta, patterned, plain or in fact any that you have in your stash.
The one I have used here is a delicate cream organza.
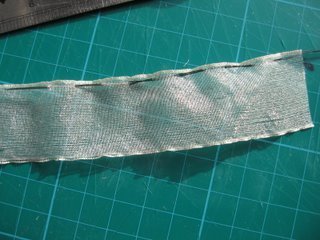
Step 2
With some cotton to match your ribbon, gather up one of the long edges with short running stitches.
(I only used black cotton so you could see the stitches....honest!)
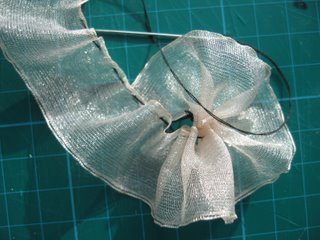
Step 3
Once you have the stitches through the edge you can then gather up the ribbon until it bunches together.
Put a couple of holding stitches in the center of the flower to keep everything in place.
And maybe a couple of stitches to hold the two short ends together.
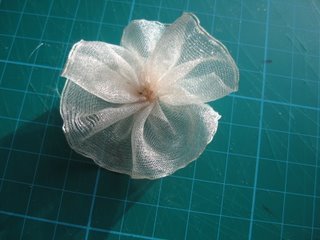
Step 4
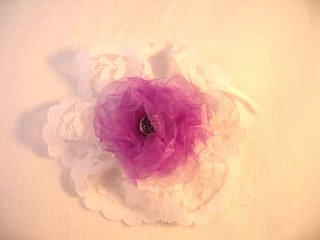
This is what your finished ribbon flower should look like...Yes?
(And the black stitching doesn't show....)
You can make them in any color and fabric that you want to.
The width of the ribbon you choose will determine the size of the flower.
Finish the centers off with a paper flower, Buttons, Brads or Gemstones.
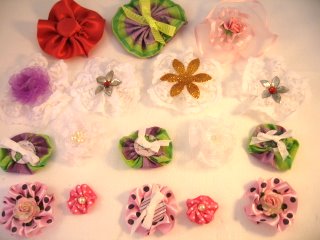
Some of the fabrics used here are silk, cotton, lace and some narrow ribbon.
In the centre of this lace ribbon flower I have added the pink Organza flower with a brad centre
Return from Ribbon Flower to Homepage


Recent Articles
-
Memory Book
Oct 15, 22 09:17 AM
 Make a memory book, fun to make and even lovelier to give.
 -
Die cut letters.
Jul 19, 21 10:12 AM
 Add that personal touch with die cut letters, add names or sentiment as you please.
 -
Diaper Fold Card.
Jul 19, 21 09:34 AM
Create this fun Diaper Fold Card...and no need for a pin!
Search
