Make this Push Pull Me Card ...
...step by step
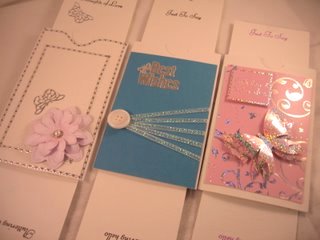
Make this Push Pull Me Card and recycle some of your grocery bags.
I have been asked many times to give a tutorial on how to make these unusual cards, and there are lots of versions around for this particular style.
It may be called by another name in your part of the world, but these instruction will show you how to get this look ... whatever name it is known by.
This is my version the Push Pull Me Card and it uses a strip of a grocery bag.
(I have used a pink one, as it shows up better in the photos.)
You will need to use one of the thicker plastic bags as the thin ones aren't strong enough.
It is another card that can be used for any occasion and is adaptable for male or female cards.
It also suits any age group, so lots of choices open to you there, but children especially love it.
But it needs some measuring to achieve...so get the ruler out!!
I have also been asked to give the measurements in inches(") as well as centimetres(cms), so I have obliged as best I can.
But work in one or the other, don't mix them up on the same card.
And as always make a Template until you are confident with this Push Pull Me Card.
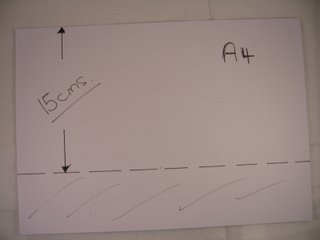
Step 1
So the first thing you need to do is to trim the bottom off your A4 card, to 15cms (6")
Don't discard these bits as they can always be used for Matting and Layering.
Step 2
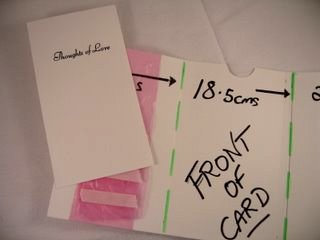
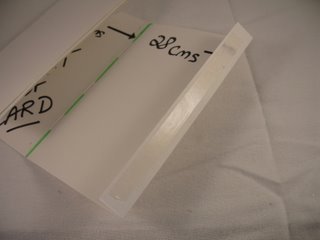
Lay this piece flat down and from the left side of the card measure in 9cms (3 1/2"), 18cms(7 1/4"), and 28cms (11").
The bit that is left over should be about 1.5cms (1/2")

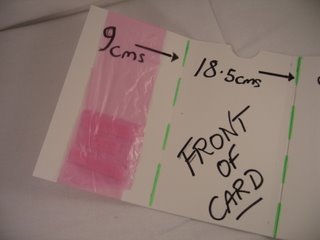
Step 3
The green lines are where you will score and fold the card.
The centre panel will be the front of the Push Pull Me Card.
Into this panel I have used a circle punch to cut away a half circle at the top.
This will allow the recipient to pull the slider.
You will need a strip of grocery bag to fit around the left panel.
With double sided tape secure the two ends together, one on top of the other.
Step 4
Now cut two pieces of card 8cms (3 1/4") x 15cms(6")and stamp your message onto these.
Don't stamp too near to the top, as this is the part that will be the slider.
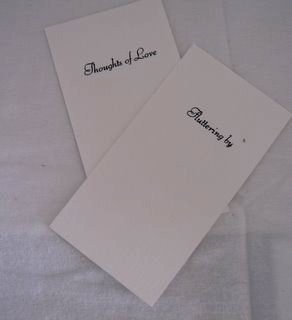
Step 5
To fit the first panel into the card, open it out flat, and add some double sided tape to the bottom of the grocery bag strip, and attach the panel neatly to this.
It needs to be fitted so that the words will show at the front of the card when the slider is pulled.
Step 6
Close the card up and fit the other stamped panel to the top of the strip with double sided tape.
Keep your stamping to the bottom and when this is now laid onto the panel the words will be inside the card.
Make sure they face the front.

Close the card up, without glueing it, and have a dry run to test the mechanism.
Step 7
On the narrow edge run a narrow line of wet glue, carefully, and close the card up.
(Double sided tape dries out and the card will soon break open.)
You will need to tuck this edge behind the slider mechanism, or it won't work.
Step 8
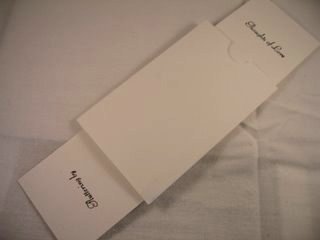
Once the card is sealed test the mechanism again and it will work more freely with use.
When the slider is pulled the message pops out at both ends of the card.
You can add a ribbon pull to the top, where the cut out is.
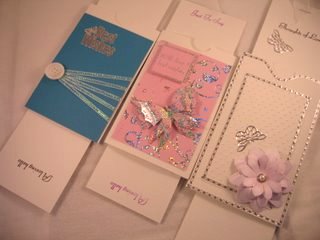
Now you can add any Embellishments that you have in your "Stash".
Make another panel from Specialised card and add it to the card.
I hope you enjoy making this Push Pull Me Card.
Return from Push Pull Me Card to Homepage
Search


Recent Articles
-
Memory Book
Oct 15, 22 09:17 AM
 Make a memory book, fun to make and even lovelier to give.
 -
Die cut letters.
Jul 19, 21 10:12 AM
 Add that personal touch with die cut letters, add names or sentiment as you please.
 -
Diaper Fold Card.
Jul 19, 21 09:34 AM
Create this fun Diaper Fold Card...and no need for a pin!
Search