Paper-flowers
Easy to make paper-flowers in easy to follow steps to adorn your cards
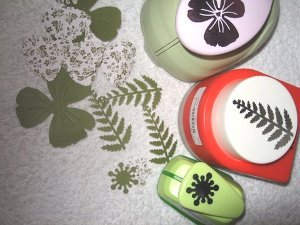
Step 1
These beautiful paper-flowers are easily made with three paper punches
One produced the petals, another the flower centre and the third gives us the leaves.
The picture shows the elements laid out ready to assemble, and the punches used.
But any punches that you have that produce petals can be used instead, the method wiill be the same.
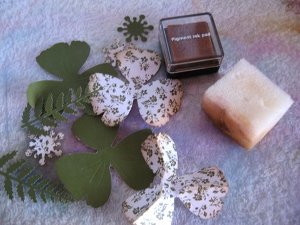
Step 2
Once you have punched out the pieces, bend the leaves along the centre of each petal to add some shape.
Then you need to distress them with an ink pad and a piece of sponge.
I use an old piece of thick acetate and dab the ink from the pad in the corner, and with the sponge pick up the amount of ink you need and drag it from the edge of the petals inwards to the centre.
(The acetate is easily cleaned off afterwards and it keeps your work surface clean. Store it away till next time)
Once the sponge starts to run out of ink then lightly go over the central bend in the petals
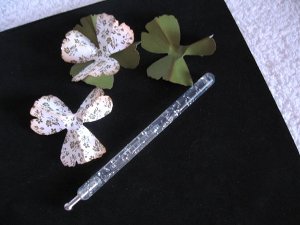
Step 3
Using a mouse mat and a large embossing tool, on the right side of the petals, rub the centre of them with the tool and they will start to curl upwards
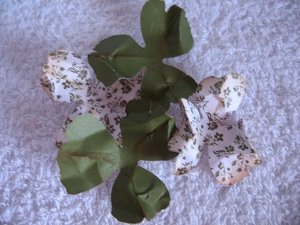
Step 4
With your fingers, gently scrunch the petals to add shape to the paper-flower, and layer them in alternate colors to make them interesting.
Stagger them so that the colours show through.
Step 5
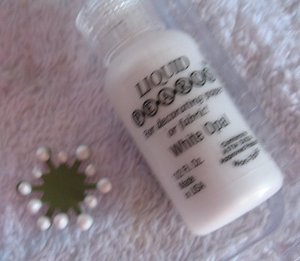
With the central piece I have added some liquid pearls to each of the stamens and left it to dry.
(Ooooops! sorry about the blurred photo!)
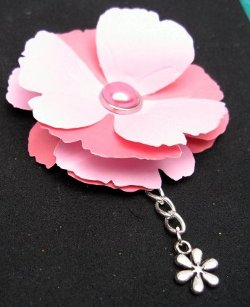
The charm is not essential, but it does make a pretty addition to any card
If you have joined the petals with a brad then add the charm to the back, and secure in place when you open the legs of the brad.
The flower looks just as good without one, just glitter up the petals instead if you prefer.
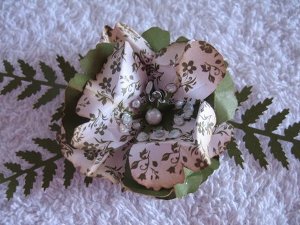
Step 6
The petals are all joined together in this paper-flower with Pinflair Gel Glue and I have added a flat backed pearl to the centre
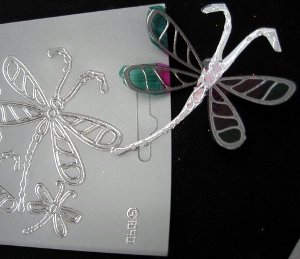
The Dragonfly I have added for effect, and is a peel off mounted onto acetate, it is then coloured with peel off pens and attached to the card with Pinflair Glue Gel
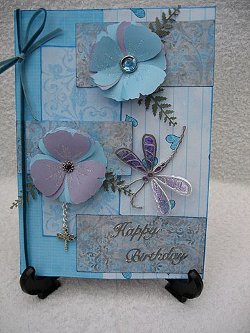
And this is a finished card using the same elements to achieve the paper-flower, but in a different colourway.
Just adding a piece of ribbon to the spine, glitter to the flower, and some pretty papers used in panels, can transform the look of the card. and each color has a different feel to it.
A lovely card for any occassion.
Return from Paper-flowers to Homepage


Recent Articles
-
Memory Book
Oct 15, 22 09:17 AM
 Make a memory book, fun to make and even lovelier to give.
 -
Die cut letters.
Jul 19, 21 10:12 AM
 Add that personal touch with die cut letters, add names or sentiment as you please.
 -
Diaper Fold Card.
Jul 19, 21 09:34 AM
Create this fun Diaper Fold Card...and no need for a pin!
Search
