Never Ending Card...
very different...but just as easy to do.
This Never Ending Card is very different...just flip it over and over till you're back to the start.
Search

This Never Ending Card looks much the same as any other ...until you start to unfold it, and then it opens layer after layer.
IT's one that will fascinate the recipient and keep them amused on every part.
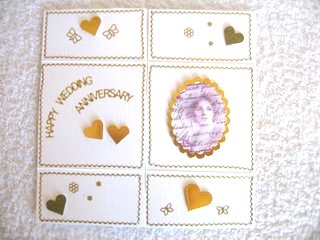
I have kept this one decorated very simply, and by the nature of the card it won't take high decoupage to the layers, otherwise it won't lie flat.
It will also need a bigger envelope to post it in.
Step 1
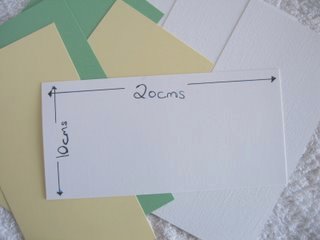
You will need four pieces of card 10 x 20cms.
Either matching or different colors.
Step 2
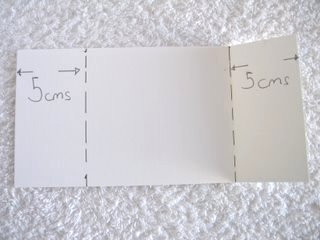
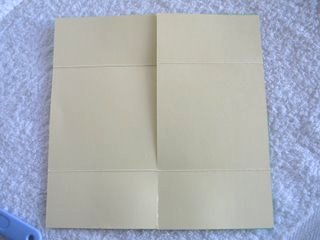
Measure in 5cms from each of the short edges.
Score and fold in both directions, to make the card pliable.
I'm using two different colors for the next few steps, so that it is easier to see.

Step 3
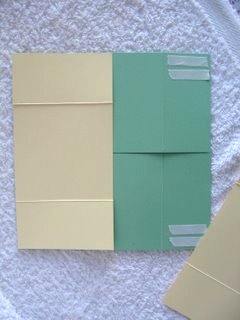
Lay two of the panels down (Horizontally), and add double sided tape to each of the four corners, in about a 5cms square.
Butt the edges neatly up to each other.
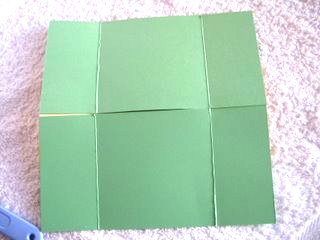
Step 4
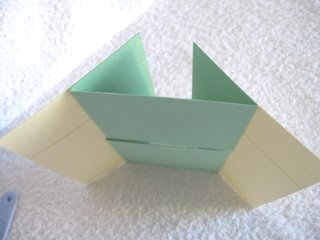
On top of these two panels lay the other two in the opposite direction. (Vertically)
This part needs to be done carefully so that the card will open, so take your time as you stick them down.
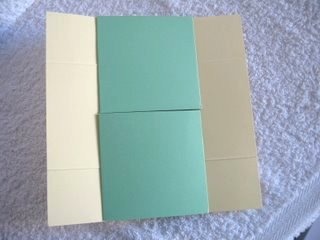
And this the the card now made.
You will need a bone folder to crease the score lines again, as you go along, to make sure that the card opens.
So to begin the folding...
Step 5
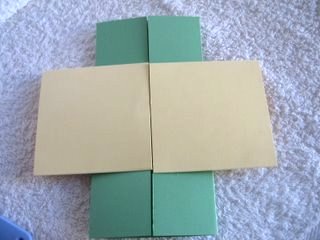
...take the card and fold the two front panels (the yellow panels)to the back and crease.
This is what it should look like so far...
Still with me? Yes? Oh good!
Step 6
With the card flat down, fold the two green panels to the back, along the score lines, and crease again.
Step 7
Then take the two yellow panels and fold them to the back, along the score lines and crease again.
Step 8
Take the green card and fold it to the back along the score lines and crease.
Step 9
And this will reveal the yellow card again which means you are now back where you started.
If the card sticks at any point then this where you can now trim it a little.
Try the mechanism several times to make the action easier to operate.
Decorate each panel seperatly, as you flip open the card, so that you know they will be in the correct place.
You could add pretty paper panels to yours making them smaller to fit each one.
Add flat flowers, Gemstones, or any other Embellishments in your stash.
Don't make them to deep though or the card won't lie flat or flip properly if you do. Most of all have fun with the card, and as always....make a Template as a practise run and keep it safe for the next time you want to make this Never Ending Card.
Return from Never Ending Card to Homepage
Search


Recent Articles
-
Memory Book
Oct 15, 22 09:17 AM
 Make a memory book, fun to make and even lovelier to give.
 -
Die cut letters.
Jul 19, 21 10:12 AM
 Add that personal touch with die cut letters, add names or sentiment as you please.
 -
Diaper Fold Card.
Jul 19, 21 09:34 AM
Create this fun Diaper Fold Card...and no need for a pin!
Search