Easel Card ... easy card !
If you are new to cardmaking, then this Easel card is a good one to start with, and yet it can look very different .
These pretty little cards are a good place to start if you have never made your own cards before.
They are just a bit different from a basic fold and yet easy to achieve either with or without the aid of dies, and there are many styles that you can try.
If you prefer to learn visually then you will find lots to watch in the Video Tutorial section
You can also find variations on this card that are just as easy to achieve with step by step instructions.
Double Version of the card
Twisted Card
Double Twisted Easel Card
Triple Easel
Triple Twisted Easel
Quad Easel
Gatefold Easel
Choose the card, topper and the sentiment that you want to use, and any embellishments that you would like to add.
Here's how to make it...

Step 1
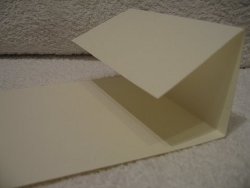
Take your piece of card and fold it in half.
Measure the size of the front as this will be where your decorative panel is attached.
Fold one side in half again.
Step 2
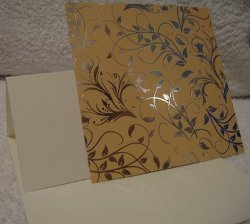
Cut a piece of your fancy card to cover the whole of the front of the card, (the size you measured earlier)
Add your chosen topper to the panel.
I used double sided tape on the lower part and attached it to the folded flap.
The top part of this decorative panel should be free. (As in the photo)
Step 3
This is what the card will look like from the side, once you have the panel in place.
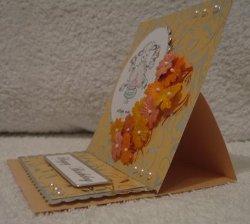
Make a small label to add to the bottom, I layered mine with silver mirror card and I added a Birthday greeting.
Fix this in place with foam pads, for the top flap to wedge onto. It acts as a stopper.
Step 4
The front can then decorated with any embellishments you have in your stash.
Flat back pearls, little mulberry flowers and glitter.


This card has been created with the Snowflake Easel dies from Card Making Magic and the top will fold flat.
It will fit into a standard sized envelope, and it tucks neatly into the stopper, and the card stands freely.
The bottom panel on this card has been made to match the top and looks just as good.
Glitter card snowflakes have been added to the centre and also on the bottom to hold the top in place.
So with or without the dies this is a very easy card to make.
Try some for yourself...you'll soon get the hang of them!
Easy peasy and very pretty!
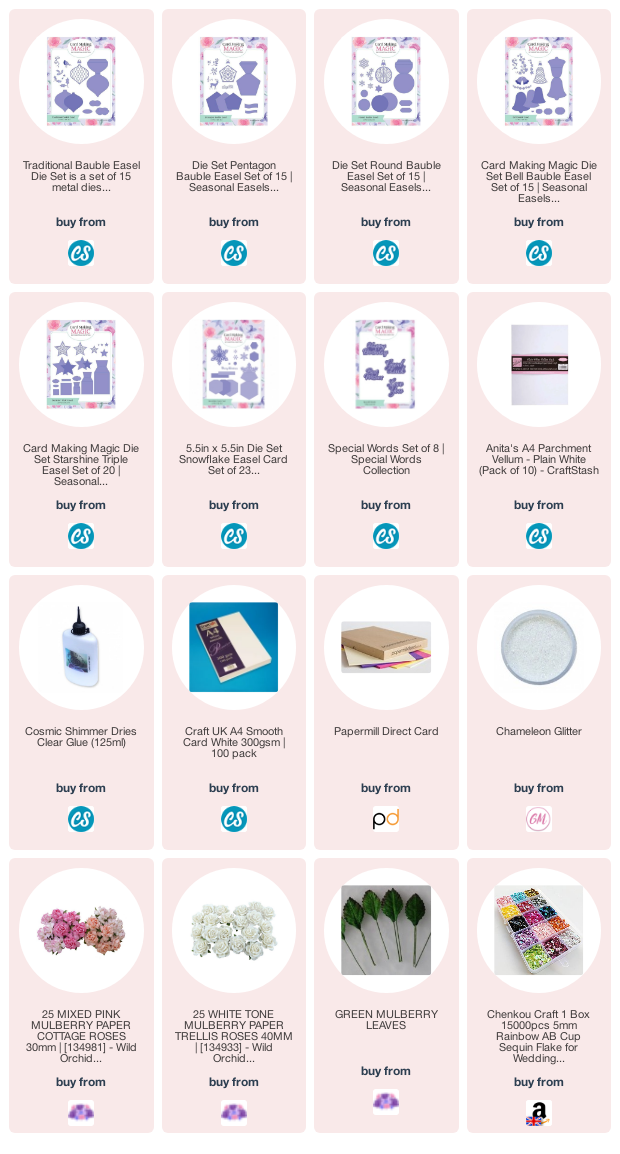
And if you prefer to use another die set instead then you will find different shaped dies at Craft Stash some are pictured below
You can also find the Easel Card playlist on my YouTube Channel for all the dies shown below
Return from Easel Card to Homepage


Recent Articles
-
Memory Book
Oct 15, 22 09:17 AM
 Make a memory book, fun to make and even lovelier to give.
 -
Die cut letters.
Jul 19, 21 10:12 AM
 Add that personal touch with die cut letters, add names or sentiment as you please.
 -
Diaper Fold Card.
Jul 19, 21 09:34 AM
Create this fun Diaper Fold Card...and no need for a pin!
Search
