Double Side Step Card
This Double Side Step Card is a variation on a theme ... so if you have tried the other styles then give this one a go too.
This pretty card is another version of the Side step card, and will be made in a similar way.
There are lots of different ways to get this fold but this is the way I like to do it and it works for me.
I have tried to keep the instructions easy to follow.
Step 1
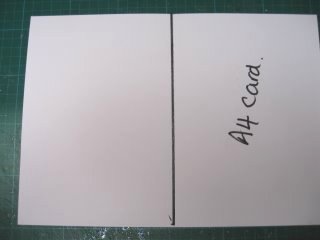
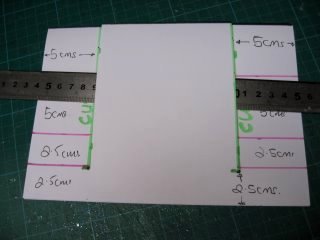
Take your A4 card, metal ruler and marker pens.
(A4 21 x approximately 30cms.) (Approx. 11 3/4" x 8 1/2")
Fold the card in half.
(And for those that prefer to work in inches then 2.5 cms is about 1")
Step 2
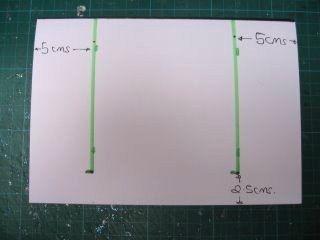
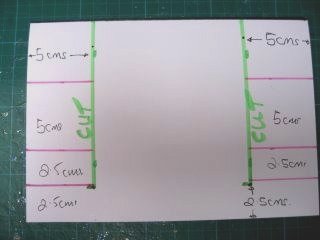
Keep the fold at the top and from each of the short sides measure in 5cms.
I have made these lines green so that you can see and this is where the card will be cut.... but not yet!
Step 3
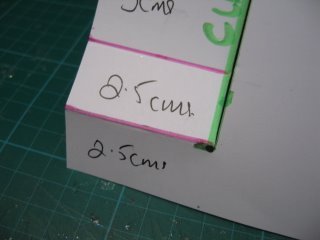
Still with the fold at the top measure up from the bottom by 2.5 cms.
I have made these marks in pink and on each side of the centre panel.
Working from the first mark measure up another 2.5 cms, then from that mark measure up 5 cms.
Step 4
Now you can cut the green lines.
Remember this is only the template we are making and you will not have all these marks on your good card.
Think of it as a trial run ... before you start on the precious good stuff.
STep 5
Now we can start the scoring and folding, but remember that we are only working on the outside panels to create the steps, and not onto the centre part.
If you keep the card folded in half as you work then the score lines will also be transfered to the back of the card at the same time.
So at the first 2.5cms mark fold the card away from you. This is a valley fold.
The next one is the opposite way, into a mountain fold. Continue through both side panels.
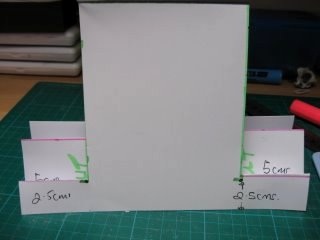
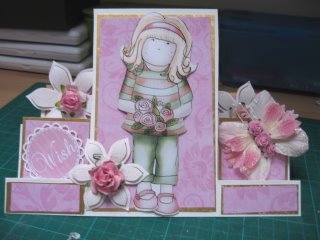
Once all the folds have been made this is what your Double Side Step Card will look like.
Step 6
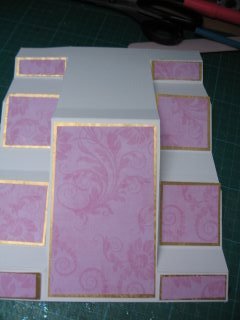
Make smaller panels to add matting and layering to your card and add any embellishments that you have in your "Stash"
It can be used for any occasion and you can make it as pretty as you want.
This pretty image is from the CD Pretty Sweet by Polkadoodles
I hope you will try this Double Side Step Card, as well as the other variations, and lots of the other projects on the website and don't forget there are lots of Video Tutorials for you too.
Kinetic Cards
Easy Projects
More Projects
Novelty Cards
Papercrafts
Return from Double Side Step card to Homepage


Recent Articles
-
Memory Book
Oct 15, 22 09:17 AM
 Make a memory book, fun to make and even lovelier to give.
 -
Die cut letters.
Jul 19, 21 10:12 AM
 Add that personal touch with die cut letters, add names or sentiment as you please.
 -
Diaper Fold Card.
Jul 19, 21 09:34 AM
Create this fun Diaper Fold Card...and no need for a pin!
Search
