Concertina Card
Just follow the steps to make this Concertina card
It is not difficult to do and you can make your own version along with me
Because of the movement involved with this card it is one to add to
Kinetic Cards.
Although making this card is a bit fiddly it is not hard and these easy to follow steps will show you how to get the results you want.
I have done the instructions for this one in inches, but an approximate guide is that 1" is 2 1/2 cms.
Before you start have a practise run with some spare card as it always helps to have a Template.
If you prefer to watch then here are the Video Instructions on how to make this Concertina Card.
Step 1
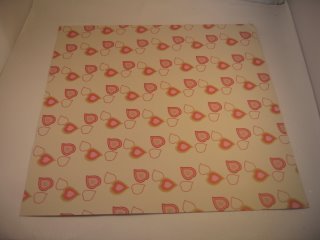
I have used quite a sturdy double sided card that measures 12" x 12"
Step 2
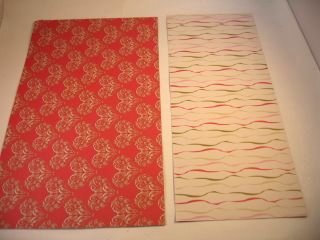
Then I have cut a panel at 7" ... and the remaining panel is 5"
And because it is double sided I can flip one side over for a contrasting look.
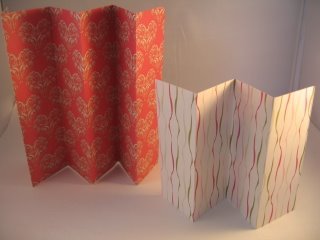
Step 3
The next part is to score each of the panels every two inches and fold it alternately... to give you the concertina shape.
Then on the smaller one remove the last 2" segment.
Step 4
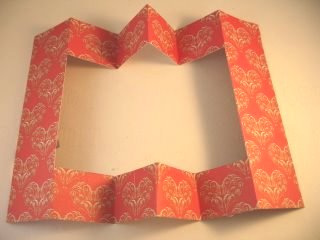
On the larger panel we are going to remove the centre.
So you will need to measure from the top edge towards the centre by 1 1/2" and repeat the same from the bottom towards the centre.
Then from the first score line to the second one remove that central portion.
(The photo shows you what your card will look like when you have done this)
Step 5
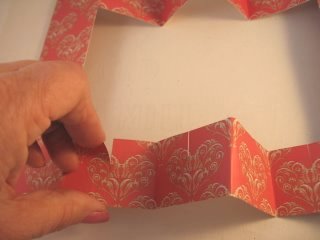
Now that central opening will be 8" x 4" and if you remember our remaining panel was 5".
We need to add somewhere for this panel to sit, so on each of the centre portions we need to add a channel and this will be about 1/2" deep at the top and bottom.
Step 6
This is the fiddly bit ... because now you have to slide the smaller panel into the slits on the larger one.
Make sure that you add it so that where you have a mountain fold on the large panel then the smaller panel is a valley one.
If you find that the centre doesn't fit then you can make any adjustments to the slits now and then try to fit the centre in again.
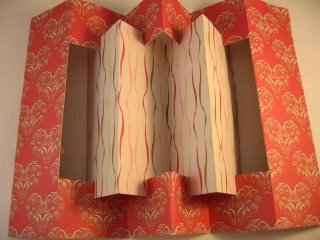
This photo ... looking from the top of the card shows you what yours should look like when you have joined them together.
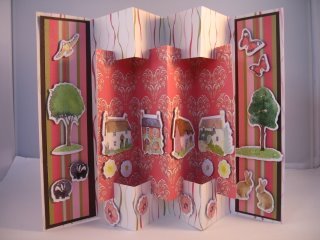
You are now ready to add any embellishments that you have in your "Stash"
It is quite an interesting design to make and so I hope you will enjoy making your own Concertina Card.
Video Tutorials
Easy Projects
More Projects
Kinetic Cards
Novelty Cards
Papercrafts
Return from Concertina Card to Homepage


Recent Articles
-
Memory Book
Oct 15, 22 09:17 AM
 Make a memory book, fun to make and even lovelier to give.
 -
Die cut letters.
Jul 19, 21 10:12 AM
 Add that personal touch with die cut letters, add names or sentiment as you please.
 -
Diaper Fold Card.
Jul 19, 21 09:34 AM
Create this fun Diaper Fold Card...and no need for a pin!
Search
