Give this "Bookmark Card"...
...to the Bookworms in your life!
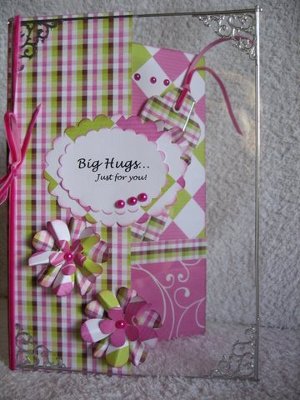
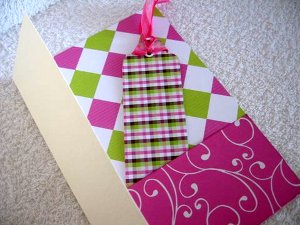
This is the Bookmark card we are going to make, and I think it looks rather special.
It makes a lovely gift for someone, and one the recipient will cherish whenever she uses it.
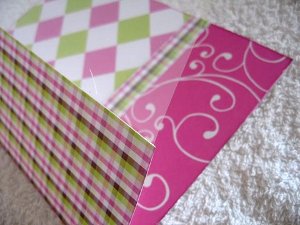
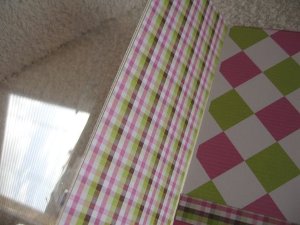
Choose the colours you want to use for your Bookmark card and either buy or print off three sheets that all blend together.
I love this pink, green and brown on white combination
They are really vibrant and the cerise pink in the ribbon and pearls sets it all off beautifully.
If you prefer to watch then here is the Video Tutorial
Step 1
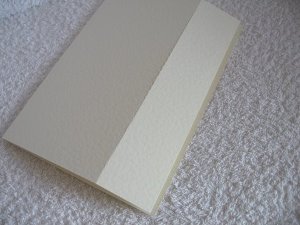
Having decided on your colours, the first thing we need to do is fold an A4 card in half.
This will make your Bookmark card and A5 size.
Remove the outer edge by about 5/6cms.(2")or you can simply fold the front in half and remove that.
But keep this as this is the piece we are going to make into the bookmark.
Step 2
With one of your chosen papers cover this card and make it into a tag shape at the top, and leave it about 18cms long.
Cover it on both sides if you prefer, it will make it stronger if you do.
Ink all the edges with a matching ink and make a hole at the top.
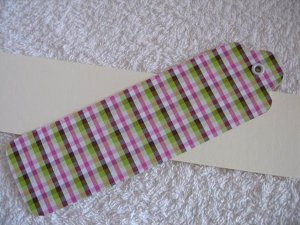
I used an eyelet setter and added a white eyelet.
Thread your ribbon through, and set to one side while we make the rest of the card.
Step 3
With a different paper line the inside of the card.
This is why you will need your papers to blend as they will all be viewed from the front.
Step 4
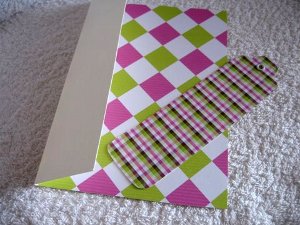
Onto this inside panel we are going to add a pocket for the bookmark to sit in.
So with another piece of paper measure out a panel that will fit across the width of the card and cover about a third.
Ink all the edges.
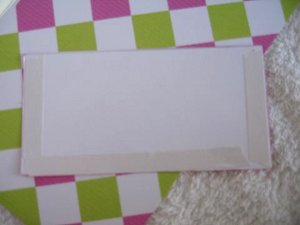
Then on one of the long sides and two of the short add double sided tape. (Leave one of the long sides open as shown in the photo.)
Step 5
Fit this panel to the bottom of the inside and keep the open end to the top so that the bookmark will slot into it.
Step 6
The front panel needs to be covered in paper now, so choose a different one to the other panels.
Then on the inside of this front panel I have added a piece of acetate which will cover the whole front of the card.
This will protect the bookmark on the finished card.
Acetate comes in different thicknesses so make sure you choose the thicker one for strength. It is called Construction Acetate and I got mine from
Crafters Companion
Step 7
On the inside, cover the acetate with another panel to hide where the tape shows.
(Makes a sort of acetate sandwich...)
Hiding the ugly workings of the card will give a neat, professional finish to your bookmark card.
I have added silver border and corner peel offs to the acetate, and on the bookmark to finish them off.
Step 8
I wanted to make this a feminine bookmark card, and so I prettied it up with some Handmade Paper Flowers
(Well fancy that!!!)
I used two flower punches of different sizes and punched out several shapes from the left over pieces of the papers.
Ink the edges as this adds definition to the petals.

Then with the right side facing, crease along the length of each petal, to the centre.
(The flower on the left of the photo shows you how it will look.)
With my embossing tool and an old mouse mat, I rolled around each of the centres to curl them up.
Take a look at the "Handmade Flower Tutorial" to help you with the flowers.
Step 9
Layer the flowers onto the front of the card and add some flat backed pearls to the centres.
I have avoided placing them on the acetate as the glueing would show through.
The sentiment was printed off on the PC, and can say anything you want it to.
I layered it up with more of the left over papers.
Add double sided tape to one side, again to avoid it showing throught the acetate.
And there is your completed Bookmark Card.
Tuck the bookmark into the pocket and give it with love.
Return from Bookmark Card to Homepage


Recent Articles
-
Memory Book
Oct 15, 22 09:17 AM
 Make a memory book, fun to make and even lovelier to give.
 -
Die cut letters.
Jul 19, 21 10:12 AM
 Add that personal touch with die cut letters, add names or sentiment as you please.
 -
Diaper Fold Card.
Jul 19, 21 09:34 AM
Create this fun Diaper Fold Card...and no need for a pin!
Pretty Embellishments
PopShops™ affiliate storesSearch
